

Mini Reindeer Amigurumi Pattern for a Quick Christmas Gift
Crochet a mini reindeer amigurumi with chenille antlers and a choice of two muzzles. A cute handmade Christmas gift in one evening.
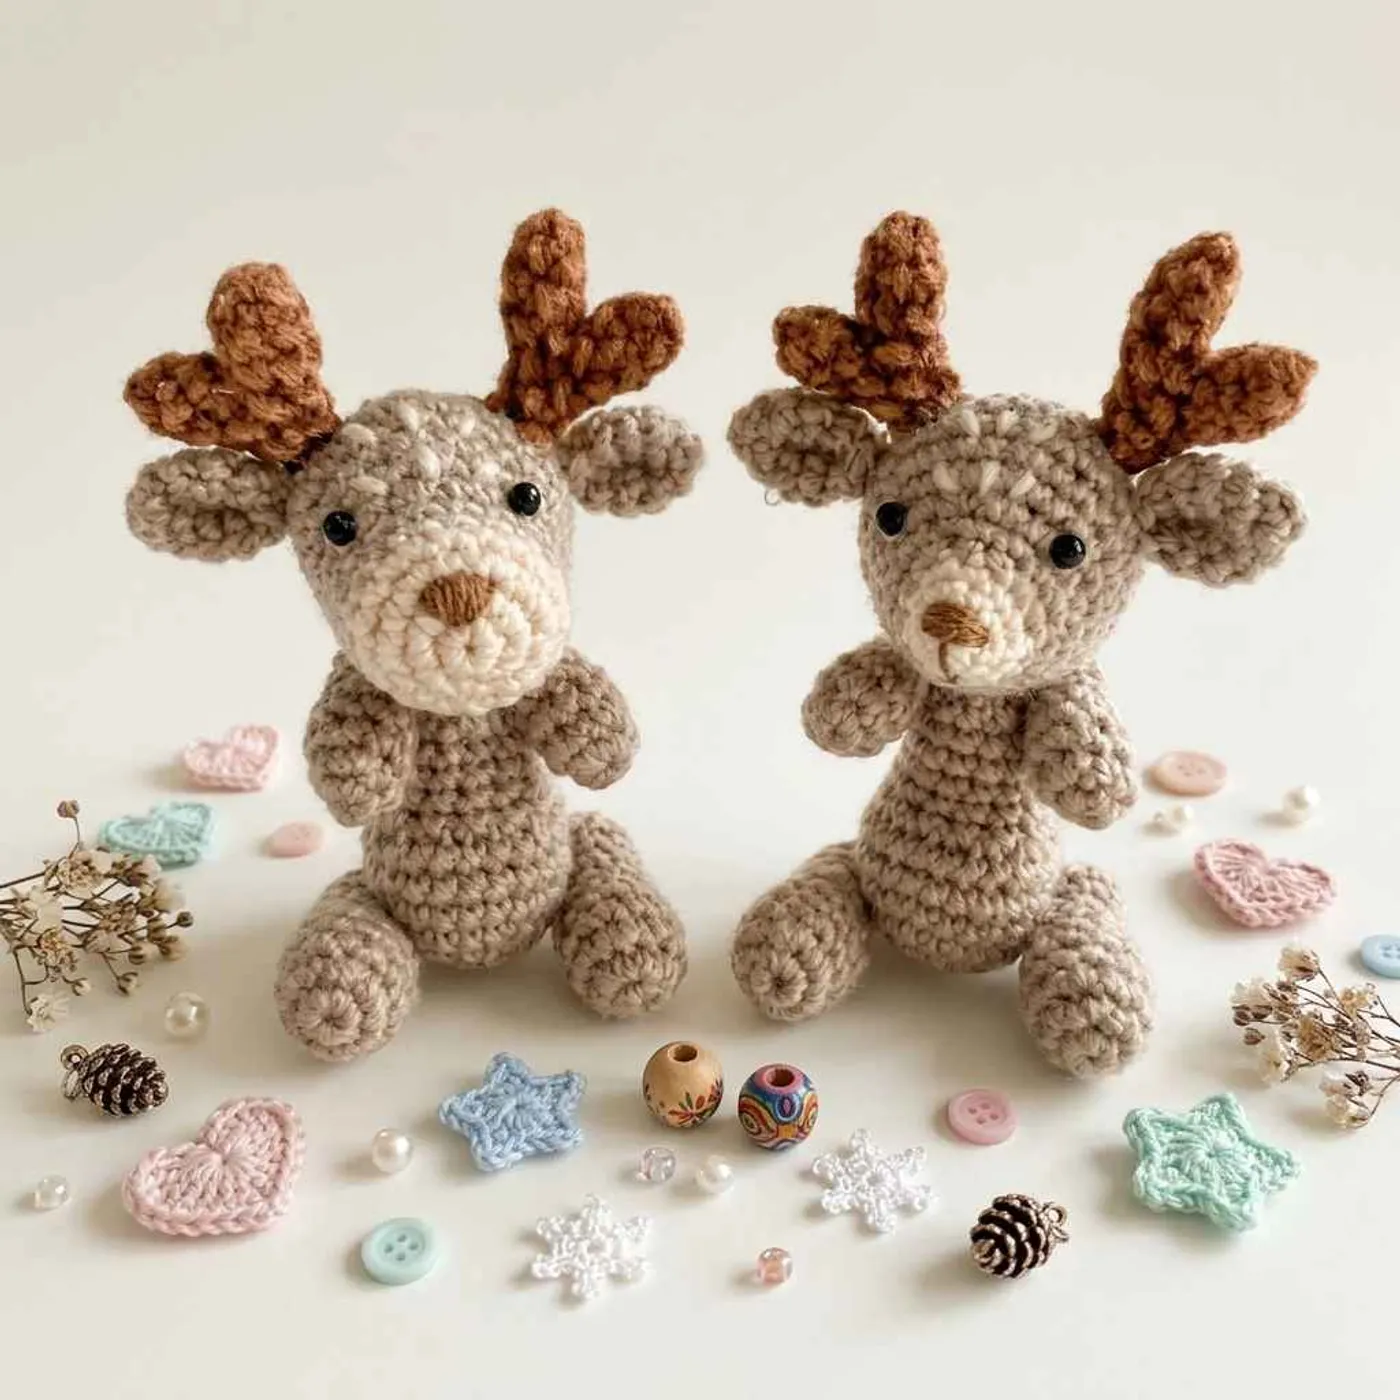
This mini reindeer amigurumi is a palm-sized Christmas deer, about 6–7 cm tall, with chenille antlers, folded ears and little stubby arms and legs. It's made for anyone who wants a handmade gift or stocking stuffer they can finish in one cozy evening.
The pattern even gives you two heads to choose from: a wide, round muzzle or a narrower, more deer-like face.
At a glance
- Yarn: fine yarn in beige and milky white, plus thin brown chenille for the antlers (the designer used Vita Brilliant, 380 m/100 g)
- Hook: 1.5 mm (Clover in the sample)
- Extras: 3 mm plastic eyes and glue, brown thread for the nose, fiberfill
- Finished size: 6–7 cm (about 2.5–2.75 in) tall, as stated in the PDF
- Difficulty: intermediate (simple stitches, but tiny pieces on a very small hook)
- Time: about 2–4 hours, our estimate
Tip: The PDF doesn't name its designer; the yarn and hook notes are written in the designer's own words. All credit for this mini reindeer goes to them.
Who this little reindeer is for
It's a great pick if you already know the magic ring, sc, inc and dec and want a small Christmas project with a big "aww" factor. Make two at once like the designer's photo: one with each muzzle.
Because the hook is so small, the stitches stay tight and the toy holds its shape with very little stuffing.
Finished size
The PDF gives 6–7 cm (about 2.5–2.75 in) for the finished toy with fine yarn and a 1.5 mm hook. A thicker yarn and bigger hook will give you a bigger reindeer with the same pattern.
Yarn substitution
- Any yarn works for the whole toy, says the designer. Fine cotton or acrylic in beige and cream is the easiest swap.
- Antlers: thin chenille gives the soft, plush look in the photo. Regular brown yarn works too and shows the stitches more.
- Hook: keep it small for your yarn (1.5–2 mm for fine yarn) so the fiberfill doesn't show.
- Thicker yarn: with DK yarn and a 2.5–3 mm hook, expect a reindeer roughly 10–12 cm tall (our estimate).
Head, option 1 (wide muzzle)
Start in milky white.
- R1: 6
scin a magic ring. [6] - R2:
incx6. [12] - R3: (
sc,inc) x6. [18] - R4:
scaround. [18]
Change to beige.
- R5–R6:
scaround. [18] - R7: 7
sc,incx4, 7sc. [22] - R8: 7
sc,inc, 6sc,inc, 7sc. [24] - R9: (3
sc,inc) x6. [30] - R10–R12:
scaround. [30] - R13: (3
sc,dec) x6. [24] - R14: (2
sc,dec) x6. [18] - R15: (
sc,dec) x6. [12]
Stuff the head.
- R16:
decx6. [6]
Fasten off and weave in the end.
Tip: The PDF lists R5–6 as "(3 rounds)". The stitch counts and the assembly notes only work with two plain rounds here, so we wrote R5–R6.
Head, option 2 (narrow muzzle)
Start in milky white.
- R1: 6
scin a magic ring. [6] - R2: (
sc,inc) x3. [9] - R3: (2
sc,inc) x3. [12]
Change to beige.
- R4: (3
sc,inc) x3. [15] - R5: (4
sc,inc) x3. [18] - R6: 7
sc,incx4, 7sc. [22] - R7: 7
sc,inc, 6sc,inc, 7sc. [24] - R8: (3
sc,inc) x6. [30] - R9–R11:
scaround. [30] - R12: (3
sc,dec) x6. [24] - R13: (2
sc,dec) x6. [18] - R14: (
sc,dec) x6. [12]
Stuff the head.
- R15:
decx6. [6]
Fasten off and weave in the end.
Ears (make 2)
With beige:
- R1: 6
scin a magic ring. [6] - R2: (
sc,inc) x3. [9] - R3: (2
sc,inc) x3. [12] - R4:
scaround. [12] - R5: (2
sc,dec) x3. [9]
Leave a tail. Sew the opening flat, then fold the ear in half and sew it again so it cups.
Antlers (make 2)
With brown chenille:
- R1: 5
scin a magic ring. [5] - R2–R3:
scaround. [5]
Make two of these small tubes. Fasten off the first one. Keep the yarn on the second and join them:
- R4: 5
scaround the first tube, 5scaround the second. [10] - R5:
decx5. [5] - R6:
scaround. [5]
Leave a tail for sewing. Don't stuff the antlers.
Body
With beige:
- R1: 6
scin a magic ring. [6] - R2:
incx6. [12] - R3: (
sc,inc) x6. [18] - R4: (2
sc,inc) x6. [24] - R5–R7:
scaround. [24] - R8:
decx6, (sc,dec) x4. [14] - R9–R11:
scaround. [14] - R12: (5
sc,dec) x2. [12] - R13:
scaround. [12]
Leave a long tail for sewing and stuff the body.
Tail
With beige: R1: 6 sc in a magic ring [6], R2: (sc, inc) x3 [9], R3: sc around [9]. Leave a tail and sew the opening flat.
Legs (make 2)
With beige:
- R1: 6
scin a magic ring. [6] - R2:
incx6. [12] - R3–R5:
scaround. [12] - R6: (2
sc,dec) x3. [9] - R7–R10:
scaround. [9]
Stuff, close the hole and weave in the end.
Arms (make 2)
With beige:
- R1: 6
scin a magic ring. [6] - R2: (
sc,inc) x3. [9] - R3–R4:
scaround. [9] - R5: (
sc,dec) x3. [6] - R6–R7:
scaround. [6]
Stuff lightly, close the hole and weave in the end.
Assembly
- Eyes: glue the 3 mm eyes at the edges of the 4 increases: between R7 and R8 for the wide muzzle, or between R6 and R7 for the narrow muzzle.
- Nose: embroider a small nose with brown thread on R2 of the muzzle.
- Ears: sew them on the sides of the head at eye level, on R11–R12 (wide muzzle) or R10–R11 (narrow muzzle).
- Antlers: sew them just above the ears, close to them. Add a few random white stitches on the forehead for spots.
- Head and body: sew the head onto the open end of the body.
- Arms: attach them one round below the head–body seam, with thread joining or by sewing.
- Legs and tail: attach the legs on the sides of the body between R4 and R5, and sew the tail to the back.
Common mistakes
- Uneven face: the 4 increases on R7 (wide) or R6 (narrow) shape the cheeks. If they drift, the eyes won't sit evenly; keep your round marker at the back.
- Floppy antlers: chenille stretches. Keep your tension tight and don't stuff the antlers.
- Arms too low: the arms go one round below the neck seam. Pin everything first and check from the front.
- Loose stitches on a 1.5 mm hook: if you see gaps, go down a hook size rather than adding more stuffing.
FAQ
Can I use safety eyes instead of glue?
Yes, 3–4 mm safety eyes work if you place them before closing the head. Glued or safety eyes are not safe for children under 3; embroider the eyes for a baby's gift.
Which head should I choose?
The wide muzzle looks rounder and cuter; the narrow one looks more like a real deer. The body, ears and antlers are the same for both.
Can I make it without chenille?
Yes. The designer says any yarn can be used for the whole toy. Regular brown yarn gives crisper antlers.
How do I turn it into an ornament?
Sew a loop of thin ribbon or yarn between the antlers before you sew the head to the body.
More Christmas crochet to make next
Pair this reindeer with our snowman with scarf and bobble hat, the Santa doll with braids or the Christmas avocado with a Santa hat for a little holiday set.
Optional & Creative Ideas
- Rudolph version: embroider the nose in red, or crochet a tiny 6
scball in red and sew it on the muzzle. - Color swaps: try dark brown with cream for a classic deer, or white with gold antlers for a "snow reindeer".
- Make it bigger: use DK yarn and a 2.5–3 mm hook; the counts stay the same and the reindeer roughly doubles in size.
- Scarf: chain about 40 in red, work one row of
sc, and tie it around the neck. - Gift and display ideas: tuck one into a stocking, tie it to a present instead of a bow, or sit a pair on a shelf like the designer's photo.
- Quick fix for a wobbly head: add a few extra stitches around the neck seam and push a little more stuffing into the body before you close it.
Patterns and instructions on OpenCrochet are for personal use. Please do not redistribute copies of this content; share the page link instead.


