

Tiny Giraffe Crochet Pattern: Mini Amigurumi Keychain
Crochet a tiny yellow giraffe keychain with a long neck, white muzzle and stubby legs in four quick pieces, perfect for scraps and bag charms.
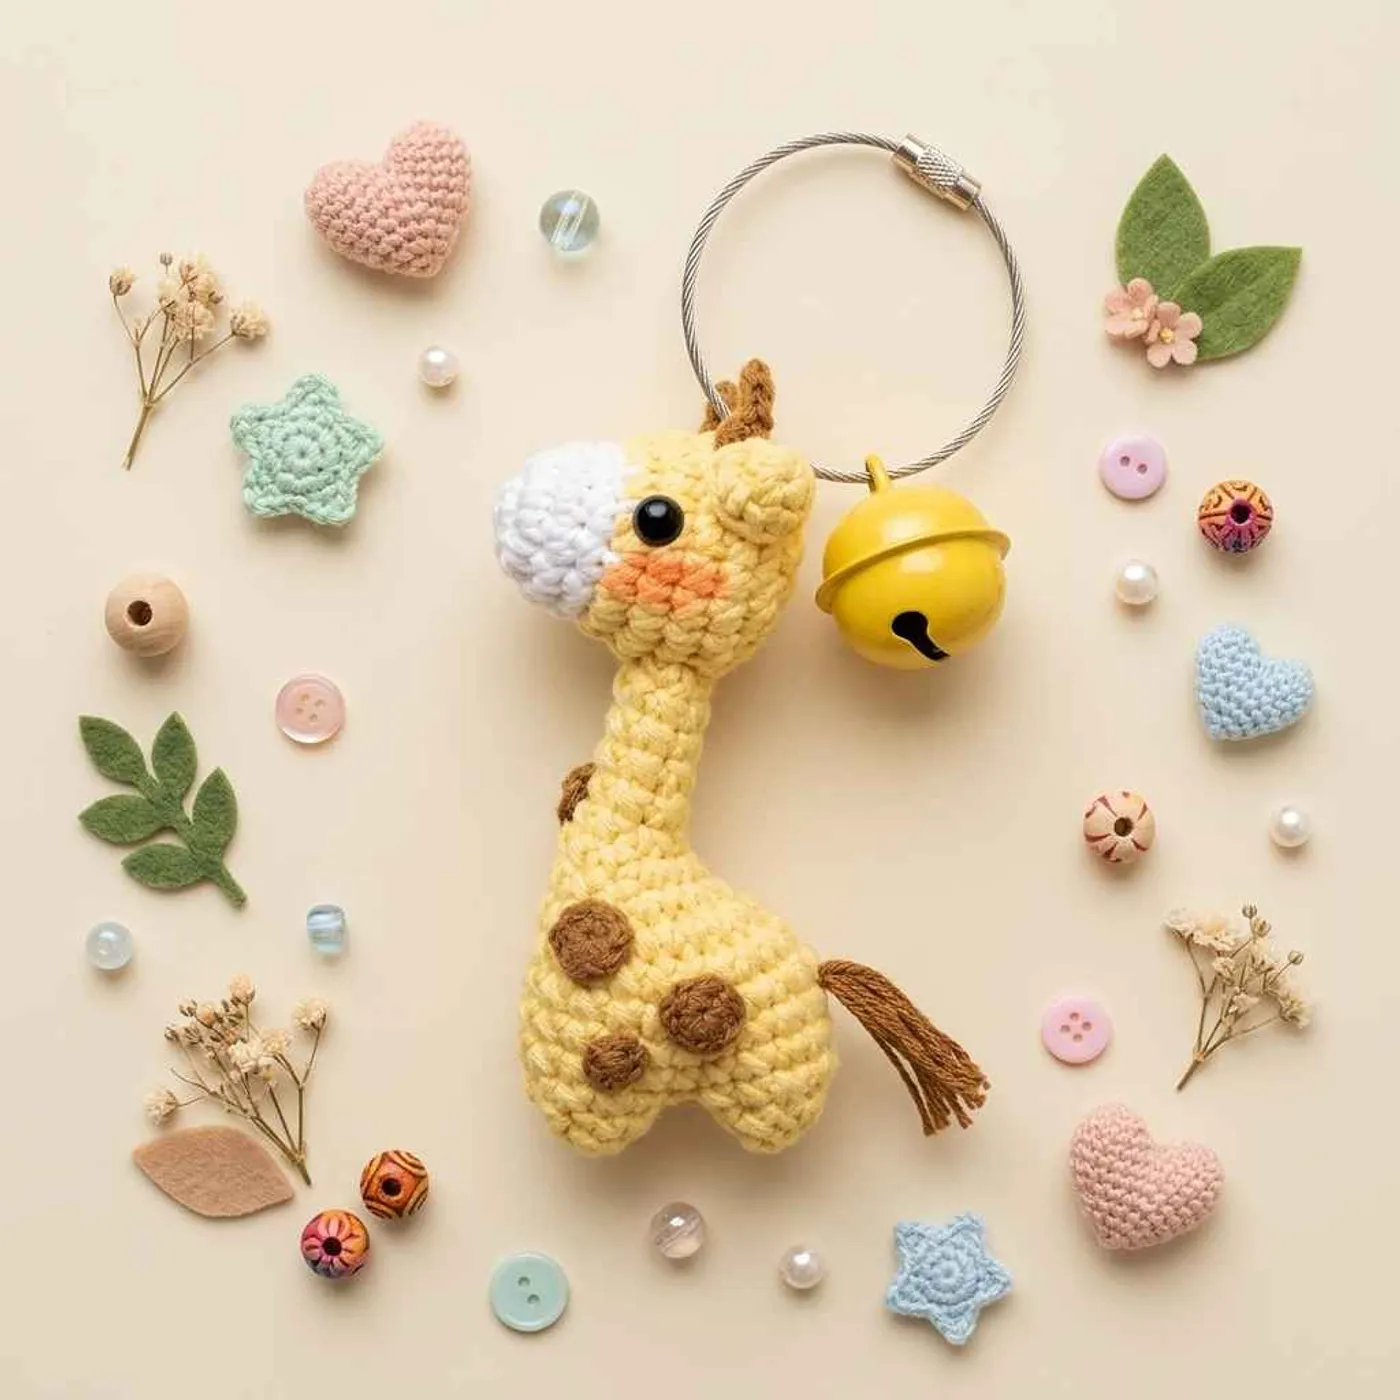
This tiny giraffe crochet pattern makes a pocket-sized giraffe keychain: a soft yellow body with a long neck, two little stubby legs, a round head with a white muzzle, tiny ears and a horn on top.
The designer's sample hangs from a key ring with a jingle bell and a short brown yarn tail.
It is one of the quickest amigurumi you can make. The whole giraffe is four small pieces (head, body with legs, ears and horn), and most of them are only a few rounds long, so it is ideal for using up scraps or making a batch of bag charms.
What makes it different from a plain mini animal is the body shaping. You start at the top of the neck with a small chain ring, work the neck straight, then add increases only on one side so the chest pushes forward.
The body then splits into two legs, which gives the giraffe its little standing silhouette.
It suits an advanced beginner. You need the magic ring, sc, inc, dec, a color change and the ability to split a round into two legs.
Tip: The PDF does not list yarn or hook. A thin cotton or milk cotton yarn with a small hook keeps the stitches tight, which matters on a piece this small.
Finished size
The PDF does not give a finished size. In the photo, the giraffe is about the size of a key ring charm. With fingering or sport weight cotton and a 2–2.5 mm hook, expect roughly 2.5–3 in (6–8 cm) tall. Treat this as an estimate; thicker yarn and a bigger hook make a bigger giraffe.
Yarn substitution
The designer's sample is worked in yellow with a white muzzle, brown horn and spots, and a brown yarn tail. No brand or weight is given in the PDF.
- Cotton or milk cotton (fingering to sport weight) gives clear stitches and keeps the long neck firm.
- Acrylic works too and is softer, but the neck may bend more; stuff it well.
- Scraps are enough: the muzzle, ears and horn take only a few yards each.
- Hook size: pick a hook one or two sizes smaller than the yarn label suggests so the stuffing does not show through.
Common mistakes
- Changing color too late on the head. The color change happens at the start of R5. R1–4 are the white muzzle; everything after is the main color.
- Putting the increases in the wrong place on the body. In R6–R9 the increases sit together in the middle of the round. Keep the start of the round at the back of the neck so the chest grows toward the front.
- Miscounting the leg split. In R14 you work 6 sts, skip 10 sts, then work 4 sts, so the first leg has 10 sts. The 10 skipped sts become the second leg.
- Forgetting to stuff before the legs close. Stuff the neck and body firmly before R14, and add a little stuffing to each leg before R15.
FAQ
Is this giraffe safe as a baby toy?
It is very small and is designed as a keychain, so it is not suitable for babies or young children. If you add safety eyes or a bell, keep it away from children under 3.
How do I attach it to a key ring?
Sew a short yarn loop or a jump ring to the top of the head, between the ears, then add a split key ring and a small bell like the designer's sample.
Where do the brown spots and tail come from?
They are not written in the pattern. In the photo they are small brown circles sewn on the body and a few strands of brown yarn knotted at the back. See the ideas at the end for a simple way to make them.
How many horns should I make?
The PDF gives one horn recipe without a count. Make one for the look in the photo, or two if you prefer a classic giraffe with two horns.
Pattern notes
- Work in continuous rounds unless the pattern says otherwise.
- Numbers in [ ] are the stitch counts at the end of the round.
- "( ) x6" means repeat the stitches in brackets 6 times.
Head
Start with white (muzzle).
- R1: 6
scin a magic ring. [6] - R2:
incx6. [12] - R3–R4:
scin each st around. [12] - R5: Change to yellow. (
sc,inc) x6. [18] - R6–R8:
scin each st around. [18] - R9: (
sc,dec) x6. [12]
Stuff the head.
- R10:
decx6. [6]
Fasten off, leaving a tail for sewing the head to the neck.
Tip: Place the eyes (safety eyes or embroidered) just above the white muzzle, around R5–R6, before you close the head.
Body
With yellow, starting at the top of the neck:
- R1: Ch 6, join with a
sl stto form a ring, then 6scaround. [6] - R2–R5:
scin each st around. [6] - R6: (
sc,inc) x2, 2sc. [8] - R7: 2
sc,incx3, 3sc. [11] - R8: 3
sc,incx4, 4sc. [15] - R9: 4
sc,incx6, 5sc. [21] - R10–R13:
scin each st around. [21]
Stuff the neck and body firmly.
First leg
- R14:
sc,dec, 4sc, skip the next 10 sts, 4sc. [10] - R15:
decx5. [5]
Add a little stuffing, close the opening and fasten off.
Second leg
Join yellow in the first of the 10 skipped sts.
- R14:
scin each of the 10 sts. [10] - R15:
decx5. [5]
Stuff lightly, close and fasten off. Sew any small gap between the legs closed.
Ears (make 2)
With yellow:
- R1: 4
scin a magic ring. [4] - R2: (
sc,inc) x2. [6]
Fasten off, leaving a tail for sewing.
Horn
With brown:
- Ch 4, turn,
sl stin each of the next 3 ch. [3]
Fasten off, leaving a tail for sewing.
Assembly
- Sew the head onto the top of the neck, with the muzzle pointing forward over the chest.
- Sew the ears on each side of the head, just behind the eyes.
- Sew the horn to the top of the head, between the ears.
- Add the brown spots and tail (optional, see below), then weave in all ends.
- For a keychain, sew a yarn loop or jump ring to the top of the head and attach a key ring.
Optional & Creative Ideas
- Brown spots: Make 3–4 tiny circles in brown (for example 5–6
scin a magic ring), and sew them on the body like the designer's sample. This is our suggestion; the PDF does not include spots. - Yarn tail: Knot 3–4 short strands of brown yarn at the back of the body and trim them to a little tassel.
- Jingle bell: Add a small bell to the key ring for the cheerful look in the photo.
- Cheeks: Embroider a little pink blush on each side of the muzzle.
- Different colors: Try pastel pink or mint for a fantasy giraffe.
Final Thoughts
This tiny giraffe works up in one short sitting and uses only scraps. The one-sided increases and the leg split are the only tricks, and they turn a few rounds into a charming little standing giraffe.
Patterns and instructions on OpenCrochet are for personal use. Please do not redistribute copies of this content; share the page link instead.


