

Tiny Swan Crochet Pattern: Mini White Goose Amigurumi
Crochet a tiny white swan with a long wired neck, mustard beak and feet. Worked in one piece from beak to tail, with simple wings and legs.
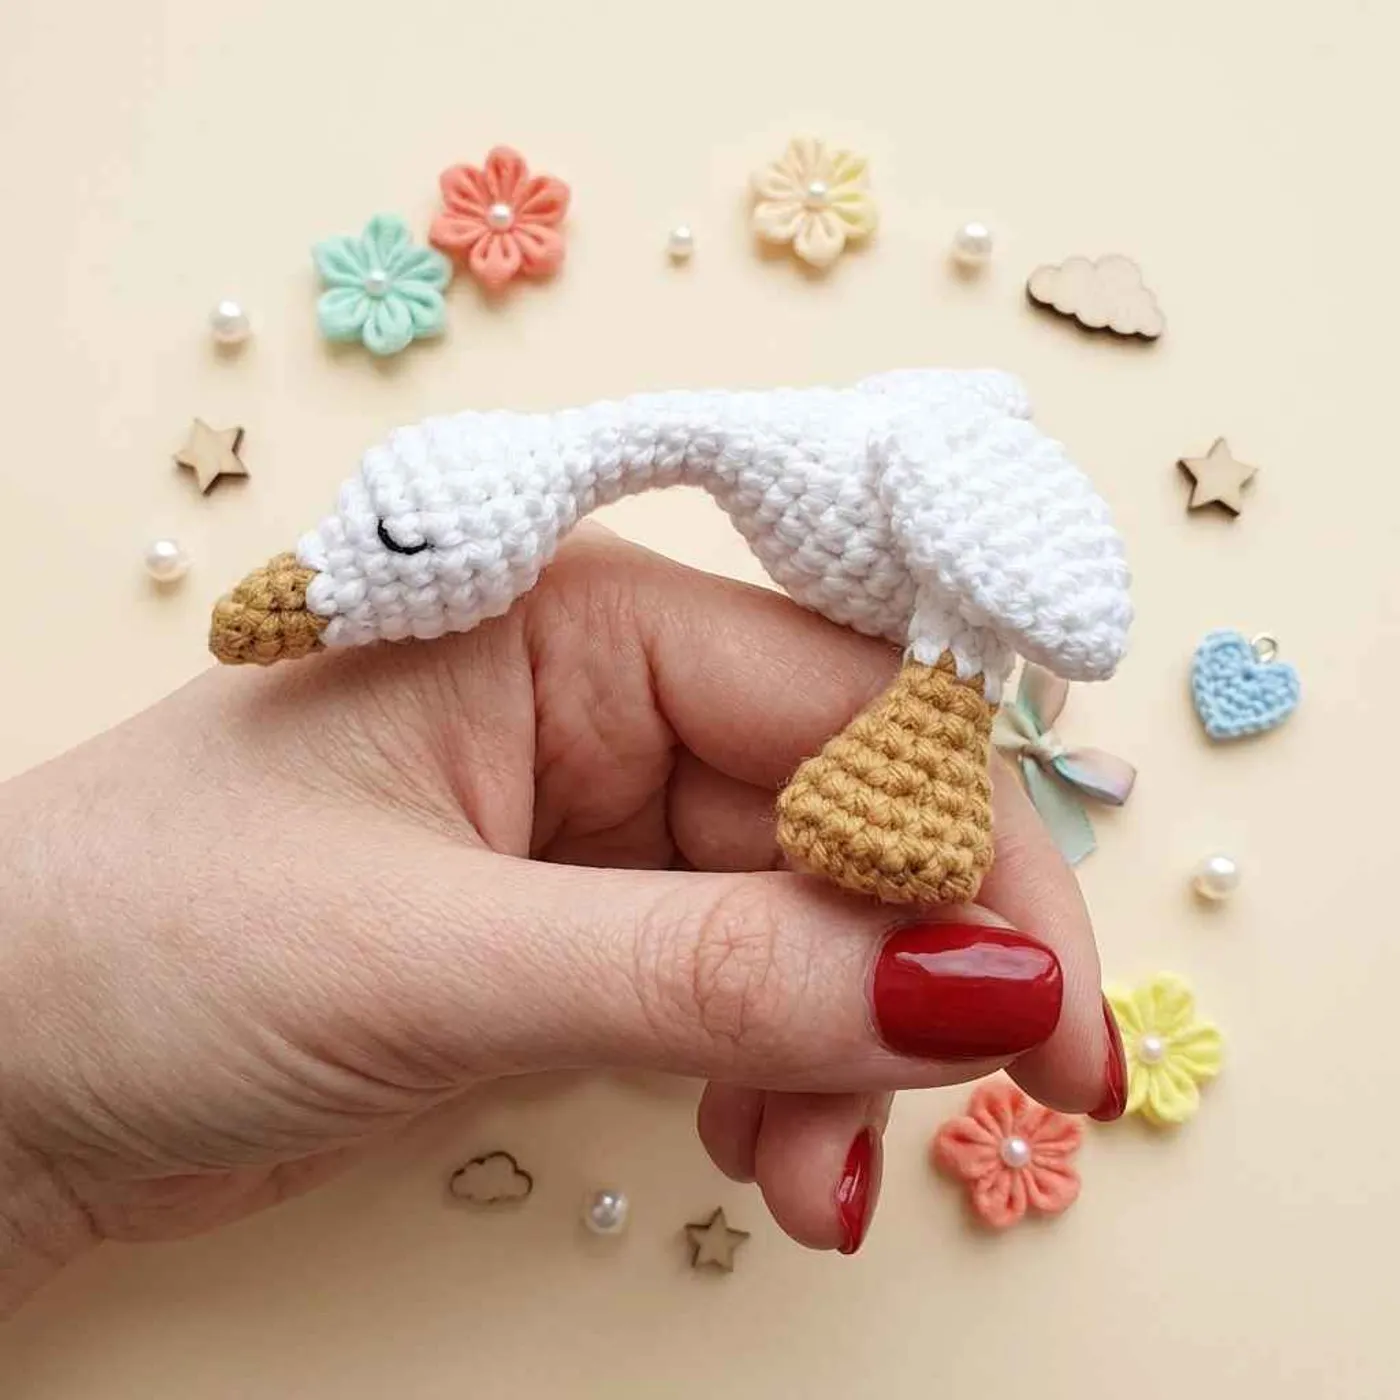
This tiny crochet swan fits on a couple of fingers. It is all white, with a mustard yellow beak, two little yellow feet, small folded wings and closed, sleepy embroidered eyes. A piece of wire inside lets you bend the long neck into a graceful curve.
The beak, head, neck and body are worked in one continuous piece, so there is very little sewing. You start at the tip of the beak in yellow, switch to white for the head, narrow down for the neck and then widen again for the round body.
Only the two wings and two legs are made separately. With simple rounds of single crochet, increases and decreases, it is a friendly project for a beginner who already knows the magic ring. The pattern is written in US crochet terms.
Finished size
The PDF does not give a finished size or a hook size. The sample in the photo is a mini swan, roughly the length of a hand, with a body only about 18 stitches around.
The size depends on your yarn and hook. Fine cotton with a small hook gives a little ornament-sized swan, and a thicker yarn with a bigger hook gives a larger plush.
Materials overview
- White yarn for the head, neck and body
- Mustard yellow yarn for the beak and feet
- A crochet hook that suits your yarn
- Thin craft wire for the neck
- Fiberfill stuffing
- Black yarn or embroidery thread for the eyes
- Yarn needle and a stitch marker
Yarn substitution
The sample looks like a smooth cotton or cotton blend, which shows the stitches clearly and holds the neck shape well. Any smooth yarn works, as long as you pick a hook a little smaller than the label suggests so the stuffing does not show.
For a goose look, keep the white body and the mustard beak. For a black swan, use black yarn for the body and red or orange for the beak and feet.
Stitch notes
- Color change at round 4: the beak is rounds 1 to 3 in yellow. Switch to white at the start of round 4 for the head.
- Neck shaping: rounds 10 to 17 narrow down to 7 stitches for a long, thin neck, then rounds 18 to 21 widen again into the body.
- Wire: the designer adds the wire around round 27, before the body closes, so it runs up through the neck.
- Legs from a chain: each leg starts with ch 6 worked on both sides, which gives the foot its flat, wide shape.
Common mistakes
- Overstuffing the neck: the neck is only 7 stitches around. Push in just a little stuffing around the wire so it stays thin and bendy.
- Forgetting the wire: once round 30 is closed you cannot add the wire easily. Insert it before you finish round 28.
- Sharp wire ends: bend both ends of the wire into small loops so they cannot poke through the stitches.
- Stuffing the wings or legs: both are worked flat with no stuffing, so they lie close to the body.
FAQ
How do I put the wire in the neck?
Cut a piece of wire long enough to reach from the head down into the body. Fold the ends into small loops, wrap a bit of stuffing around it and slide it up into the neck before you close the body.
Is this swan safe for small children?
The wire makes it a decoration rather than a toy for children under 3. For a baby, leave the wire out and stuff the neck firmly instead. The eyes are embroidered, so there are no small parts there.
Where do the wings and legs go?
Sew the wings on round 23 of the body, one on each side. Sew the legs between rounds 24 and 26, under the body.
Do I stuff the whole piece?
Yes, stuff the beak, head and body as you go. Only the wings and legs are left unstuffed.
Pattern
Work in continuous rounds and move your stitch marker up at the start of each round.
Beak, head and body
Stuff as you go.
R1: with yellow yarn, 5 sc in MR (5)
R2: 5 sc (5)
R3: (sc, inc) * 2, sc (7)
R4: switch to white yarn, 3 sc, inc, 3 sc (8)
R5: (sc, inc) * 4 (12)
R6: 4 sc, 4 inc, 4 sc (16)
R7–9: 16 sc (16) (3 rounds)
R10: (2 sc, dec) * 4 (12)
R11: (2 sc, dec) * 3 (9)
R12: sc, dec, 2 sc, dec, 2 sc (7)
R13–17: 7 sc (7) (5 rounds)
R18: (2 sc, inc) * 2, sc (9)
R19: (2 sc, inc) * 3 (12)
R20: 12 sc (12)
R21: (sc, inc) * 6 (18)
R22–26: 18 sc (18) (5 rounds)
R27: (sc, dec) * 6 (12)
Tip: now prepare the wire and slide it up into the neck to strengthen it.
R28: 12 sc (12)
R29: (2 sc, dec) * 3 (9)
R30: (sc, dec) * 3 (6)
Pull the opening closed, cut the yarn and fasten off. Weave the yarn end inside the piece.
Wings (make 2)
Work with white yarn. Do not stuff.
R1: 5 sc in MR (5)
R2: (sc, inc) * 2, sc (7)
R3: (2 sc, inc) * 2, sc (9)
R4: (2 sc, inc) * 3 (12)
R5–7: 12 sc (12) (3 rounds)
R8: (2 sc, dec) * 3 (9)
R9: (sc, dec) * 3 (6)
R10: fold the piece in half and work 3 sc through both edges (3)
Fasten off, leaving a long tail for sewing.
Legs (make 2)
Do not stuff.
R1: with yellow yarn, ch 6. Starting in the 2nd ch from the hook, work 4 sc, 3 sc in the last ch, then along the other side of the chain 3 sc, inc (12)
R2–3: 12 sc (12) (2 rounds)
R4: (2 sc, dec) * 3 (9)
R5: 9 sc (9)
R6: (sc, dec) * 3 (6)
R7–8: 6 sc (6) (2 rounds)
R9: switch to white yarn, 6 sc (6)
R10–11: 6 sc (6) (2 rounds)
R12: fold the piece in half and work 3 sc through both edges (3)
Fasten off, leaving a tail for sewing.
Assembly and decoration
- Sew the wings to round 23 of the body, one on each side.
- Sew the legs between rounds 24 and 26 of the body.
- With black yarn, embroider the eyes between rounds 6 and 7 of the head. Small curved lines give the sleepy look from the photo.
- Bend the neck into a gentle S curve and weave in any remaining ends.
Optional & Creative Ideas
- Black swan: make the body in black and the beak and feet in red for a dramatic version.
- Swan couple: crochet two and bend their necks toward each other to make a heart shape for a wedding or anniversary gift.
- Little crown: add a tiny gold yarn crown for a swan princess.
- Hanging ornament: sew a loop of thread to the back and hang it on a tree or a baby mobile (without the wire for a baby).
Final Thoughts
This mini swan is quick and satisfying, and the wire neck is what gives it its charm. Take care to add the wire before you close the body, and you will have an elegant little bird in an hour or two.
Patterns and instructions on OpenCrochet are for personal use. Please do not redistribute copies of this content; share the page link instead.


