

Tiny Shark Amigurumi Crochet Pattern with White Belly
Crochet a 3 in light blue shark with a color-change white belly, flat fins and an embroidered smile.
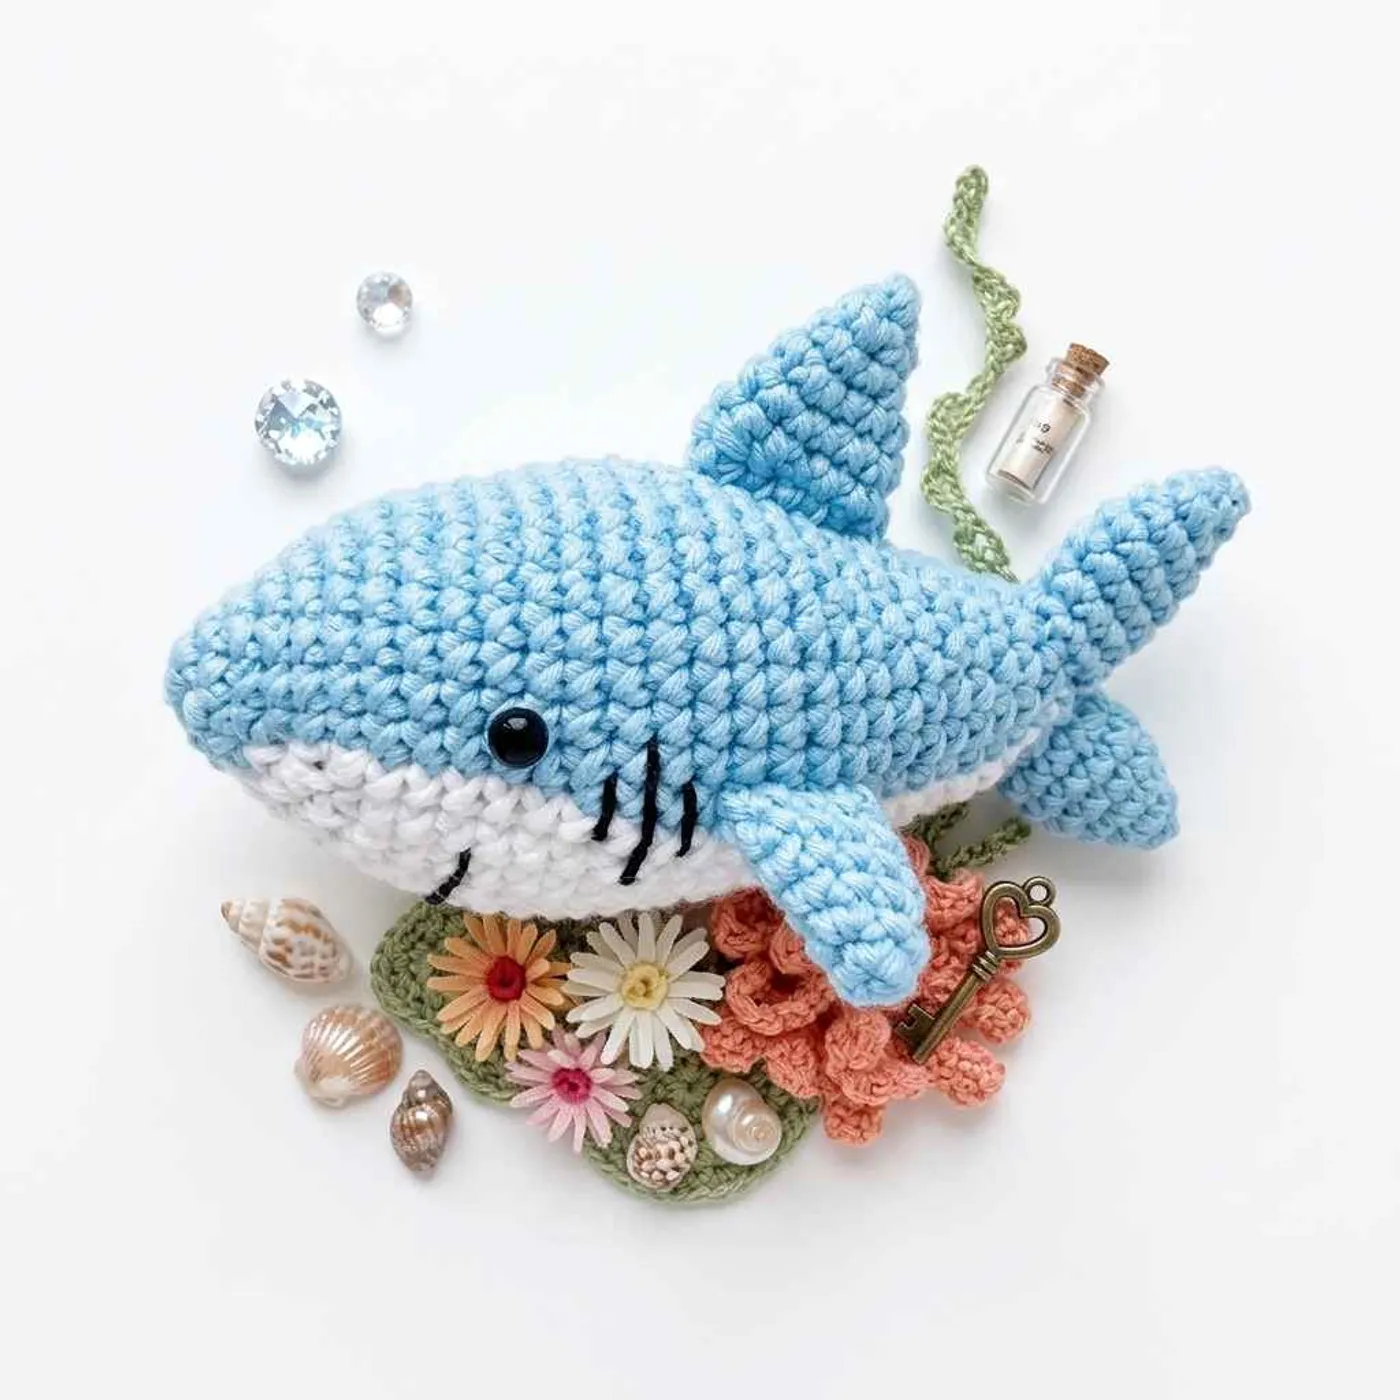
This tiny crochet shark is a palm-sized amigurumi, only about 3 in (8 cm) long, with a light blue back, a white belly, a little embroidered smile and three gill stripes on each side. It is a quick, cheerful make for ocean lovers, keychains, desk buddies or a shark-week gift.
What makes this shark different is the body: it is one single piece worked from the nose to the tail, and the white belly is crocheted in as you go with color changes in every round. There is no sewn-on belly patch, so the blue and white line looks clean and smooth.
You need fine cotton yarn in light blue and white, a 1.5 mm hook, 4 mm plastic eyes and a little fiberfill. The fins are small flat pieces sewn on at the end. It suits an advanced beginner who is comfortable working color changes in the round.
The pattern is written in US crochet terms.
Finished size
The finished shark is about 3 in (8 cm) long with fine cotton (90 m / 25 g) and a 1.5 mm hook. The body is 33 stitches around at its widest point (rounds 12–14).
With a thicker yarn and bigger hook the shark grows. Sport or DK cotton with a 2.5–3 mm hook gives a shark of roughly 4–5 in (10–13 cm).
Materials overview
- Fine 100% cotton yarn (about 90 m / 25 g) in light blue and white
- 1.5 mm crochet hook
- Plastic eyes, 4 mm, and glue
- Fiberfill stuffing
- Sewing (yarn) needle and scissors
- Black or dark grey yarn for the smile and gill stripes
- Stitch marker
Yarn substitution
The sample uses thin 100% cotton, which gives crisp stitches and a clear color line between the blue back and white belly. Any smooth fine or lace-weight cotton that suits a 1.5–2 mm hook works the same way.
You can use a sport or DK cotton with a 2.5–3 mm hook for a bigger shark. Keep the hook small for the yarn so the stuffing does not show through.
For a different species, swap the blue for grey (classic great white), dark navy, or pink and lilac for a fun pastel shark. Keep the belly white or cream for contrast.
Stitch notes
- Two colors in every round: from round 4 the body uses white (belly) and blue (back) in each round. Change color in the last pull-through of the stitch before the new color, and carry the unused yarn inside the body.
- Split increase in rounds 4–6: the last stitch of these rounds is an increase worked in two colors. Make 1 sc in blue, change to white, and make 1 sc in white into the same stitch.
- Spiral rounds: work in a continuous spiral and move your stitch marker up every round.
- Flat fins: the fins are not stuffed. Flatten them and sew the opening closed before attaching.
Common mistakes
- Losing track of the color blocks: each round tells you how many stitches go in white and in blue. Count both parts, because one wrong stitch shifts the belly line.
- Pulling carried yarn too tight: let the unused color lie loosely inside the body. Tight floats pucker the fabric along the color change line.
- Stuffing the fins: the side, tail and upper fins stay flat. Stuffing them makes them round and droopy.
- Uneven eyes: the eyes sit between rounds 10 and 11. Pin the fins first, then place the eyes so they match the fins and the white belly on both sides.
FAQ
Is the 4 mm plastic eye safe for small children?
Glued plastic eyes can come off. For a toy for a baby or toddler, embroider the eyes with black yarn instead.
When do I start stuffing the body?
Start stuffing after round 20, when the body begins to get narrower. Keep adding small pieces as you go and finish stuffing before you close the last round.
Do I need to cut the yarn at every color change?
No. Carry both colors inside the body for all rounds. Only cut the white yarn at the end; the blue tail is used to sew the opening closed.
Where exactly do the fins go?
The tail fins go on the closed back end, the side fins on rounds 16–19 along the color change line, and the upper fin on top of the back over rounds 16–21.
Body
Start with light blue at the nose. The body is worked as one piece from the nose to the tail.
Rnd 1: 6 sc in MR (6)
Rnd 2: (1 sc, inc) 3 times (9)
Rnd 3: (2 sc, inc) 3 times (12)
Join white yarn now. Do not cut the blue yarn; carry both colors from here on.
Rnd 4: white: 3 sc; blue: inc, 3 sc, inc, 3 sc, 1 sc; white: 1 sc into the same stitch (15)
Rnd 5: white: 4 sc; blue: inc, 4 sc, inc, 4 sc, 1 sc; white: 1 sc into the same stitch (18)
Rnd 6: white: 5 sc, inc; blue: 5 sc, inc, 5 sc, 1 sc; white: 1 sc into the same stitch (21)
Rnd 7: white: 6 sc, inc, 1 sc; blue: 5 sc, inc, 6 sc, inc (24)
Rnd 8: white: 7 sc, inc, 2 sc; blue: 5 sc, inc, 7 sc, inc (27)
Rnd 9: white: 11 sc; blue: 16 sc (27)
Rnd 10: white: 8 sc, inc, 2 sc; blue: 6 sc, inc, 8 sc, inc (30)
Rnd 11: white: 12 sc; blue: 18 sc (30)
Rnd 12: white: 2 sc, inc, 9 sc; blue: inc, 9 sc, inc, 7 sc (33)
Rnd 13–14: white: 13 sc; blue: 20 sc (33) (2 rounds)
Rnd 15: white: 6 sc, dec, 5 sc; blue: 7 sc, dec, 9 sc, dec (30)
Rnd 16: white: 12 sc; blue: 18 sc (30)
Rnd 17: white: 5 sc, dec, 5 sc; blue: 6 sc, dec, 4 sc, dec, 4 sc (27)
Rnd 18: white: 11 sc; blue: 16 sc (27)
Rnd 19: white: 4 sc, dec, 5 sc; blue: 5 sc, dec, 4 sc, dec, 3 sc (24)
Rnd 20: white: 10 sc; blue: 14 sc (24)
Start stuffing now and keep stuffing as you go.
Rnd 21: white: 4 sc, dec, 4 sc; blue: 4 sc, dec, 3 sc, dec, 3 sc (21)
Rnd 22: white: 9 sc; blue: 12 sc (21)
Rnd 23: white: 3 sc, dec, 4 sc; blue: 3 sc, dec, 3 sc, dec, 2 sc (18)
Rnd 24: white: 8 sc; blue: 10 sc (18)
Rnd 25: white: 3 sc, dec, 3 sc; blue: 2 sc, dec, 2 sc, dec, 2 sc (15)
Rnd 26: white: 7 sc; blue: 8 sc (15)
Rnd 27: white: 3 sc, dec, 2 sc; blue: 1 sc, dec, 2 sc, dec, 1 sc (12)
Rnd 28: white: 2 sc, dec, 2 sc; blue: dec, 2 sc, dec (9)
Finish stuffing. Cut the white yarn, secure it and weave in the end. Cut the blue yarn, leaving a tail, and sew the opening closed with it. Secure the thread and weave in the ends.
Side fins (make 2)
Use light blue yarn.
Rnd 1: 4 sc in MR (4)
Rnd 2: (1 sc, inc) 2 times (6)
Rnd 3: (1 sc, inc) 3 times (9)
Rnd 4: 8 sc, inc (10)
Rnd 5–6: 10 sc (10) (2 rounds)
Do not stuff. Leave a long tail for sewing. Fold the opening flat and sew the edges together.
Tail fins (make 2)
Use light blue yarn.
Rnd 1: 4 sc in MR (4)
Rnd 2: (1 sc, inc) 2 times (6)
Rnd 3: (1 sc, inc) 3 times (9)
Rnd 4: (1 sc, inc) 2 times, 5 sc (11)
Rnd 5: 11 sc (11)
Rnd 6: 6 sc, dec, 3 sc (10)
Rnd 7: 5 sc (incomplete round)
Do not stuff. Leave a long tail for sewing.
Upper fin
Use light blue yarn.
Rnd 1: 4 sc in MR (4)
Rnd 2: (1 sc, inc) 2 times (6)
Rnd 3: (1 sc, inc) 3 times (9)
Rnd 4: (2 sc, inc) 3 times (12)
Rnd 5: 12 sc (12)
Rnd 6: 4 sc, 4 hdc, 4 sc (12)
Fasten off and leave a long tail for sewing. The hdc stitches in the middle of the last round make the pointed tip of the fin.
Assembly
- Sew the two tail fins onto the closed back end of the body.
- Sew the side fins onto rounds 16–19, right on the color change line between blue and white.
- Sew the upper fin on top of the back, over rounds 16–21.
- Glue the 4 mm eyes between rounds 10 and 11 on each side. Place them so they are symmetrical with the fins and the white belly.
- Embroider a small smile on round 10 with dark yarn.
- Embroider 3 short gill stripes on each side, just in front of the side fins.
Tip: pin all the fins in place before sewing and look at the shark from above. It is much easier to fix a crooked fin with pins than after sewing.
Optional & Creative Ideas
- Keychain shark: sew a small jump ring or keychain loop to the upper fin before closing it in.
- Shark family: make a bigger mom or dad shark with DK cotton and a 3 mm hook next to the tiny one.
- Different species: use grey for a great white, or add dark spots on the back for a whale shark look.
- Safe eyes: embroider the eyes with black yarn if the shark is for a small child.
- Teeth: add a few tiny white straight stitches along the smile for a toothy grin.
Final Thoughts
This little shark is a great way to practice two-color rounds on a small, quick project. Once you have the belly line down, you can make a whole school of sharks in an afternoon or two.
Patterns and instructions on OpenCrochet are for personal use. Please do not redistribute copies of this content; share the page link instead.


