

Stingray Amigurumi Crochet Pattern in Chenille Yarn
Crochet a soft, flat stingray in chunky chenille yarn, worked in one piece from a foundation chain with pointed wings and a long curly tail.
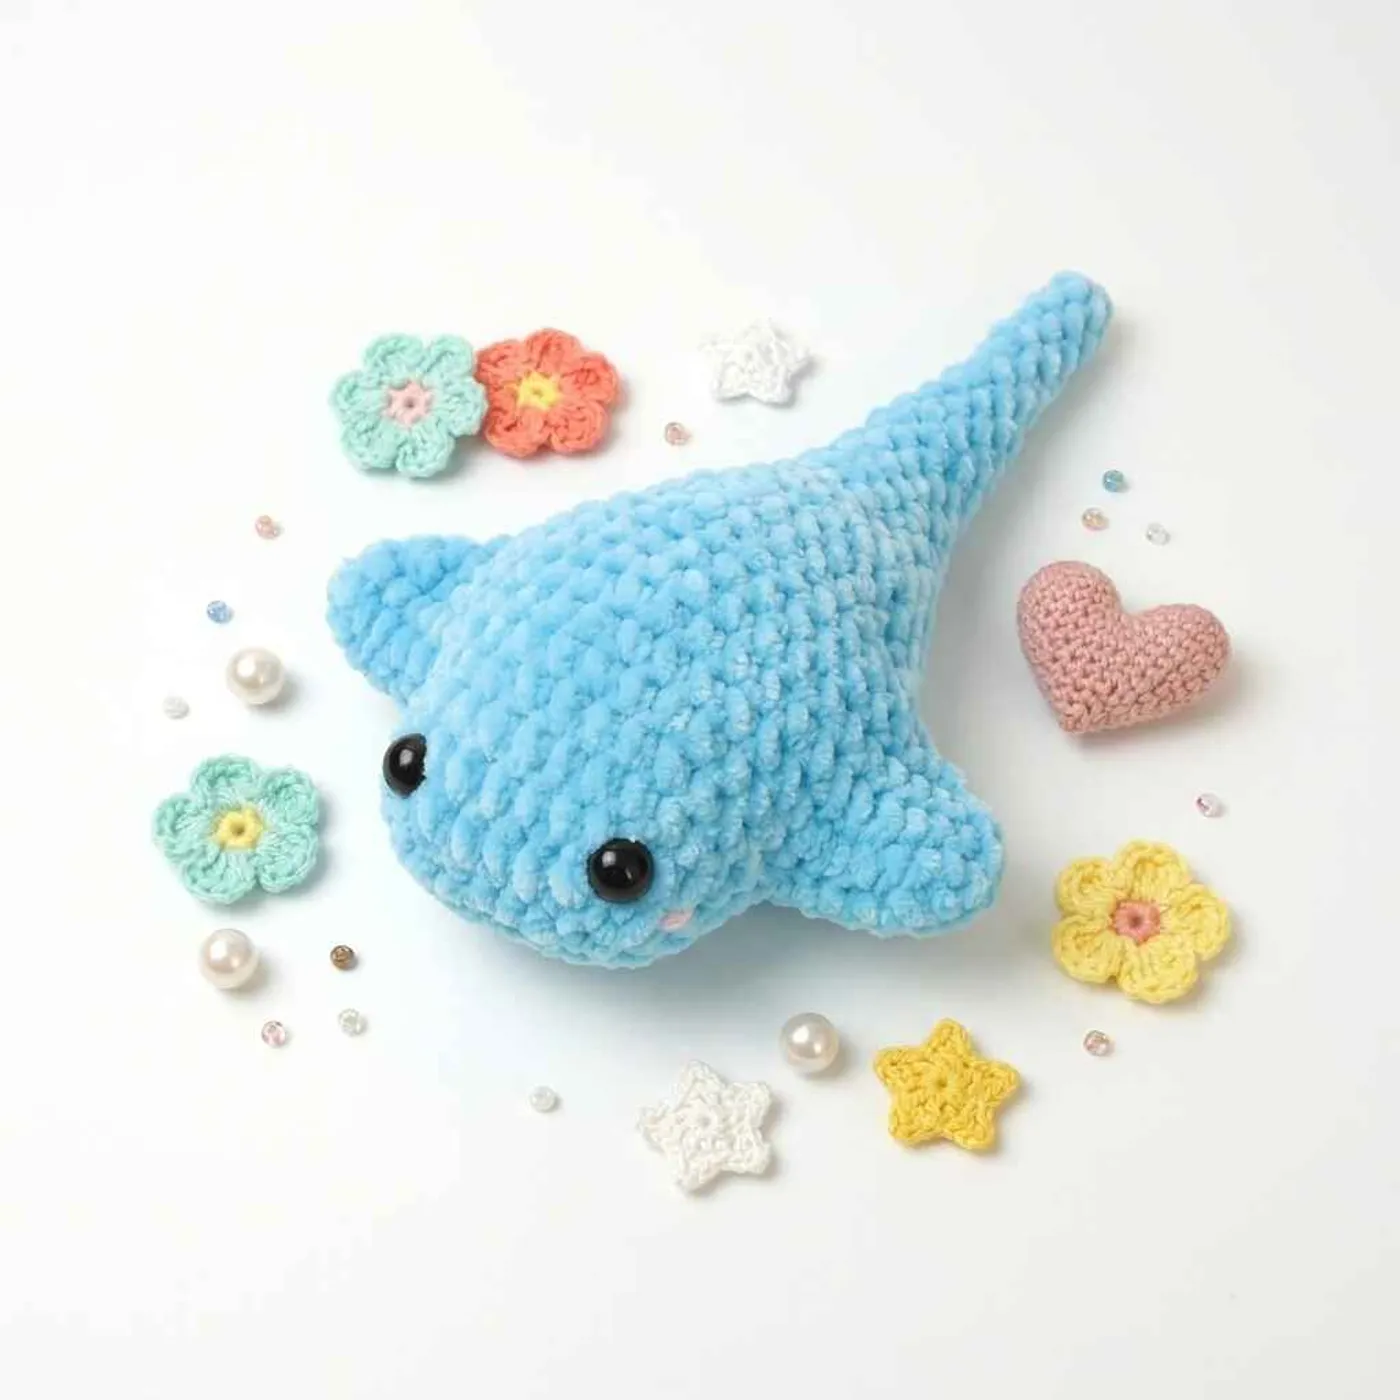
This crochet stingray is a flat, cuddly sea creature made in chunky chenille yarn. The sample is light blue, with two black safety eyes on the front edge, tiny pink cheeks and a long, thin tail that you can curl with a pipe cleaner.
Unlike most amigurumi, this one does not start with a magic ring. You begin with a foundation chain and work around it, so the stingray is wide and flat from the very first round.
The two wing tips are made with short chains in round 4, and the body then tapers down into the tail.
It is a quick, one-piece project with no sewing of separate parts, which makes it a good pick for an advanced beginner who already knows how to increase and decrease in the round. The pattern is written in US crochet terms.
Finished size
The PDF does not give a finished size. Your stingray's size depends on the yarn and hook: with chunky chenille and a US G (4.25 mm) hook you get a soft, flat plush with a long tail of 9 rounds of 6 sc.
For a bigger stingray, use a thicker blanket yarn and a larger hook. For a keychain-sized one, use DK cotton and a 2.5–3 mm hook.
Materials overview
- Chunky chenille yarn (James C. Brett Flutterby Chunky in the sample), light blue
- A small amount of medium weight pink yarn for the cheeks
- US G (4.25 mm) crochet hook
- 9 mm safety eyes
- Fiberfill stuffing
- Yarn needle and stitch markers (optional)
- Pipe cleaner (optional, for a curled tail)
Yarn substitution
The sample uses James C. Brett Flutterby Chunky, a soft velvet-style chenille. Any similar plush yarn works, and it gives the stingray its squishy, velvety look.
You can also use worsted weight acrylic or cotton with a smaller hook. The stitches will be easier to see and count, and the stingray will be smaller and a little firmer.
Light blue, grey, sandy beige or spotted variegated yarn all look great for a stingray.
Stitch notes
- Foundation chain start: round 1 is worked on both sides of a chain of 10, with 3 sc in each end stitch. This makes an oval base instead of a circle.
- Wing tips: in round 4 you chain 6 and work 5 sc back along the chain to make each wing point, then keep going around the body.
- Invisible decrease: the designer uses the invisible decrease for every dec, which keeps the top of the stingray smooth.
- Marking rounds: chenille hides stitches, so a stitch marker at the start of each round really helps.
Common mistakes
- Losing count around the wings: rounds 4 and 5 are the trickiest. Count your stitches at the end of each and check against the totals (47 and 49).
- Stuffing too much: a stingray should be flat. Add only a little stuffing so it keeps its flat, wide shape.
- Placing the eyes too late: put the safety eyes in after rounds 13–14, while the opening is still wide enough to reach the backs.
- Crocheting too tight in chenille: tight chenille is hard to work and can break. Keep a relaxed tension.
FAQ
Where do the safety eyes go?
Place them between rounds 2 and 3, near the front edge, with 6 or 7 stitches between them. Attach them before the body gets too narrow.
How do I make the tail curl?
Insert a pipe cleaner into the tail after you close the piece, then bend it into a gentle curve. Fold the sharp ends of the pipe cleaner over so they cannot poke through.
Is this stingray safe for a baby?
Safety eyes and pipe cleaners are not recommended for children under 3. For a baby, embroider the eyes with black yarn and skip the pipe cleaner.
When do I stuff it?
Stuff the body lightly after round 18, before the tail gets narrow. The tail itself does not need stuffing.
Pattern
We start at the front of the face and work back along the body toward the tail. Work in continuous rounds.
Body and wings
Make a slip knot and ch 10.
R1: starting in the 2nd ch from the hook: 8 sc, 3 sc in the same st, 7 sc (along the other side of the chain), 3 sc in the same st (21)
R2: inc, 7 sc, inc, 1 sc, inc, 8 sc, inc, 1 sc (25)
R3: 25 sc (25)
R4: 12 sc, ch 6, 5 sc back along the ch, base dec, 12 sc, ch 6, 5 sc back along the ch (47)
Tip: the two chains of 6 become the pointed wing tips. Work the 5 sc into the chain, starting in the 2nd ch from the hook.
R5: dec (base of the ch and the next st), 11 sc, 4 sc in the ch, 2 inc, 4 sc, 13 sc, 4 sc in the ch, 2 inc, 4 sc (49)
R6: 49 sc (49)
R7: 17 sc, 2 dec, 20 sc, 2 dec, 4 sc (45)
R8: dec, 9 sc, dec, 3 sc, 2 dec, 3 sc, dec, 8 sc, dec, 3 sc, 2 dec, 3 sc (37)
R9: 12 sc, 2 dec, 16 sc, 2 dec, 1 sc (33)
R10: 11 sc, 2 dec, 14 sc, 2 dec (29)
R11: 10 sc, 2 dec, 11 sc, 2 dec (25)
R12: dec, 7 sc, dec, 14 sc (23)
R13–14: 23 sc (23) (2 rounds)
Attach the 9 mm safety eyes between R2 and R3, with 6 or 7 stitches between them.
R15: dec, (1 sc, dec) x 7 (15)
R16: 15 sc (15)
R17: (3 sc, dec) x 3 (12)
R18: 12 sc (12)
Stuff the body lightly.
Tail
R19: (4 sc, dec) x 2 (10)
R20–21: 10 sc (10) (2 rounds)
R22: (3 sc, dec) x 2 (8)
R23–24: 8 sc (8) (2 rounds)
R25: (2 sc, dec) x 2 (6)
R26–34: 6 sc (6) (9 rounds)
Finishing
- Fasten off and cut the yarn. Sew the hole at the end of the tail closed.
- With pink yarn, embroider small cheeks just below the eyes if you like.
- If you want a curved tail, insert a pipe cleaner into the tail and bend it gently.
- Weave in all the ends inside the body.
Optional & Creative Ideas
- Spotted stingray: embroider small white or dark dots on the back for a spotted eagle ray look.
- Smile: add a tiny stitched smile between the eyes with black yarn.
- Ocean set: pair it with a crochet shark, jellyfish or dolphin for an under-the-sea gift set.
- Mini version: use cotton yarn and a small hook to make a stingray keychain or bag charm.
Final Thoughts
This stingray is fast, flat and very cuddly in chenille yarn. Take your time with rounds 4 and 5, where the wing tips form, and the rest of the body is smooth sailing down to the tail.
Patterns and instructions on OpenCrochet are for personal use. Please do not redistribute copies of this content; share the page link instead.


