

How to Crochet a Tiny Astronaut Amigurumi for Little Space Fans
Crochet a astronaut amigurumi with an orange suit, silver helmet and dark visor. A quick scrap-yarn gift for kids who love space.
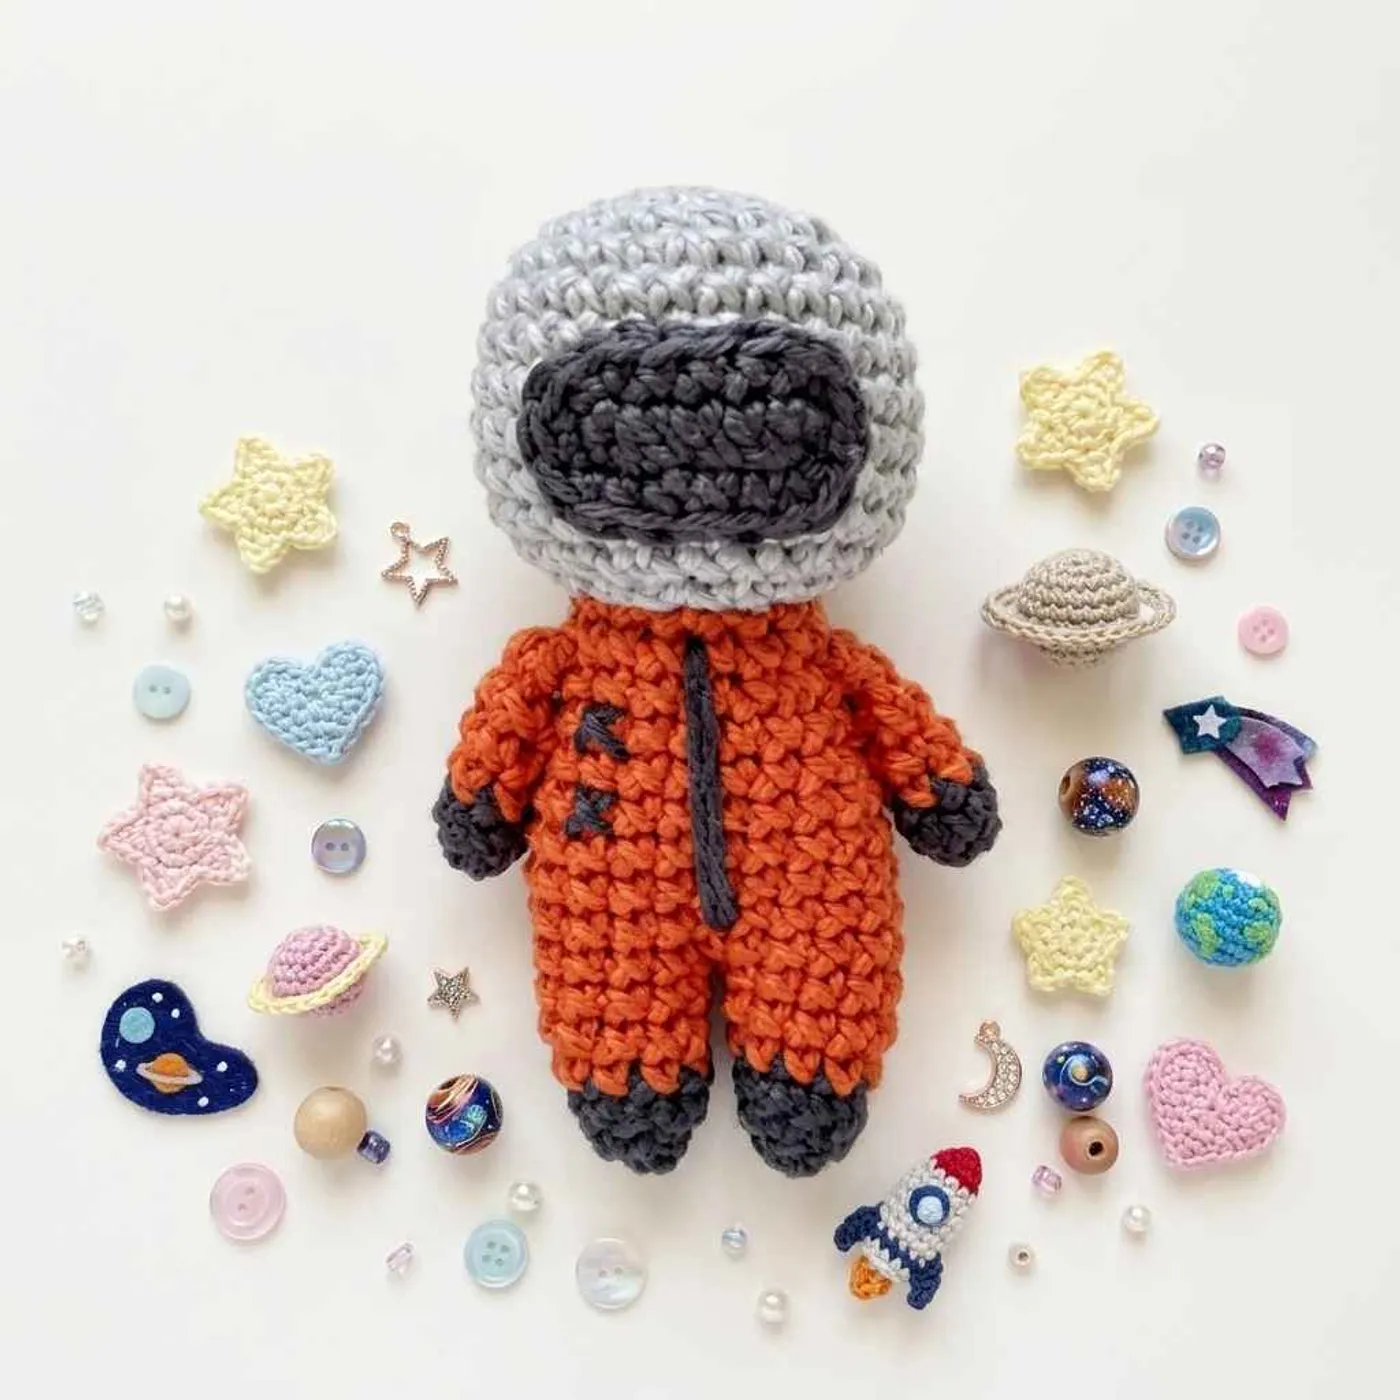
This astronaut amigurumi is a 3-inch (7.5 cm) space explorer in an orange suit, a silver helmet and a dark visor. It's a quick, satisfying make for anyone who wants a tiny gift for a space-loving kid, a desk buddy, or a way to use up scraps of sport weight yarn.
Quick facts
- Yarn: sport weight in three colors: silver (about 20 yd), graphite (about 5 yd) and orange (about 15 yd)
- Hook: B (2.25 mm), or the size that gives you a firm fabric
- Other: tapestry needle, stitch marker, stuffing
- Finished size: 3 in (7.5 cm) tall, as stated in the pattern
- Difficulty: beginner (basic stitches, small pieces, no safety eyes)
- Time: about 1–2 hours (our estimate)
Credit: this is the designer's "The Tiniest Astronaut" pattern. The PDF doesn't print the designer's name, so all credit for the design and photos goes to its original maker.
Finished size
The sample measures 3 in (7.5 cm) from boot to helmet. It fits in the palm of your hand, so it works well as a pocket toy, an ornament or a cake topper.
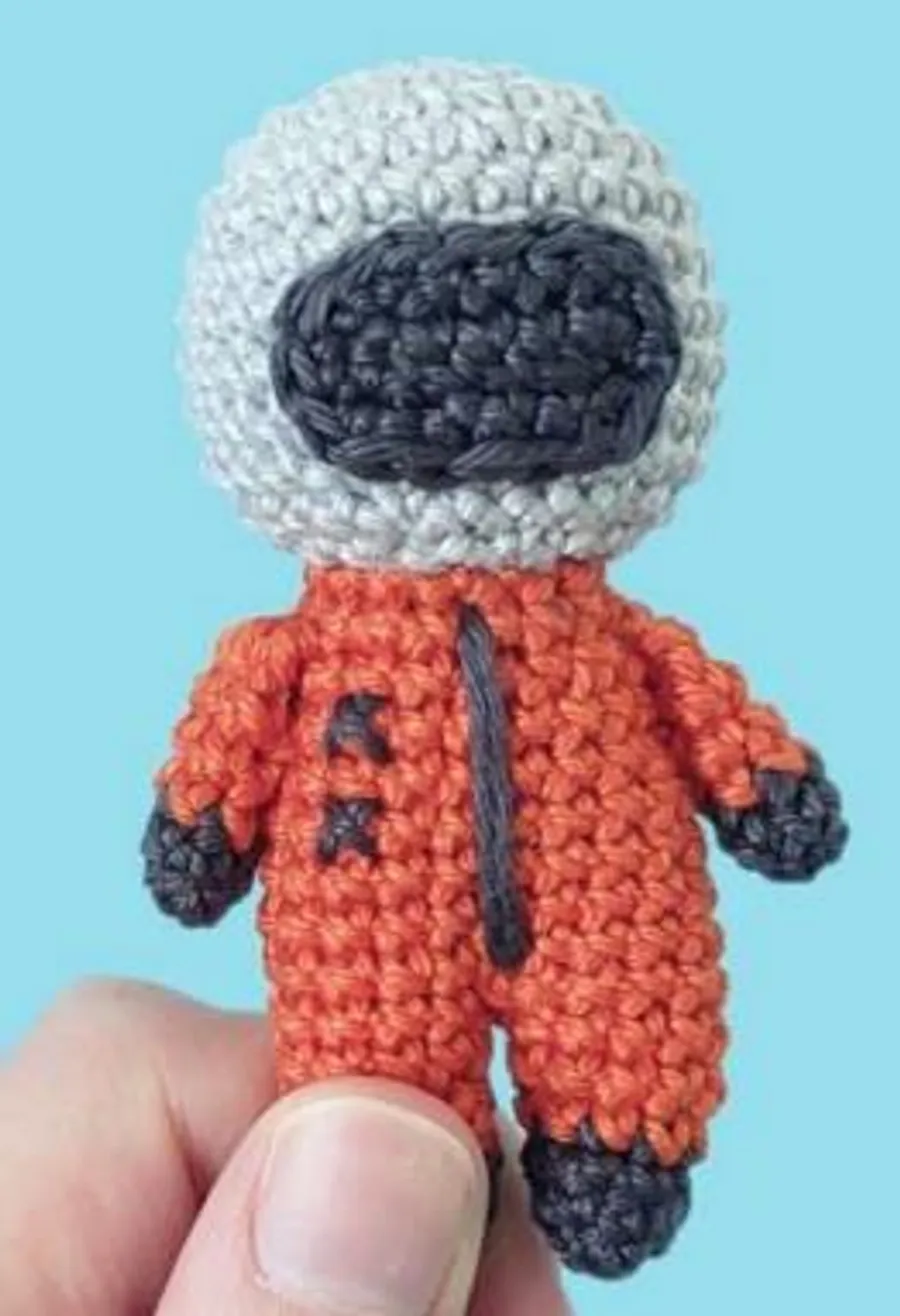
Thicker yarn makes a bigger astronaut with the same counts, but you'll need more yarn than the estimates.
Yarn substitution
The designer made the samples from stash yarn (Yarn and Colors Must-Have in Silver, Graphite and Sorbus). Any sport weight cotton or acrylic works.
- Keep all three yarns the same thickness. Even two "fingering" yarns can be different, and that shows on such a small toy.
- Go down a hook size if you can see stuffing between the stitches.
- Want a bigger doll? DK yarn and a 3 mm hook give a slightly larger astronaut (our estimate, not tested).
Before you start: two stitch tips
The rounds are worked in a continuous spiral, through both loops unless the pattern says otherwise. Mark the first stitch of each round.
The designer uses the X-shaped single crochet: yarn under the hook instead of over it. These stitches look square and stack neatly on top of each other.
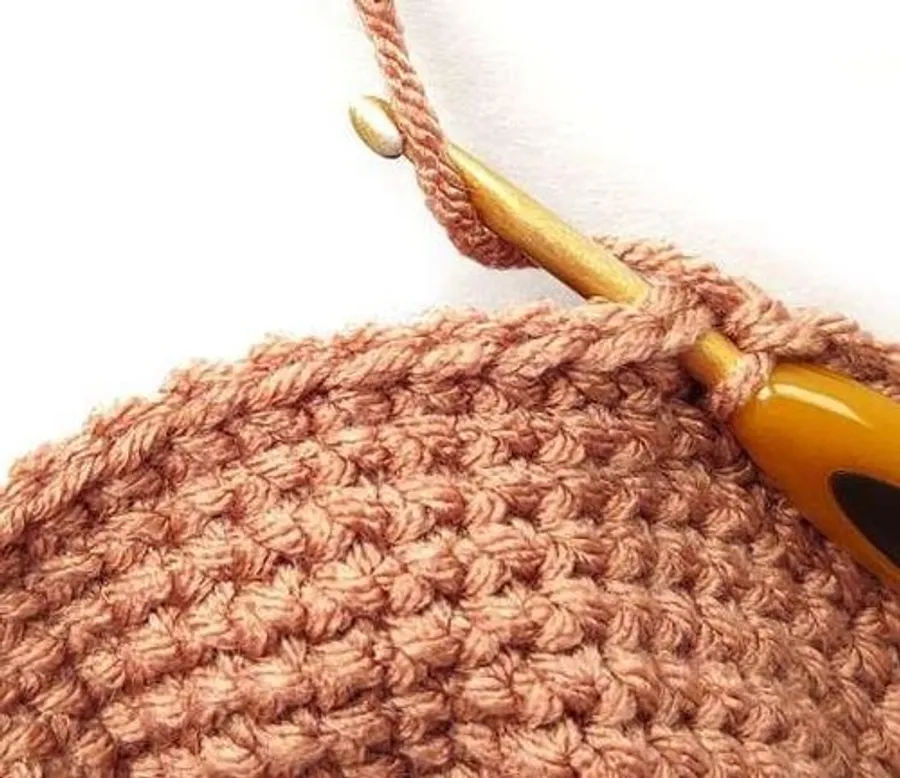
You can use the usual V-shaped sc too. Your astronaut will just look a little different from the photos.
Invisible fasten off
Several pieces end with this neat finish:
- Cut the yarn and pull the end out of the last stitch.
- Skip one stitch to the left and use a needle to pull the tail from front to back through both loops of the next stitch.
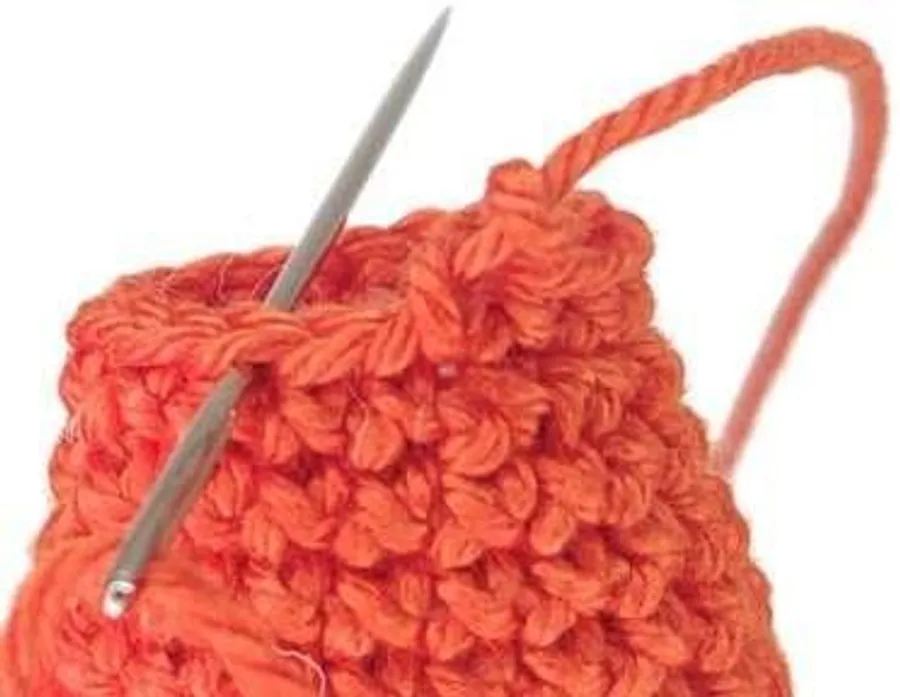
- Thread the tail back down through the top of the last stitch, between the front and back loops.
- Adjust the new loop so it matches the stitches beside it. Secure the end inside the piece unless told otherwise.
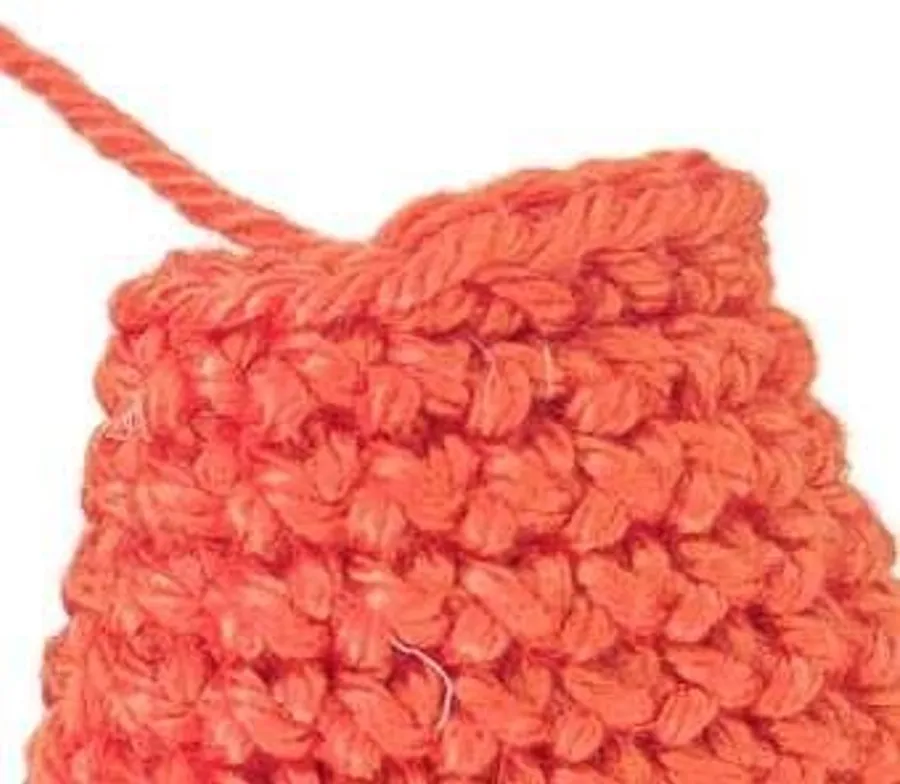
Helmet
With Color 1 (silver):
- Rnd 1: 6
scin a magic ring. [6] - Rnd 2:
inc6 times. [12] - Rnd 3: (
sc,inc) 6 times. [18] - Rnd 4: (
sc,inc,sc) 6 times. [24] - Rnd 5: (
scin next 3 sts,inc) 6 times. [30] - Rnds 6–11:
scin each st (6 rounds). [30] - Rnd 12: (
scin next 3 sts,dec) 6 times. [24]
Begin stuffing the helmet.
- Rnd 13: (
sc,dec) 8 times. [16] - Rnd 14: in
BLO,dec8 times. [8]
Cut the yarn, draw the end through the front loops of Rnd 14, pull tight and knot to close. Weave in the end.
Tip: Rnd 14 is worked in the back loops on purpose. The free front loops of Rnd 13 become your guide line for sewing the helmet to the body later.
Visor
With Color 2 (graphite), ch 6.
- Rnd 1:
scin next 4 ch, 3scin next ch. Rotate and work in the bottom of the foundation chain:scin next 3 ch,incin next ch. [12]
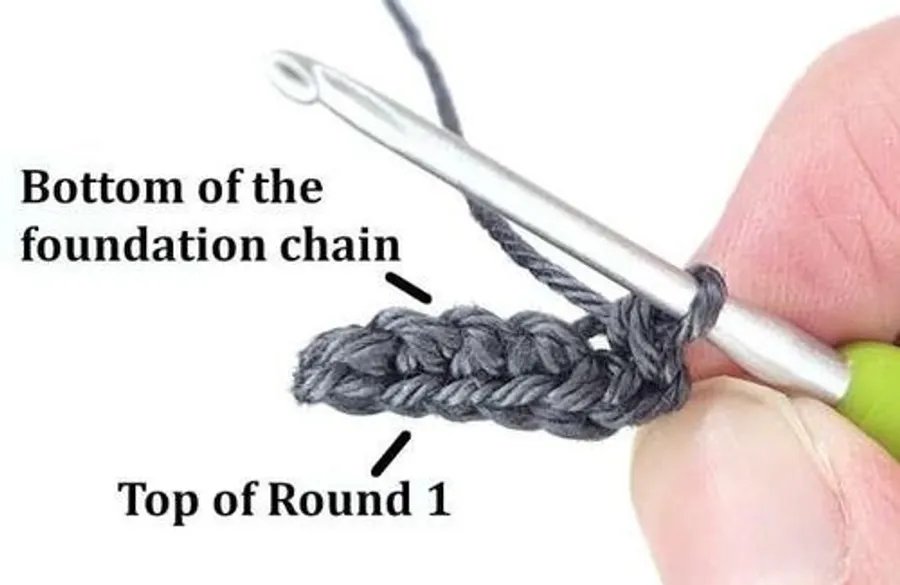
- Rnd 2:
inc,scin next 3 sts,incin next 3 sts,scin next 3 sts,inc,sc. [17]
Fasten off with the invisible method and leave a long tail for sewing.
Legs (make 2)
- Rnd 1: with Color 2 (graphite), 6
scin a magic ring. [6] - Rnd 2: (
sc,inc,sc) 2 times. [8] - Rnd 3:
scin each st. [8]
Switch to Color 3 (orange).
- Rnd 4: (
scin next 3 sts,inc) 2 times. [10] - Rnds 5–6:
scin each st (2 rounds). [10]
Fasten off the first leg. Don't fasten off the second leg: work sc in the next 2 sts (this hides the color change), then go straight on to the body.
Body
- Rnd 1:
scin the next 10 sts of the first leg, thenscin the next 10 sts of the second leg. [20]
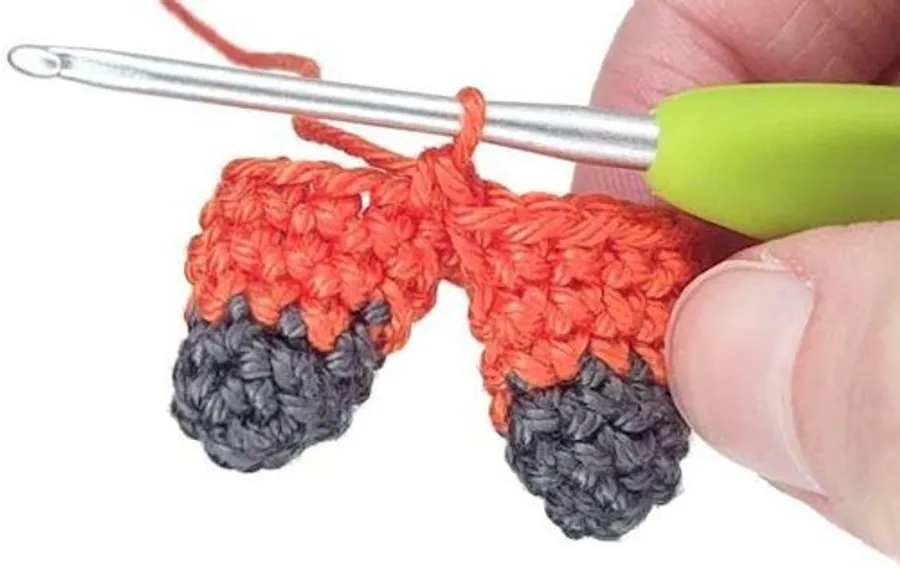
Place your marker in the first stitch you made in the first leg. This is now the start of the round.
- Rnds 2–5:
scin each st (4 rounds). [20] - Rnd 6: (
scin next 4 sts,dec,scin next 4 sts) 2 times. [18] - Rnd 7:
scin each st. [18] - Rnd 8: (
scin next 7 sts,dec) 2 times. [16] - Rnd 9:
scin each st. [16]
Fasten off with the invisible method and leave a long tail for sewing.
Arms (make 2)
- Rnd 1: with Color 2 (graphite), 6
scin a magic ring. [6] - Rnd 2:
scin each st. [6]
Switch to Color 3 (orange).
- Rnds 3–5:
scin each st (3 rounds). [6]
Flatten the opening so the stitches on both sides line up.
- Rnd 6: 3
scthrough both layers. [3]
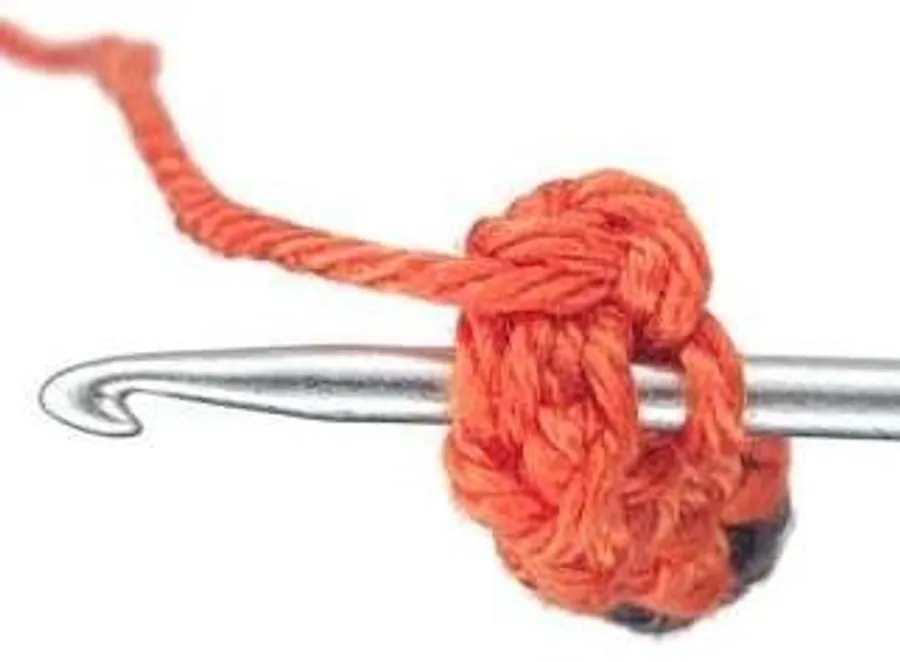
Fasten off with a long tail for sewing. The arms aren't stuffed.
Finishing your astronaut
- Use the tail of the first leg to close the small gap between the legs. Stuff the legs and the body.
- Sew the helmet to the opening of the body, using the front loops of Rnd 13 as a guide. The designer prefers to sew around the post of the stitch instead of the front loop. Add a little more stuffing to the neck before you close it.
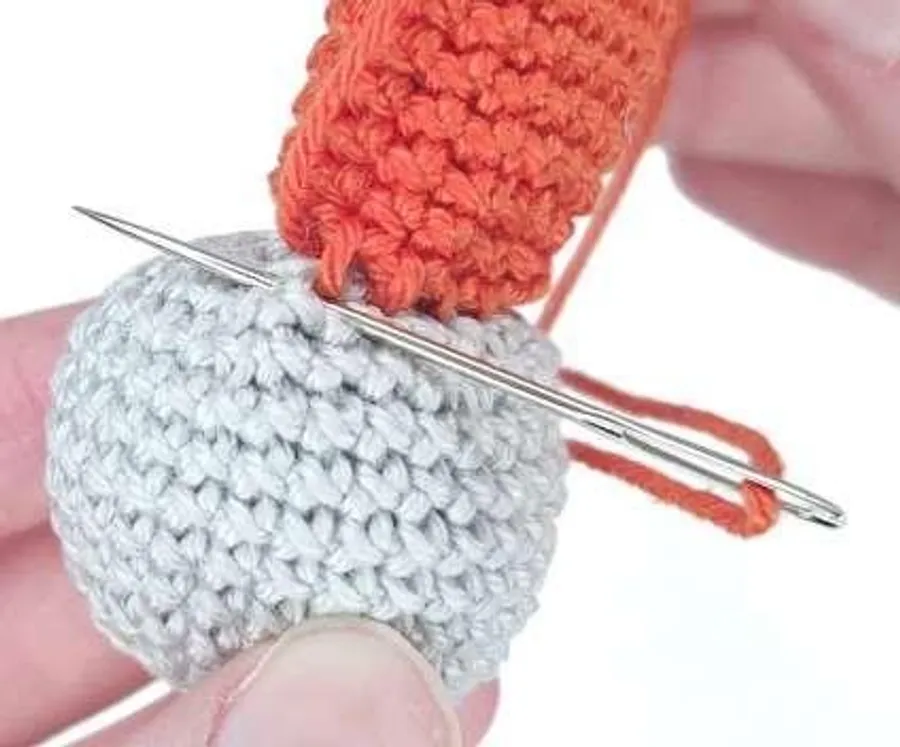
- Sew the arms to both sides of the body at Rnd 8.
- Sew the visor to the helmet between Rnds 7 and 11, centered on the front above the arms.
- With a scrap of Color 2, embroider the zipper with two long stitches down the front of the body, and two buttons with cross stitches beside it.
FAQ
Is this astronaut amigurumi safe for babies?
There are no safety eyes or small parts, because the visor is crocheted. Sew every piece on very securely and check the seams before giving it to a small child.
Do I have to use the X-shaped single crochet?
No. The designer says both versions work. X-shaped stitches look tidier and more square; V-shaped ones make the toy look slightly different.
Why is the helmet stuffed before the last round?
The opening gets very small after Rnd 13. Stuffing at Rnd 12 lets you shape a firm, round helmet.
How do I keep the color change neat on the legs?
Switch colors on the last stitch of Rnd 3, and carry on in a spiral. The 2 extra sc at the end of the second leg move the start of the body away from the color jog.
Common mistakes
- Helmet sewn on crooked: pin it first, lining up the free front loops of Rnd 13 with the top of the body all the way around.
- Visor too low or off-center: it sits between Rnds 7 and 11 of the helmet, facing the same way as the zipper. Check from the front before you sew.
- Gap between the legs: close it with the first leg's tail before you stuff, or stuffing will poke out.
- Floppy neck: add stuffing to the neck just before the last stitches of the helmet seam.
- Stuffing showing through: your fabric is too loose; go down a hook size.
Bonus: make a whole space crew
- Suit colors: swap Color 3 for white for a classic NASA look, or blue, yellow or pink to make a team where each astronaut has its own color.
- Mission patch: embroider a tiny star or flag on the chest with one strand of yellow or red yarn.
- Ornament or keychain: sew a ribbon loop or a keyring to the top of the helmet before you close Rnd 14.
- Gift idea: tuck one into a birthday card, a space-themed party bag or a child's lunchbox for a surprise.
Looking for more tiny dolls? Try the mini Wootteo crochet doll, the Santa doll with braids or our tiny giraffe keychain.
Optional & Creative Ideas
- Make it bigger: use DK yarn and a 3 mm hook, or worsted with a 3.5–4 mm hook, for a larger astronaut with the same counts (our estimate).
- Helmet with a face: embroider small eyes and a smile on the visor with white or pink thread.
- Fix for a wobbly head: run a long stitch from the top of the helmet down through the body and back up to stiffen the neck.
- Display it: sit the astronaut on a crocheted moon or planet ball, or on a stack of books on a desk shelf.
Patterns and instructions on OpenCrochet are for personal use. Please do not redistribute copies of this content; share the page link instead.


