

Sweetie the Pig Amigurumi Crochet Pattern
Crochet Sweetie the Pig, a light pink amigurumi with a dark pink snout, curly tail and sunken safety eyes.
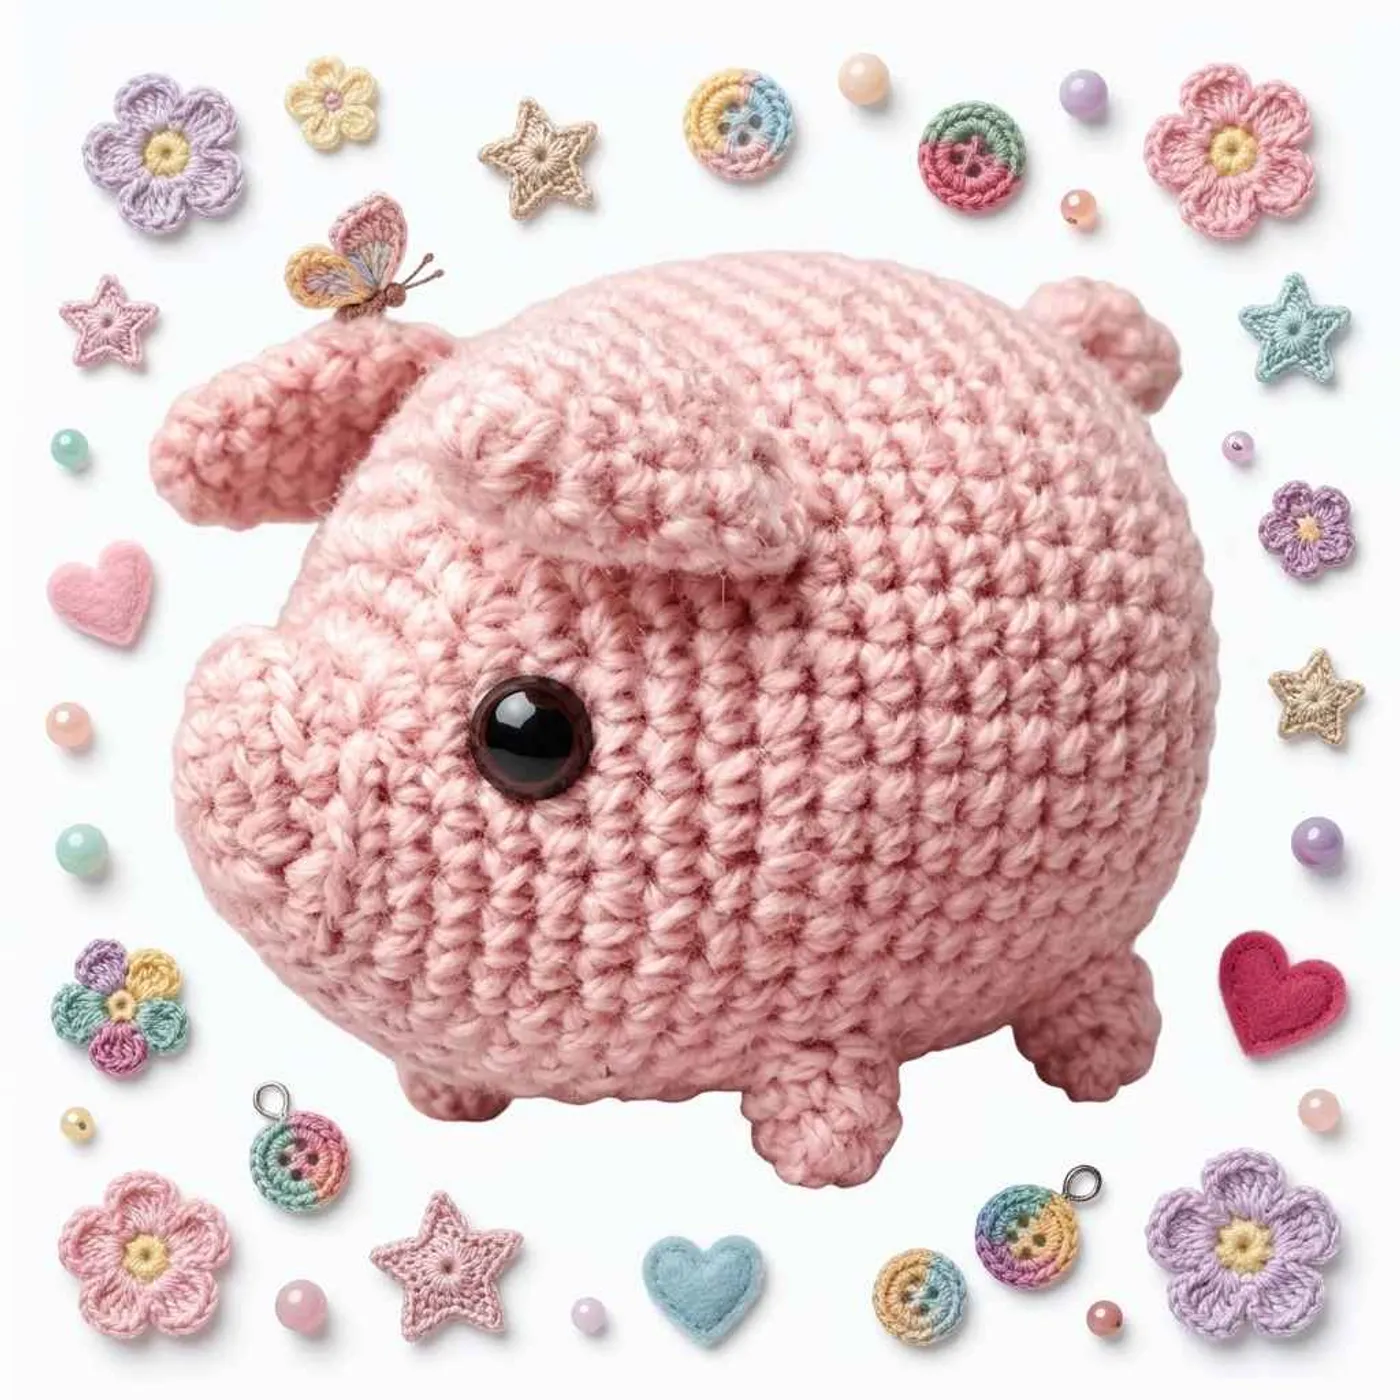
Sweetie the Pig is a soft, chubby amigurumi pig crocheted as one long head-and-body tube in light pink, with a darker pink snout and feet, folded triangle ears and a curly chain tail. The finished sample is about 12 inches from the back to the top of the head when made in worsted weight yarn with a 3.25 mm hook.
Unlike tiny keychain pigs, this one is a proper cuddle-size toy. The head and body are worked in one piece from the snout end toward the rear, so there is no neck seam to sew.
The face gets a sunken-eye trick with 24 mm safety eyes, white yarn highlights and a sculpted two-color nose that uses double crochet bumps for the nostrils.
It is written for an intermediate crocheter who already knows the magic ring, increases, decreases and a simple color change. Expect a few evenings of work once you add the four legs, ears, nose and tail. The pattern uses US crochet terms throughout.
Finished size
About 12 inches (30 cm) from the back of the body to the top of the head, using worsted weight (#4) yarn and a 3.25 mm (D) hook.
A thicker yarn or a bigger hook will give you a larger pig. Keep the fabric firm so the 24 mm eyes sit neatly and the stuffing does not show through the light pink stitches.
Materials overview
- Worsted weight (#4) yarn: about 100 g light pink (Color A) and 50–75 g dark pink (Color B)
- 3.25 mm (D) crochet hook
- 24 mm safety eyes
- Polyester fiberfill
- Stitch marker, scissors and a yarn needle
- A little white yarn for eye highlights (optional)
Suggested yarn from the designer: I Love This Yarn Soft Pink (Color A) and I Love This Yarn Pink (Color B).
Yarn substitution
Any smooth worsted acrylic or cotton blend works. Soft Pink and a slightly deeper pink give the classic pig look from the sample.
If you prefer a plush pig, try a light chenille or velvet yarn with a hook that still makes a dense fabric. You will need to adjust the eye and nose placement, because the stitch count stays the same but the finished size changes.
Stitch notes
- Continuous spiral: do not join rounds unless the pattern says so. Mark the first stitch of every round.
- Head and body in one piece: you start at the face and work all the way to the rear, then close the hole. Stuff firmly as you go.
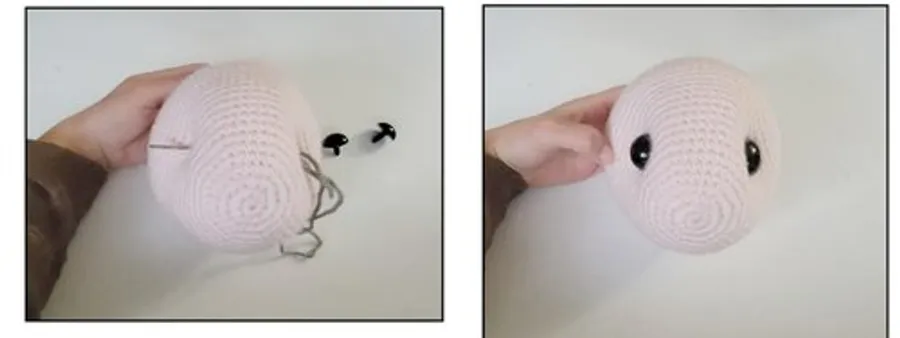
- Sunken eyes: place the 24 mm safety eyes between rounds 12 and 13, 19 holes apart. For a sunken look, wait until round 33 to put the washers on, then sculpt with yarn before closing.
- Nose shaping: round 4 of the nose works
3 dcbumps for the nostrils in dark pink, then you switch to light pink and work the next round in the back loops only. - Ears: do not stuff. Fold each ear in half and single crochet the opening closed before sewing.
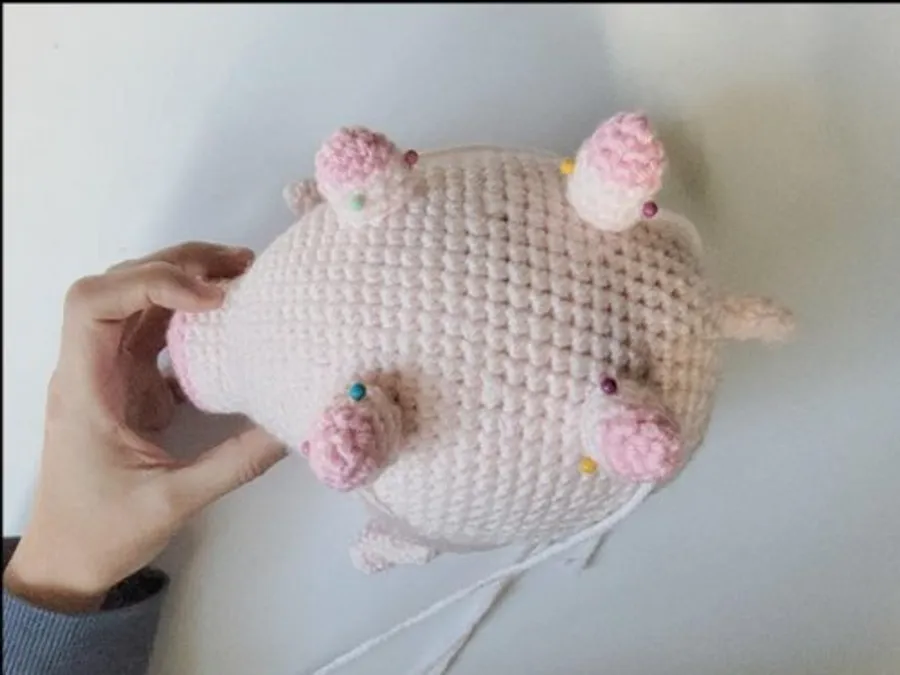
- Legs: the designer leaves them unstuffed. Start in dark pink for the feet, then change to light pink.
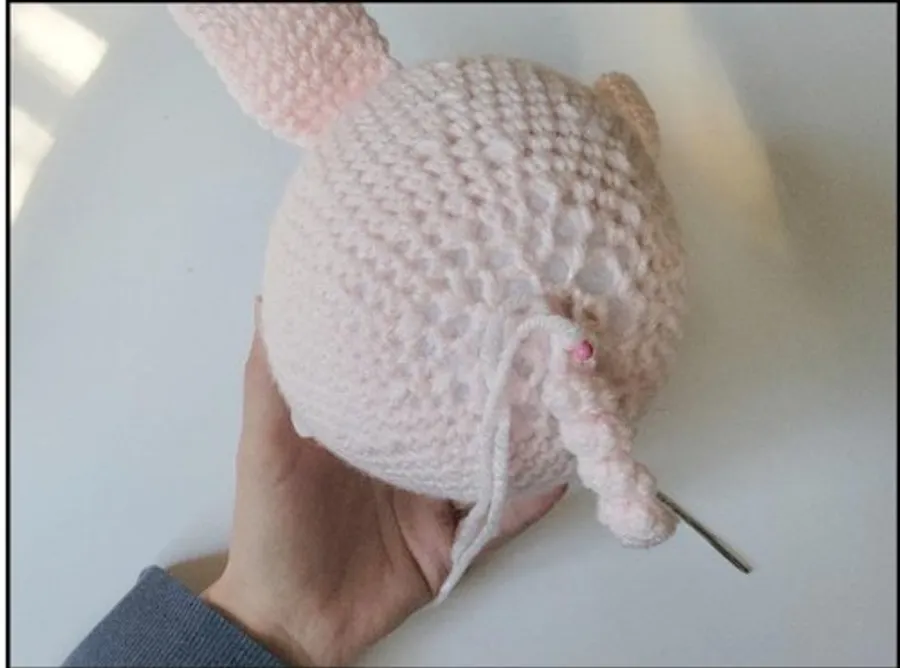
- Curly tail: chain 17, then increase in every chain so the strip coils naturally.
Common mistakes
- Eyes too close or too far apart: keep 19 holes between the eyes on rounds 12–13. Adjust only if your yarn or hook changes the gauge a lot.
- Putting the washers on too early: if you want the sunken-eye look, wait until round 33, remove most of the stuffing, lock the washers, then restuff.
- Understuffing the head: the head should feel firm before you sculpt the eyes and sew the nose on, or the face will look flat.
- Stuffing the ears or legs: both are meant to stay flat or soft. Stuffing them makes the ears bulky and the legs stick out awkwardly.
- Skipping the BLO round on the nose: round 5 in the back loops creates a neat ridge where the dark pink snout meets the light pink face.
FAQ
Is this pig safe for a baby?
24 mm safety eyes can come loose if they are not locked tightly. For a child under 3, embroider the eyes with black yarn and skip the hard washers.
How do I get the sunken eye look?
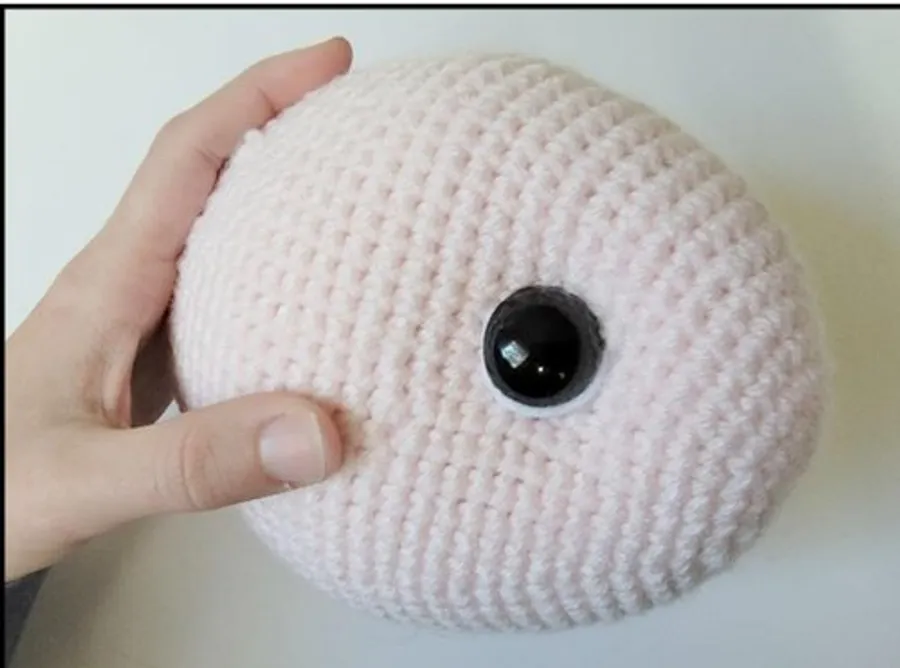
Place the eye posts between rounds 12 and 13 without the washers. At round 33, stuff the head, then use a long yarn strand to go back and forth through the eye holes and pull gently. Remove most of the stuffing, add the washers, and restuff.
Do I need to stuff the legs?
No. The designer leaves the four legs unstuffed so they sit softly under the body. You can add a tiny bit of fiberfill in the dark pink feet if you want them slightly rounded.
Can I change the yarn weight?
Yes. A different hook or yarn weight only changes the finished size. Recheck eye and nose placement on your pig before you sew the parts on.
Where do the ears go?
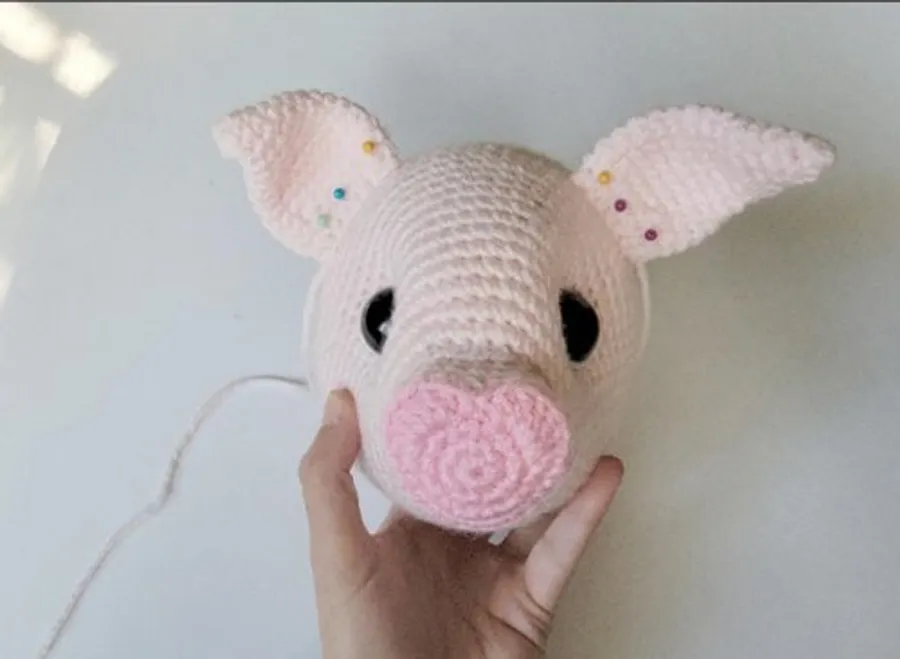
Pin them on top of the head roughly between rounds 18 and 19, then sew them down with the long yarn tails.
Pattern
Work in continuous rounds unless a section says otherwise. The number in brackets is the stitch count at the end of the round.
Head and body
Crocheted from the front of the head to the back. With Color A (light pink).
Rnd 1: 6 sc in a magic ring (6)
Rnd 2: inc in each st around (12)
Rnd 3: (sc, inc) x 6 (18)
Rnd 4: (2 sc, inc) x 6 (24)
Rnd 5: (3 sc, inc) x 6 (30)
Rnd 6: sc in each st around (30)
Rnd 7: (2 sc, inc) x 10 (40)
Rnd 8: sc in each st around (40)
Rnd 9: (4 sc, inc) x 8 (48)
Rnd 10: sc in each st around (48)
Rnd 11: (5 sc, inc) x 8 (56)
Rnd 12–13: sc in each st around (56) (2 rounds)
Tip: place the 24 mm safety eyes between rounds 12 and 13, 19 holes apart. For a sunken look, do not put the washers on until round 33. Adjust the placement if your yarn or hook changes the size.
Rnd 14: (6 sc, inc) x 8 (64)
Rnd 15–18: sc in each st around (64) (4 rounds)
Rnd 19: (7 sc, inc) x 8 (72)
Rnd 20–22: sc in each st around (72) (3 rounds)
Rnd 23: (7 sc, dec) x 8 (64)
Rnd 24–27: sc in each st around (64) (4 rounds)
Rnd 28: (6 sc, dec) x 8 (56)
Rnd 29–30: sc in each st around (56) (2 rounds)
Rnd 31: (5 sc, dec) x 8 (48)
Rnd 32: sc in each st around (48)
Rnd 33: (4 sc, dec) x 8 (40)
Rnd 34: sc in each st around (40)
Stuff the head firmly. For sunken eyes: cut a long strand of yarn, remove the eye posts temporarily if needed, and weave the needle back and forth through each eye hole and a hole next to it, pulling gently after each pass.
To lock the washers, remove most of the stuffing, place the backs on the eyes, then restuff.
Rnd 35: (3 sc, dec) x 8 (32)
Rnd 36: sc in each st around (32)
Rnd 37: (2 sc, dec) x 8 (24)
Rnd 38: sc in each st around (24)
Rnd 39: (sc, dec) x 8 (16)
Rnd 40: dec x 8 (8)
Rnd 41: (sc, dec) x 2 (6)
Fasten off and sew the hole closed.
Ears (make 2)
With Color A. Do not stuff.
Rnd 1: 4 sc in a magic ring (4)
Rnd 2: (sc, inc) x 2 (6)
Rnd 3: (2 sc, inc) x 2 (8)
Rnd 4: (inc, sc) x 4 (12)
Rnd 5–6: sc in each st around (12) (2 rounds)
Rnd 7: (inc, 2 sc) x 4 (16)
Rnd 8–9: sc in each st around (16) (2 rounds)
Rnd 10: (inc, 3 sc) x 4 (20)
Rnd 11–12: sc in each st around (20) (2 rounds)
Rnd 13: (dec, 3 sc) x 4 (16)
Rnd 14: (dec, 2 sc) x 4 (12)
Fold the ear in half and sc the opening closed. Fasten off and leave a long tail for sewing.
Tail
With Color A.
Row 1: ch 17. Inc in the 2nd ch from the hook and in each ch across (32)
Fasten off and leave a long tail for sewing. The strip will curl into a pig tail.
Nose
Start with Color B (dark pink).
Rnd 1: 6 sc in a magic ring (6)
Rnd 2: inc in each st around (12)
Rnd 3: (sc, inc) x 6 (18)
Rnd 4: 3 dc in each of the next 2 stitches, 2 sl st, 3 dc in each of the next 2 stitches, 12 sc (26)
Change to Color A (light pink).
Rnd 5: BLO 6 sc, dec, 16 sc, dec (24)
Rnd 6–7: sc in each st around (24) (2 rounds)
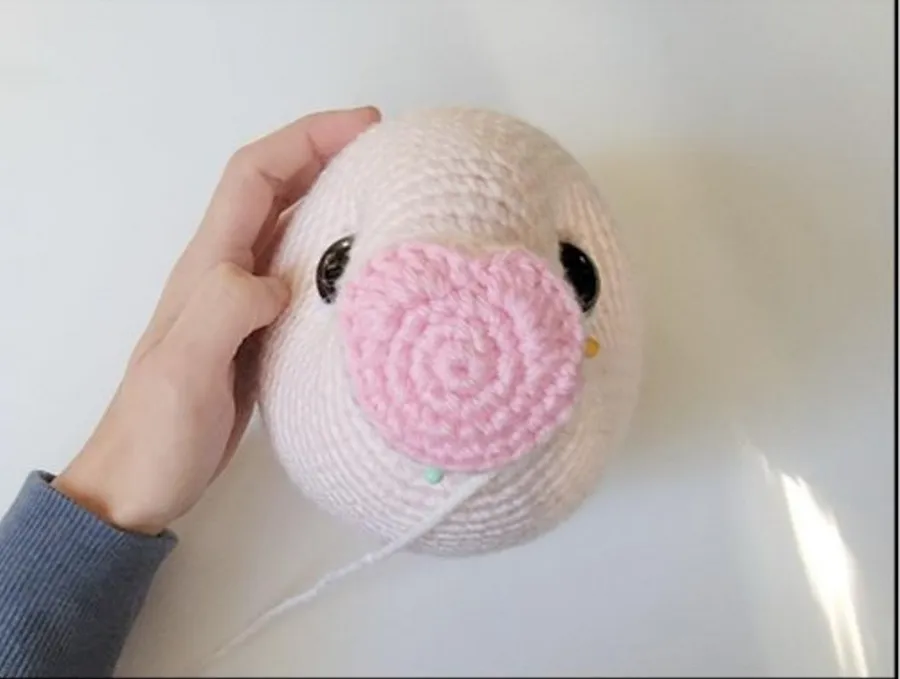
Fasten off and leave a long tail for sewing. Stuff the nose lightly when you sew it on.
Legs (make 4)
Start with Color B. The designer does not stuff the legs.
Rnd 1: 4 sc in a magic ring (4)
Rnd 2: inc in each st around (8)
Rnd 3: (3 sc, inc) x 2 (10)
Change to Color A.
Rnd 4–6: sc in each st around (10) (3 rounds)
Fasten off and leave a long tail for sewing.
Assembly
- Eye highlights (optional): with a long strand of white yarn, insert the needle into a hole between the eyes, bring it to a lower corner of one eye, wrap around the outside of the eye and insert into a hole on top of the eye. Pull a little tightly for a highlight. Repeat on the second eye and weave in the ends.
- Nose: pin the nose onto the front of the head and sew it in place, adding a little stuffing as you go.
- Ears: pin the ears on top of the head between rounds 18 and 19, then sew them down.
- Tail: pin the curly tail onto the back of the body and sew it in place.
- Legs: turn the body upside down, pin the four legs in place and sew them on. Weave in all remaining ends.
Optional & Creative Ideas
- Pastel farm set: make a second pig in mint or butter yellow yarn for a soft nursery shelf pair.
- Embroidered nostrils: if you prefer a flatter snout, skip the double crochet bumps and embroider two dark pink ovals on a simple oval nose.
- Keychain mini: use DK yarn and a 2.5 mm hook, embroider the eyes, and add a keyring to the back of the head.
- Bow or bandana: crochet a tiny bow in Color B and sew it between the ears for a gift-ready pig.
Final Thoughts
Sweetie the Pig is a satisfying one-piece body with playful details in the sunken eyes, curly tail and two-tone snout. Take your time on the eye sculpting and nose placement — those two steps give the pig its sweet face.
Patterns and instructions on OpenCrochet are for personal use. Please do not redistribute copies of this content; share the page link instead.


