

No-Sew Gummy Bear Amigurumi Crochet Pattern
Crochet a tiny no-sew gummy bear in one piece. Bobble ears, arms and legs, candy colors, beginner friendly.
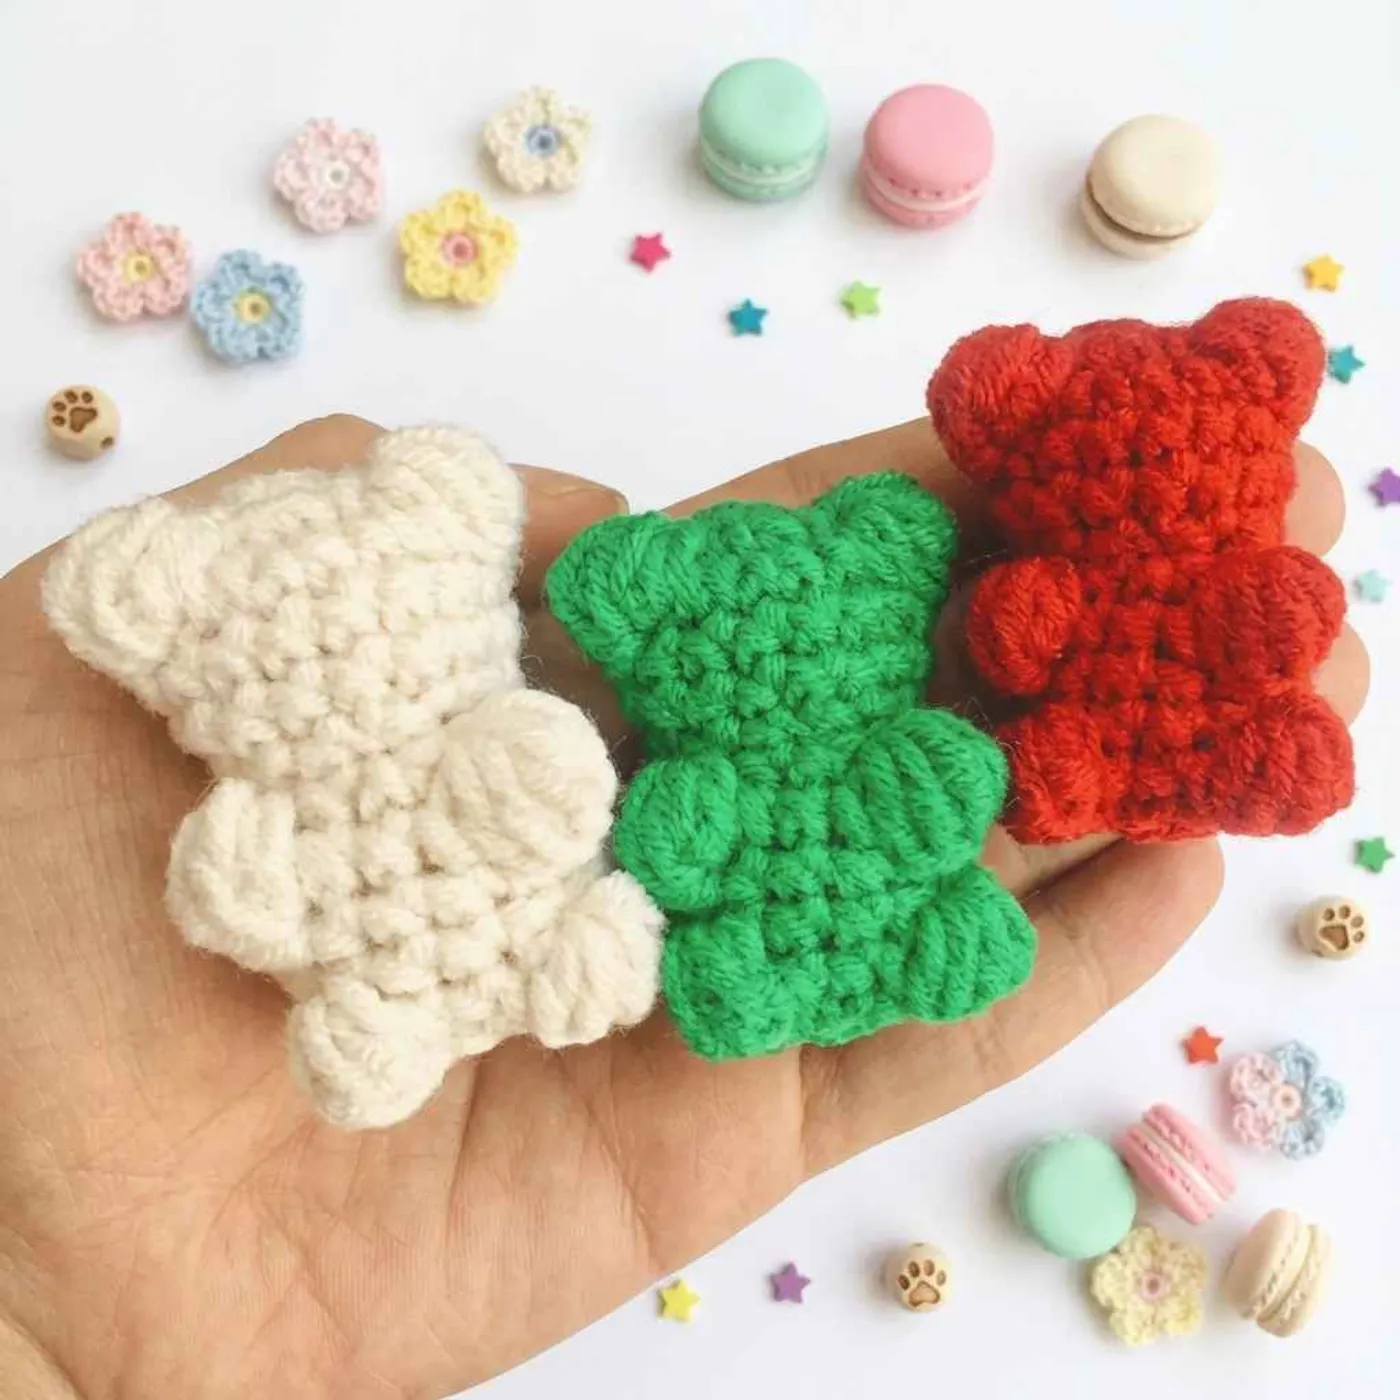
This tiny crochet gummy bear is a one-piece, no-sew amigurumi that looks just like the candy: a round head, a chubby body and little bobble ears, arms and legs.
In the photo, three of them sit in the palm of a hand — white, bright green and red — with no embroidered face, so they keep that classic gummy look.
The whole bear is only 13 continuous rounds of single crochet. You never sew on separate parts. The ears, arms and legs are all made with bobble stitches (bo) worked into the body as you go. Stuff before the final decrease, close the hole, and you are done.
The PDF does not list yarn, hook size or finished measurements. From the photo, the sample looks like a smooth cotton or acrylic yarn with clear stitch definition, worked with a small hook so the fabric is firm.
The pattern is written in US crochet terms and suits a beginner who already knows the magic ring, increases, decreases and wants to try a bobble.
Finished size
The PDF gives no finished size. In the photo, three bears fit side by side in an adult palm, so each one is roughly 4–5 cm (1.5–2 in) tall when made in DK or light worsted yarn with a 2.5–3.5 mm hook.
A thicker chenille yarn and a larger hook will give a squishier, bigger bear. A finer cotton and a 2 mm hook will give a keychain-sized one.
Materials overview
The PDF has no materials list. These are reasonable beginner choices inferred from the photo (smooth yarn, clear stitches, tiny size):
- DK or light worsted cotton or acrylic yarn in candy colors (the sample uses white, bright green and red)
- 2.5–3.5 mm crochet hook (inferred; use a small hook for a firm fabric)
- Polyester fiberfill
- Yarn needle
- Scissors
- Stitch marker
Note: the sample bears have no safety eyes or embroidered face. You can leave them plain like real gummies, or add tiny embroidered eyes if you prefer.
Yarn substitution
A smooth cotton or cotton blend shows the bobbles clearly and keeps the bear looking neat, which matches the photo. Acrylic DK or worsted works just as well and is often cheaper for making a whole bowl of candy colors.
Chenille or velvet yarn also works if you want a softer, plush gummy. Use a slightly larger hook and mark every round carefully, because chenille hides stitches.
Pick classic gummy colors — red, green, yellow, orange, white, pink — or make a rainbow set.
Stitch notes
- Bobble (
bo): the PDF usesbobut does not define it. Treat it as a standard amigurumi bobble that counts as one stitch. A common version: yarn over, insert hook in the stitch, yarn over and pull up a loop, yarn over and pull through 2 loops; repeat this 4 more times in the same stitch (5 incomplete dc on the hook), yarn over and pull through all loops, then chain 1 to close. Skip the next stitch if your usual bobble needs it — here the stitch counts only work if the bobble itself occupies one stitch, so do not skip an extra stitch after it. - Continuous rounds: work in a spiral. Move a stitch marker up every round.
- Bobble placement:
- R3 — two bobbles for the ears
- R8 — two bobbles for the arms
- R11 — two bobbles for the legs
- No sew: the ears, arms and legs are built in. The yarn tail at the end is only for closing the opening, not for sewing on parts.
Common mistakes
- Treating
boas something else: if you work a single crochet or a puff that does not sit as one stitch, R3, R8 and R11 will not end on 15 stitches. Stick to a one-stitch bobble. - Skipping a stitch after the bobble: some bobble tutorials tell you to skip the next stitch. Do not do that here, or your stitch count will drop.
- Understuffing: stuff firmly before R13 so the bear keeps a round gummy shape. Soft stuffing makes it look flat.
- Losing the bobble positions: the ears, arms and legs need to stack roughly on top of each other. If your spiral drifts, nudge the start of the round with a slip stitch (not counted) before the next bobble round so the features line up.
- Closing without a tight finish: after R13 you have 5 stitches. Weave the tail through the front loops, pull tight and hide the end inside so the bottom does not stay open.
FAQ
What does bo mean in this pattern?
The PDF never lists bo in the abbreviations. It is interpreted here as a bobble stitch that counts as one stitch. That reading matches the stitch totals on R3, R8 and R11 and creates the ears, arms and legs you see in the photo.
Do I need safety eyes?
No. The sample bears are blank-faced like real gummy candy. Embroider tiny eyes with black yarn only if you want a cuter face. For a child under 3, embroider rather than using plastic eyes.
When do I stuff the bear?
Stuff after R12, when you have 10 stitches left, then work R13 and close. It is hard to push stuffing through the final 5-stitch opening.
Can I make a whole set of colors?
Yes. The pattern is the same for every color. Make one in each candy shade and keep them in a jar or use them as party favors and keychains.
Pattern
Work in continuous rounds (a spiral). The number in brackets is the stitch count at the end of the round. US terms.
Body (one piece)
R1: 6 sc in a magic ring [6]
R2: (inc) repeat 6 times [12]
R3: 3 sc, bo, 3 inc, bo, 4 sc [15]
Tip: the two bobbles on this round become the ears.
R4–5: 15 sc [15] (2 rounds)
R6: (sc, dec) repeat 5 times [10]
R7: (sc, inc) repeat 5 times [15]
R8: 5 sc, bo, 3 sc, bo, 5 sc [15]
Tip: these bobbles are the arms. Try to keep them under the ears.
R9–10: 15 sc [15] (2 rounds)
R11: 6 sc, bo, 3 sc, bo, 4 sc [15]
Tip: these bobbles are the legs.
R12: (sc, dec) repeat 5 times [10]
Stuff the bear firmly.
R13: (dec) repeat 5 times [5]
Fasten off, leaving a yarn tail. Thread the tail through the front loops of the remaining 5 stitches, pull tight to close the hole, weave the end inside the bear and trim.
Finishing
- Check that the ears, arms and legs sit in a straight column down the front.
- Shape the head and belly with your fingers so the bear looks round and gummy.
- Optional: embroider two tiny eyes between the ears with black yarn.
- Make more bears in other candy colors for a full set.
Optional & Creative Ideas
- Candy jar set: crochet red, green, yellow, orange, white and pink bears and keep them in a clear jar.
- Keychain: sew a jump ring through the top of the head and add a keychain clasp.
- Face details: embroider eyes and a tiny smile, or leave the face blank like a real gummy.
- Chenille version: use plush yarn and a larger hook for a squishy desk buddy.
- Baby mobile: make several in pastel colors and hang them from a wooden ring (embroider eyes; no plastic parts).
Final Thoughts
This no-sew gummy bear is a fast, satisfying make once you are happy with the bobble. Stuff it firmly, line up the bobbles, and you will have a palm-sized candy friend in under an hour.
Patterns and instructions on OpenCrochet are for personal use. Please do not redistribute copies of this content; share the page link instead.


