

Red Crested Rooster Crochet Pattern: Easy Amigurumi Chicken
Crochet a chubby white rooster with a red comb, picot collar and yellow feet. One-piece head and body
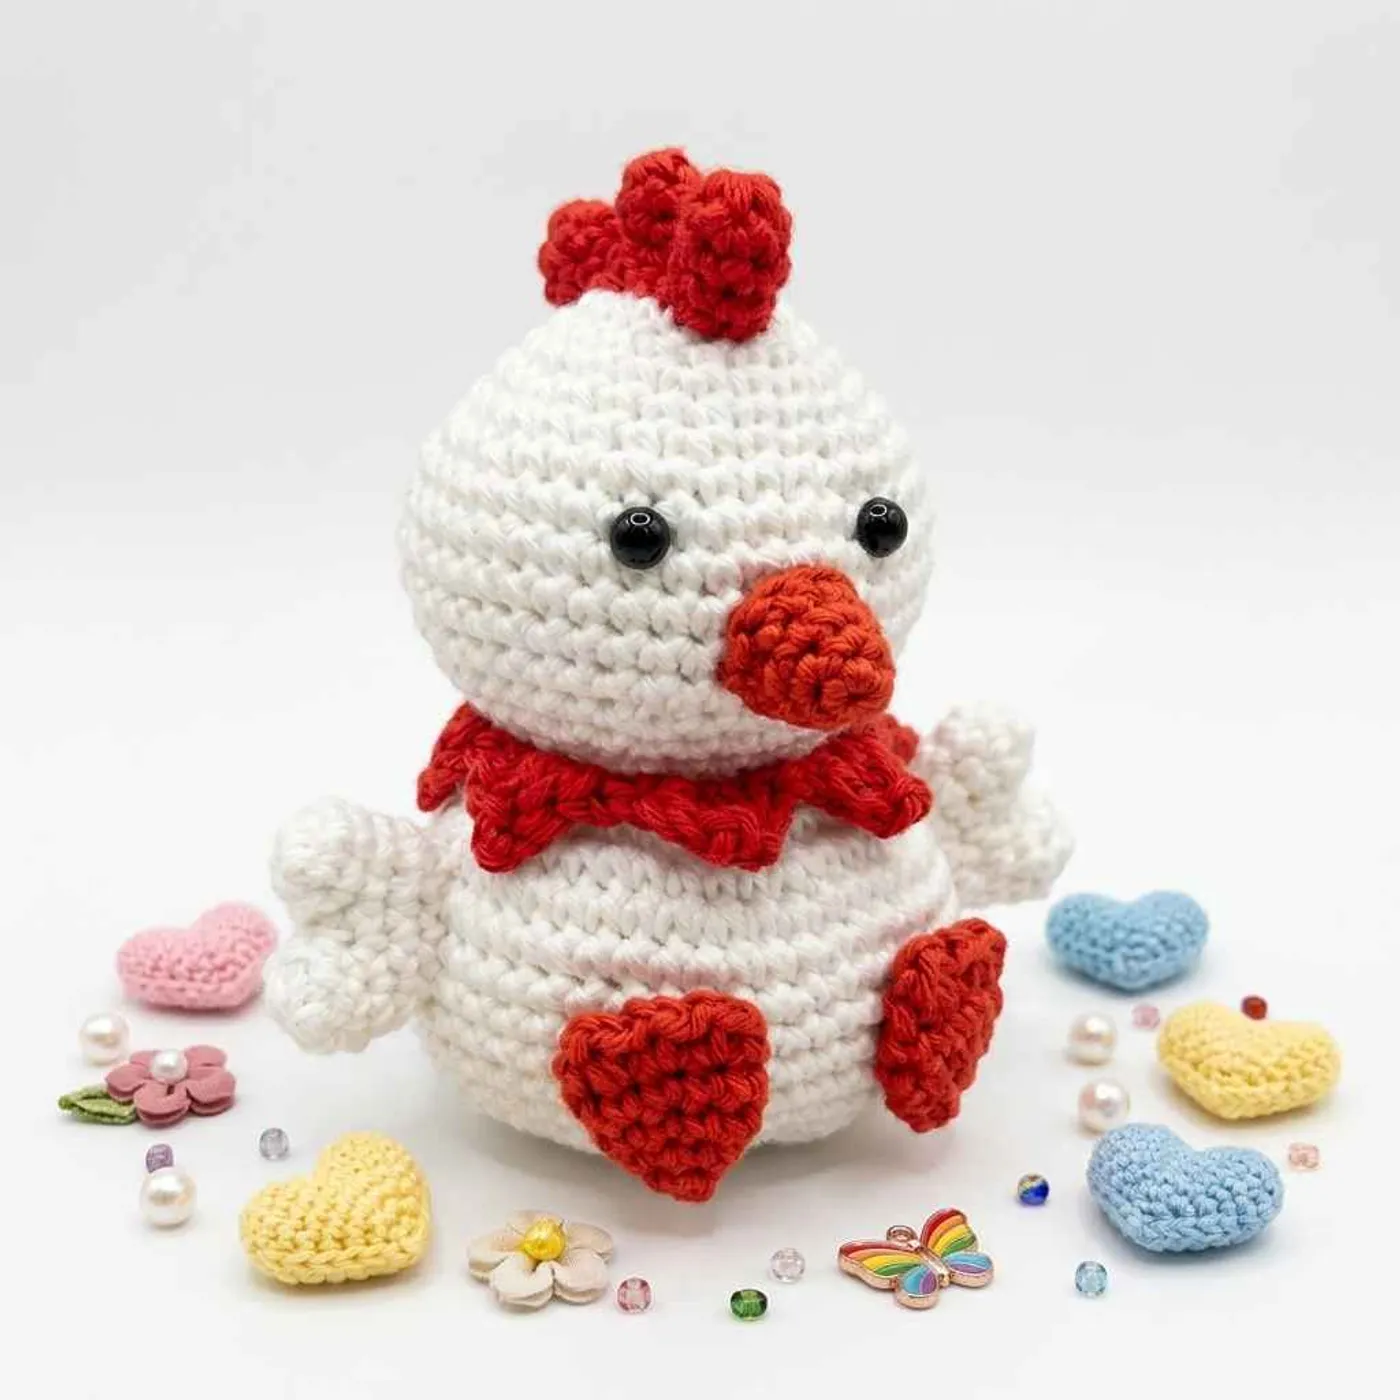
This red crested rooster crochet pattern makes a chubby little white rooster with a bright red comb, a ruffled red collar, a yellow beak and two flat yellow feet. The head and body are worked in one piece, so there is very little sewing.
The designer used Ricorumi cotton in white, yellow and red with a 3 mm hook and 6 mm safety eyes. The result is a round, sitting rooster that fits in your palm and stands on its own wide base.
What makes this rooster different from a basic bird amigurumi is the shaping and the trims. A back-loop round flattens the base so he sits upright, the collar is a chain with tiny pointed picot spikes, and the comb and wings are made by joining small tubes together.
It is a good project for an advanced beginner who knows the magic ring, increases and decreases and wants a quick farm animal, Easter decoration or Chinese New Year rooster gift.
Tip: Mark the first stitch of every round. Head and body are one long piece of 32 rounds, and a stitch marker makes the counts much easier to check.
Finished size
The PDF does not give a finished height. With DK-weight cotton and a 3 mm hook, the 48-stitch body and 42-stitch head make a rooster roughly 4–4.5 in (10–11 cm) tall to the top of the comb. Treat this as an estimate; your tension will change it.
For a bigger rooster, use worsted weight yarn and a 3.5–4 mm hook. Keep the fabric tight so the stuffing does not show.
Yarn substitution
The designer used Ricorumi cotton (a DK-weight cotton) in white, yellow and red.
- Any DK or light worsted cotton works with a 3 mm hook. Cotton gives the crisp stitch definition you see on the collar spikes and comb.
- Acrylic is fine too and is softer for a toy. Go down a hook size if the fabric looks loose.
- Hen version: Keep the same colors but make the comb smaller (two tubes instead of three) for a hen to match your rooster.
Common mistakes
- Forgetting the eyes. Insert the safety eyes between Rnds 9 and 10, about 5 stitches apart, before the head closes at Rnd 17.
- Not stuffing the head first. Stuff the head firmly at Rnd 17, while the neck is only 18 stitches. It is hard to fill the head well once the body is worked.
- Skipping the BLO round. Rnd 30 is worked in back loops only. This makes the flat base that lets the rooster sit up. Stuff the body before the last rounds.
- A twisted collar chain. Keep the chain of 32 flat as you work the spikes, or the collar will curl when you wrap it around the neck.
- Miscounting the joined tubes. The wings end with 12 stitches on Rnd 3, and the comb joins three tubes. Count the stitches after each join.
FAQ
Is this rooster safe for a baby?
Safety eyes can be a choking risk for children under 3. For a baby, embroider the eyes with black yarn and sew the beak, comb, wings and feet on very securely.
Where do I sew the feet?
The photo shows the feet sewn flat to the front of the base, pointing forward, so the rooster looks like he is sitting. Place them on the lower body rounds, a few stitches apart.
How do I make the collar spikes?
Each spike is (hdc, dc, ch 2, sl st in the 2nd ch from the hook, dc, hdc) in one stitch. The ch 2 with the slip stitch makes a small picot point at the tip.
Can I make the rooster without the collar?
Yes. The collar hides the join between head and body, but the body is already one piece, so you can leave it off or replace it with a small bow.
Pattern notes
- The rooster is made in these pieces: Head & Body (one piece), Beak, Collar, 2 Feet, 2 Wings and the Comb.
- Work in continuous spiral rounds unless the pattern says otherwise.
- Numbers in [ ] are the stitch counts at the end of the round. "( )x6" means repeat to the end of the round.
- A few small typos in the PDF are fixed here (collar "hde, de" means hdc, dc).
Head & Body
With white, make a magic ring.
- Rnd 1: 6
scin MR. [6] - Rnd 2:
incin each st around. [12] - Rnd 3: (
sc,inc) 6 times. [18] - Rnd 4:
scin each st around. [18] - Rnd 5: (2
sc,inc) 6 times. [24] - Rnd 6:
scin each st around. [24] - Rnd 7: (3
sc,inc) 6 times. [30] - Rnd 8: (2
sc,inc, 2sc) 6 times. [36] - Rnd 9: (5
sc,inc) 6 times. [42] - Rnds 10–13 (4 rnds):
scin each st around. [42] - Rnd 14: (5
sc,dec) 6 times. [36] - Rnd 15: (4
sc,dec) 6 times. [30] - Rnd 16: (3
sc,dec) 6 times. [24]
Insert the safety eyes between Rnds 9 and 10, about 5 stitches apart.
- Rnd 17: (2
sc,dec) 6 times. [18]
Stuff the head firmly.
- Rnd 18: (
sc,inc,sc) 6 times. [24] - Rnd 19: (
sc,inc) 12 times. [36] - Rnd 20: (5
sc,inc) 6 times. [42] - Rnd 21: (3
sc,inc, 3sc) 6 times. [48] - Rnds 22–29 (8 rnds):
scin each st around. [48]
Stuff the body firmly.
- Rnd 30: working in BLO,
decaround. [24] - Rnd 31:
decaround. [12] - Rnd 32:
decaround. [6]
Add the last bit of stuffing, fasten off and close the hole with the yarn tail.
Tip: The BLO round makes a neat edge around the base. Press the bottom flat with your hand so the rooster sits steadily.
Beak
With yellow, make a magic ring.
- Rnd 1: 4
scin MR. [4] - Rnd 2: (
sc,inc) 2 times. [6] - Rnd 3: (
sc,inc) 3 times. [9] - Rnd 4:
scin each st around, 1sl st. [9]
Fasten off, leaving a tail for sewing. Sew the beak between the eyes, slightly below them.
Collar
With red, ch 32.
Work along the chain: [sc, sl st, sc, then in the next stitch work (hdc, dc, ch 2, sl st in the 2nd ch from hook, dc, hdc)]. Repeat to the end of the chain.
Fasten off and wrap the collar around the neck (Rnds 17–18). Sew it in place.
Feet (make 2)
With yellow, make a magic ring.
- Rnd 1: 4
scin MR. [4] - Rnd 2: (
sc,inc) 2 times. [6] - Rnd 3: (
sc,inc) 3 times. [9] - Rnds 4–5 (2 rnds):
scin each st around. [9]
Flatten the foot and work through both layers:
- Rnd 6: (
sc, ch 2,scin the same st) 3 times, 1sl st.
Fasten off, leaving a tail. Sew the feet flat to the front of the base.
Wings (make 2)
With white, make 2 small parts for each wing.
- Rnd 1: 6
scin MR. [6] - Rnd 2:
scin each st around. [6]
Fasten off the first part. Do not cut the yarn on the second part.
- Rnd 3: on the second part, 3
sc; join to the first part with 1sc, 5scaround the first part, then 3scon the other side of the second part. [12] - Rnd 4:
scin each st around. [12] - Rnd 5: (4
sc,dec) 2 times. [10]
Fasten off, leaving a tail for sewing. Sew one wing to each side of the body, just below the collar. The two little tubes make the wing tips.
Comb
With red, make 3 small parts.
- Rnd 1: 6
scin MR. [6] - Rnds 2–3 (2 rnds):
scin each st around. [6]
Fasten off the first and second parts. Do not cut the yarn on the third part.
Join the parts: after Rnd 3 of the third part, join to the second part with 1 sc and work 2 more sc. Join to the first part with 1 sc and work 5 sc around it. Then work 3 sc on the other side of the second part and 3 sc on the other side of the third part.
Fasten off, leaving a tail, and sew the comb to the top of the head.
Assembly
- Sew the beak between and slightly below the eyes.
- Wrap the collar around the neck and sew it in place.
- Sew the wings to the sides of the body under the collar.
- Sew the feet flat to the front of the base.
- Sew the comb on top of the head and weave in all ends.
Optional & Creative Ideas
- Make a hen: Use a smaller two-tube comb and leave off the collar spikes for a matching hen.
- Rosy cheeks: Add a few pink stitches or a touch of blush under the eyes.
- Easter basket: Make a few little chicks in yellow with the same body and add them to a basket with your rooster.
- Keychain or ornament: Sew a loop of yarn to the top of the comb so the rooster can hang.
- Child-friendly version: Embroider the eyes with black yarn instead of safety eyes.
Final Thoughts
This rooster works up quickly because the head and body are one piece. The picot collar and the joined comb take a little attention, but they give him his proud farmyard look.
Patterns and instructions on OpenCrochet are for personal use. Please do not redistribute copies of this content; share the page link instead.


