

Lucky Cat Crochet Pattern (Maneki-Neko with Gold Coin)
Crochet a white maneki-neko lucky cat with a waving paw, teal bib, bell and gold coin. One-piece head and body in sc, US terms, beginner friendly.
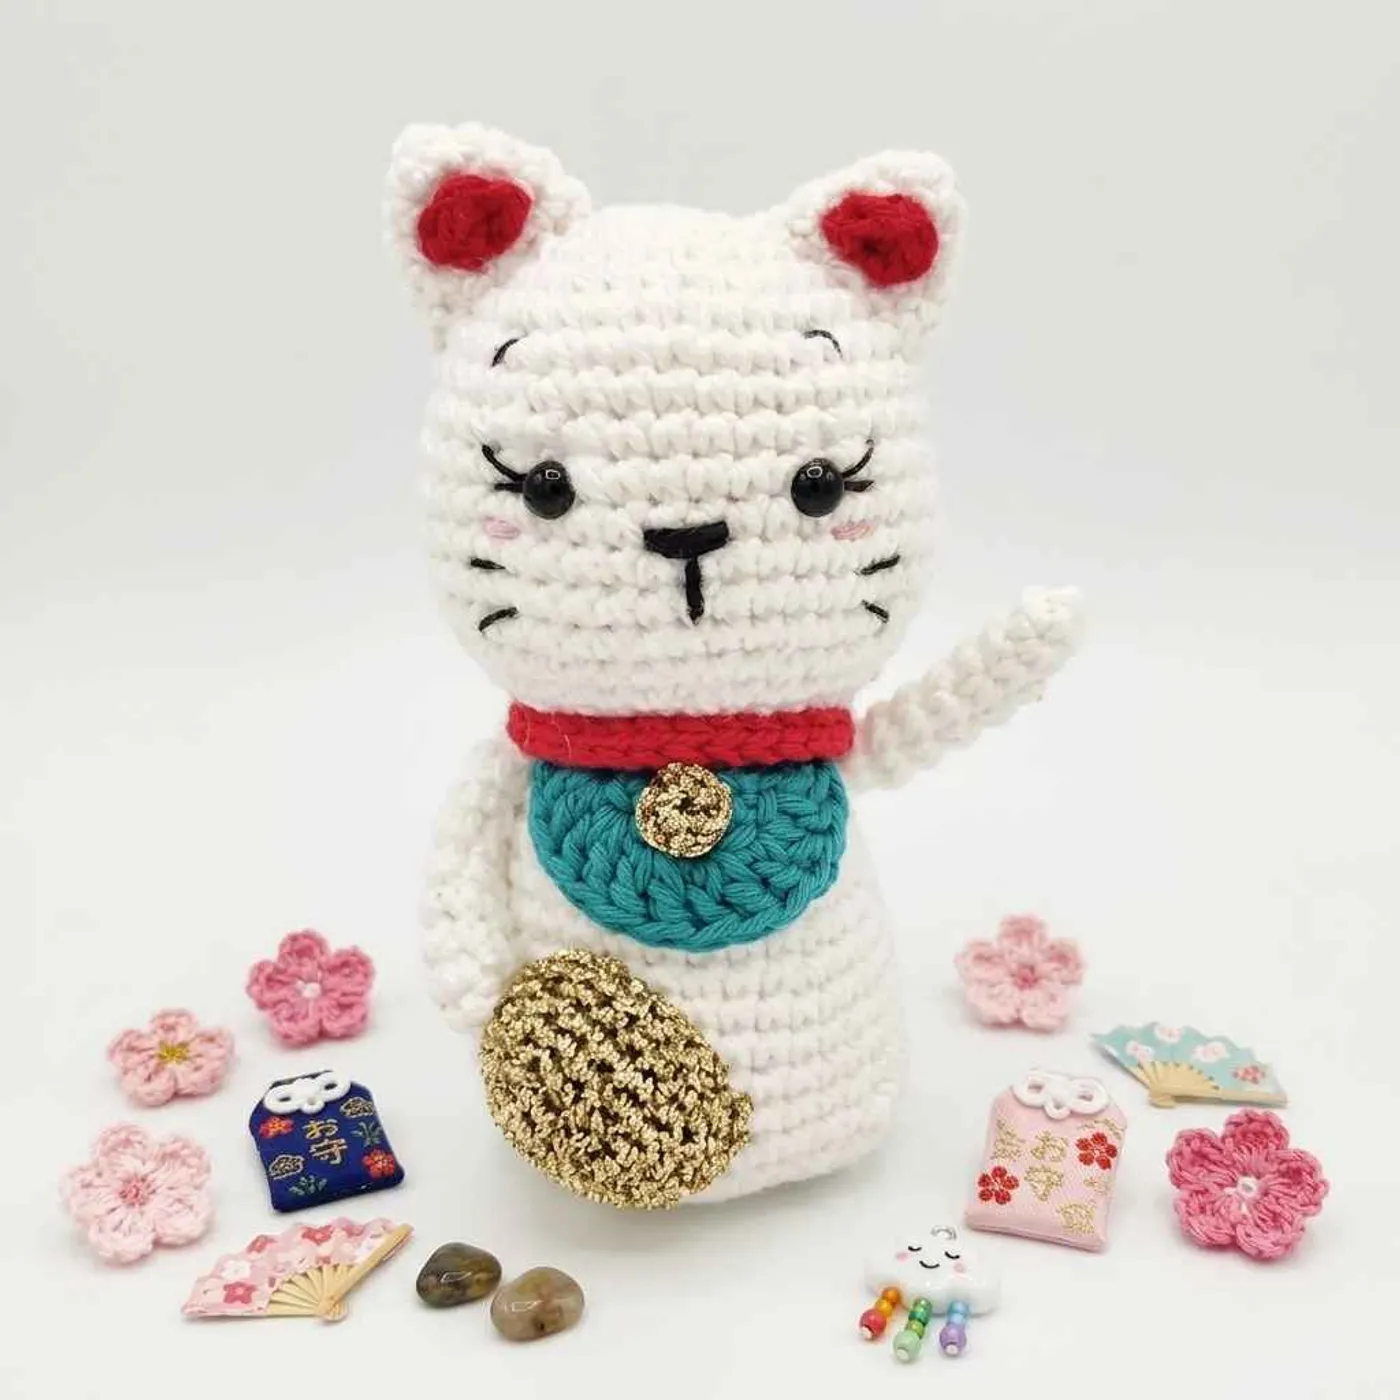
This lucky cat crochet pattern makes a small white maneki-neko, the classic Japanese "beckoning cat" that is said to bring good fortune.
It has red inner ears, a red collar with a little gold bell, a teal bib, one paw raised in a wave and a shiny gold koban coin held against its tummy.
The head and body are crocheted in one continuous piece of single crochet, so there is no neck seam to sew. The arms, ears, bib, collar, bell and coin are small add-ons, which makes this a relaxed beginner-friendly project that looks great on a desk or shelf.
The designer uses cotton yarn with a 3 mm hook and 6 mm safety eyes. Gold metallic yarn for the coin and bell is what gives this cat its festive, good-luck look, so it is a lovely make for Lunar New Year, a housewarming or a new job.
Tip: Stuff the head and body as you go. The neck narrows to 18 stitches at Rnd 18, so fill the head firmly before you reach it.
Finished size
The PDF does not give measurements. Worked in cotton yarn with a 3 mm hook, as in the sample, the cat stands roughly 11–13 cm (4.5–5 in) tall including the ears. That is an estimate from the round count and the photo, not the designer's figure.
Yarn substitution
The pattern calls for Ricorumi cotton, a fine DK-weight 100% cotton. Any light DK or sport-weight cotton or cotton blend works with a 2.5–3 mm hook.
- White for the head, body, arms and outer ears.
- Red for the inner ears and collar.
- Teal or green for the bib.
- Gold metallic yarn or thread for the bell and koban coin. If you can't find metallic yarn, use mustard or yellow cotton.
- Pink and black embroidery thread for the cheeks and face details.
Choose a smooth yarn for the white parts so the embroidered eyelashes and whiskers stay crisp.
Common mistakes
- Rushing the neck. The head decreases down to 18 stitches and then the body grows again from Rnd 19. Stuff the head firmly before Rnd 18 or the head will wobble.
- Forgetting the back loop round. Rnd 32 is worked through the back loops only. This creates the flat base, so the cat can stand upright.
- Placing the eyes too low. Insert the 6 mm eyes between Rnd 10 and Rnd 11, the widest part of the head, about 5–6 stitches apart.
- Mixing up the arms. For the classic beckoning pose, the left arm is sewn raised and the right arm is sewn lowered, with its hand resting on the coin.
- Leaving the coin too soft. Add a small amount of stuffing to the koban before you sew it closed, so it stays plump and oval.
FAQ
Do I need to stuff the arms?
The arms are only 6 stitches wide, so the pattern does not ask for stuffing. You can push in a tiny pinch with the end of your hook if you want them firmer.
Is this cat safe for a baby or toddler?
Safety eyes and a sewn-on bell can be a choking risk for children under 3. For a baby gift, embroider the eyes with black yarn and crochet the bell flat and sew it down securely.
What is the gold coin it is holding?
It is a koban, an old oval Japanese gold coin. Maneki-neko figures traditionally hold one as a symbol of wealth and good luck.
How do I make the cat stand up?
The back loop round at Rnd 32 gives the body a flat bottom. Stuff the base firmly and evenly, and press it flat on a table before closing the last rounds.
Pattern
All parts are worked in continuous rounds unless stated otherwise. Use a stitch marker to mark the first stitch of each round.
Head and body
Worked in white, in one piece. Stuff as you go.
- Rnd 1: mr, 6
sc[6] - Rnd 2: (
inc) x 6 [12] - Rnd 3: (1
sc,inc) x 6 [18] - Rnd 4: (2
sc,inc) x 6 [24] - Rnd 5: (3
sc,inc) x 6 [30] - Rnd 6: (4
sc,inc) x 6 [36] - Rnd 7–9: 36
sc[36] - Rnd 10: (5
sc,inc) x 6 [42] - Rnd 11–14: 42
sc[42]
Insert the safety eyes between Rnd 10 and Rnd 11.
- Rnd 15: (5
sc,dec) x 6 [36] - Rnd 16: (4
sc,dec) x 6 [30] - Rnd 17: (3
sc,dec) x 6 [24] - Rnd 18: (2
sc,dec) x 6 [18]
Stuff the head firmly. Now the body begins.
- Rnd 19: (2
sc,inc) x 6 [24] - Rnd 20: 24
sc[24] - Rnd 21: (3
sc,inc) x 6 [30] - Rnd 22–24: 30
sc[30] - Rnd 25: (4
sc,inc) x 6 [36] - Rnd 26–29: 36
sc[36] - Rnd 30: (5
sc,inc) x 6 [42] - Rnd 31: 42
sc[42] - Rnd 32: working in back loops only, (5
sc,dec) x 6 [36]
Finish stuffing the body, keeping the base flat.
- Rnd 33: (2
sc,dec) x 9 [27] - Rnd 34: (1
sc,dec) x 9 [18] - Rnd 35: (
dec) x 9 [9] - Rnd 36: (1
sc,dec) x 3 [6]
Fasten off and close the hole. Embroider pink cheeks under the eyes, then use black thread to embroider the nose, eyelashes, eyebrows and whiskers.
Tip: The PDF lists Rnd 26–29 as "26 sc [36]". The stitch count only works with 36 sc, so work 36 single crochet in each of those rounds.Arms (make 2)
Worked in white.
- Rnd 1: mr, 4
sc[4] - Rnd 2: (1
sc,inc) x 2 [6] - Rnd 3–8: 6
sc[6]
Fasten off, leaving a tail for sewing.
Ears (make 2)
Inner ear (make 2), in red: ch 2, then work (1 sc, 1 hdc, 1 sc) in the 2nd chain from the hook. Fasten off, leaving a tail.
Outer ear (make 2), in white:
- Rnd 1: mr, 4
sc[4] - Rnd 2: (1
sc,inc) x 2 [6] - Rnd 3: (2
sc,inc) x 2 [8] - Rnd 4: (3
sc,inc) x 2 [10] - Rnd 5: (4
sc,inc) x 2 [12]
Do not stuff. Flatten each outer ear, then sew or glue a red inner ear onto the front. Sew the ears to the top of the head, across Rnd 3 to Rnd 7.
Bib
Worked in green or teal.
- Rnd 1: mr, ch 3, 6
dcinto the ring [6] - Rnd 2: ch 3, (
hdcinc) x 6 [12]
Sl st into the top of the starting chain and fasten off.
Necklace (collar)
Worked in red: ch 30, then sl st in each chain starting from the 2nd chain from the hook [29]. Fasten off, leaving a tail.
Bell
Worked in gold: mr, 6 sc, sl st to join [6]. Fasten off.
Koban (gold coin)
Worked in gold, in rounds around a starting chain to make an oval.
- Rnd 1: ch 5,
scin the 2nd chain from the hook, 2sc, 3scin the last chain; continuing on the other side of the chain, 2sc,inc[10] - Rnd 2:
inc, 2sc,inc, 1sc,inc, 3sc,inc[14] - Rnd 3: 2
sc,inc, 3sc,inc, 2sc,inc, 3sc,inc[18] - Rnd 4: 3
sc,inc, 4sc,inc, 3sc,inc, 4sc,inc[22], sl st to join - Rnd 5: working in back loops only, sl st in each stitch [22]
Lightly stuff the coin and sew it closed against the body.
Tip: The PDF writes Rnd 4 of the coin with "2 sc" in the third repeat, which only adds up to 21 stitches. Using 3 sc there, as above, gives the stated 22.Assembly
- Wrap the red necklace around the neck at Rnd 18–19 and sew it in place.
- Sew the bib just under the necklace at the front, then sew the gold bell to the center top of the bib.
- Sew the left arm raised beside the head in a waving pose.
- Sew the right arm lowered along the body, then sew the koban under the hand so the cat looks like it is holding the coin.
Your lucky cat is finished, ready to bring a little good fortune to your desk.
Optional & Creative Ideas
- Customize colors: Make a black lucky cat for protection or a pink one for love, keeping the gold coin and bell.
- Add calico spots: Sew small orange and black ovals to the head and back for a traditional calico maneki-neko.
- Write on the coin: Embroider a few lines or a simple symbol on the koban with brown thread.
- Keychain version: Work it in fingering-weight yarn with a 2 mm hook and add a keyring between the ears.
Final Thoughts
This lucky cat is a quick, cheerful make with a one-piece head and body and a handful of tiny details. The gold coin and bell make it a thoughtful good-luck gift for a new home, a new job or the new year.
Patterns and instructions on OpenCrochet are for personal use. Please do not redistribute copies of this content; share the page link instead.


