Baby Yellow Chick Amigurumi Crochet Pattern
Make a tiny round baby chick amigurumi. Beginner-friendly Easter and spring crochet pattern with a small beak, using simple decreases.
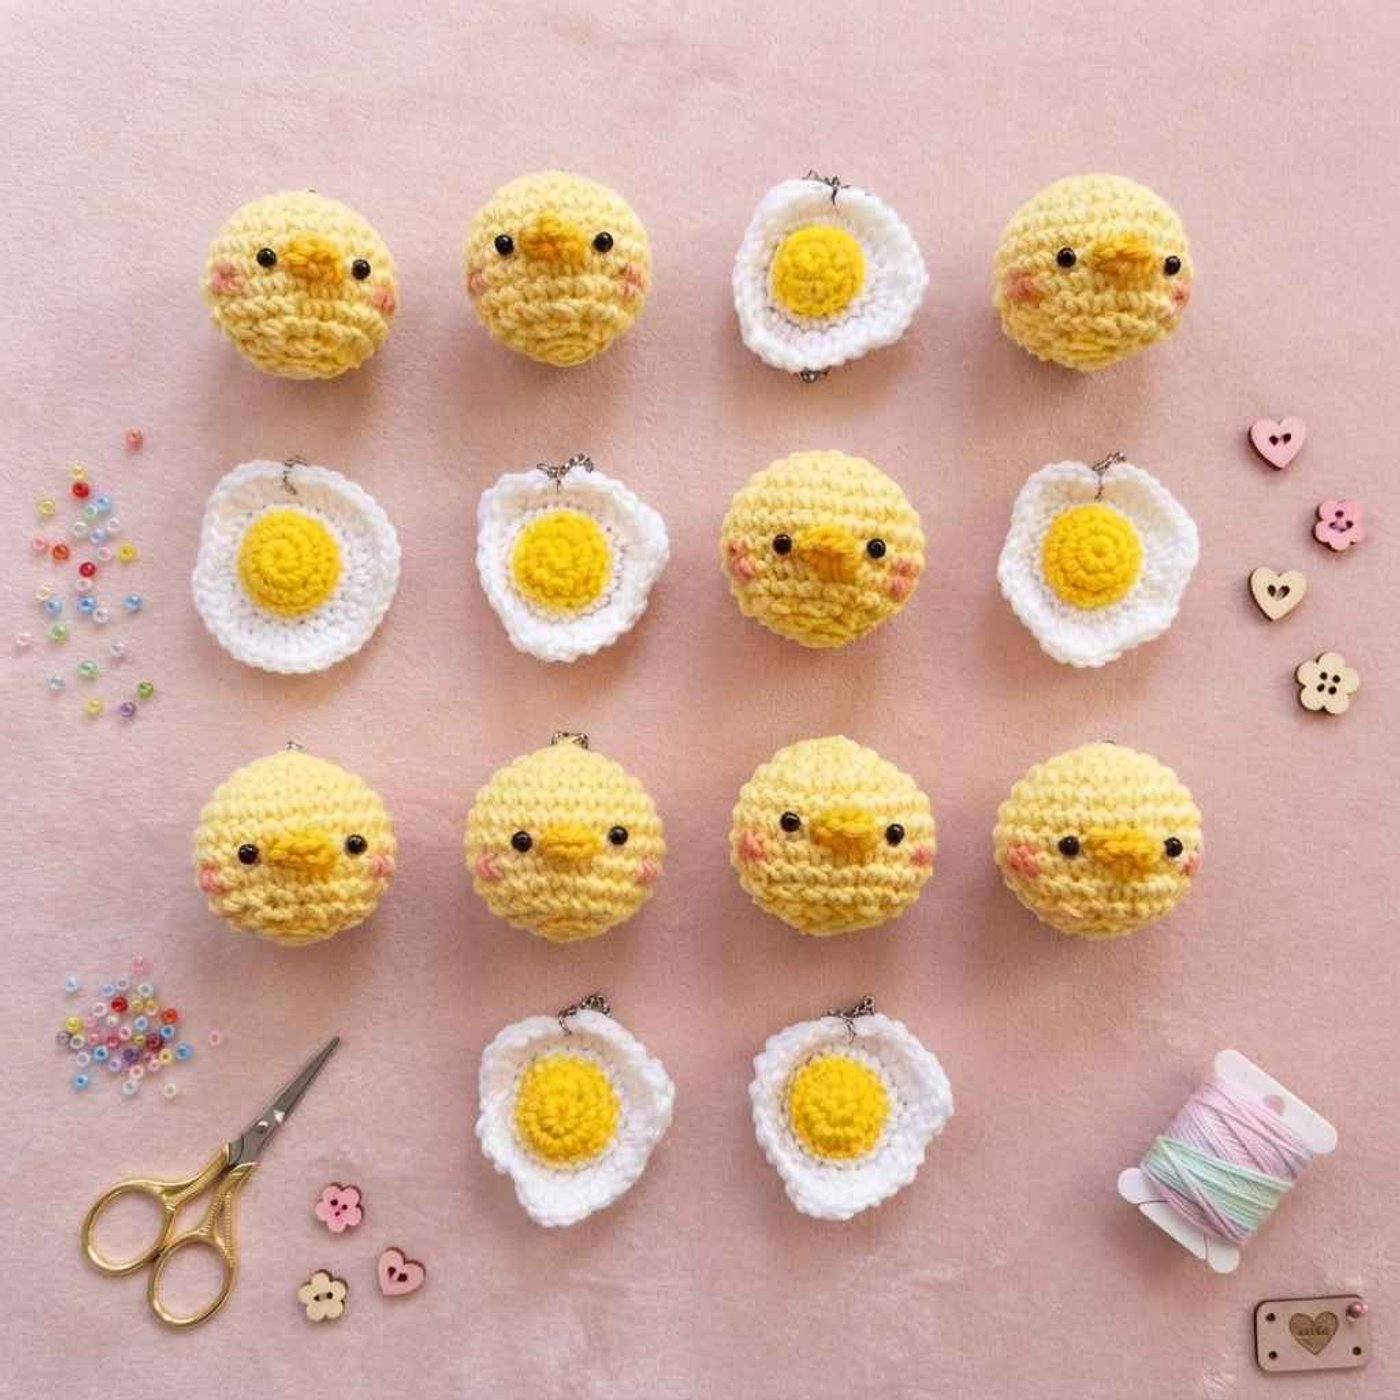
This is a quick, tiny crochet baby chick: a round yellow ball with two small black eyes, a little beak and rosy cheeks. The whole body is only 14 rounds worked from a magic ring up to just 24 stitches, followed by a 2-round beak that you sew on at the end. That makes it a nice first amigurumi for anyone who knows single crochet, increases and invisible decreases, and a good small project for Easter and spring decorations, gift toppers, basket fillers or a whole flock made from yarn leftovers. Unlike a standard duck or chicken pattern, there are no wings, feet or tail here: the charm comes entirely from the plain ball shape, the beak placement and the face details, so tidy stitches and even stuffing matter more than anything else. The original pattern is short and does not list materials, so the notes below fill in what you need to make it comfortably.
Finished size
The original pattern does not give a measurement. The widest round has only 24 stitches, so expect a small ball that grows or shrinks directly with your yarn weight and hook. For a larger chick, use thicker yarn and a bigger hook. For a smaller one, use thinner yarn and a smaller hook. Keep the stitch counts the same either way.
Yarn substitution
- Body: a soft yellow yarn works best. Any weight is fine as long as you use a hook small enough that the stuffing does not show through.
- Beak: orange or a deeper yellow. Use the same weight as the body so the two beak rounds look in proportion.
- Texture: smooth cotton or acrylic gives crisp stitches. Fluffy or chenille yarn gives a plush look but hides the stitches and makes the invisible decreases harder to see.
- Eyes: match the eye size to the yarn weight. Small black eyes or beads suit this tiny face.
Common mistakes
- Round 14 has no stitch count: after Round 13 you have 6 stitches, so Round 14 is also 6 sc, worked in the back loops only.
- Using a normal decrease: the pattern calls for invisible decreases. A regular decrease leaves visible bumps on such a small ball.
- Closing before stuffing: the pattern does not mention stuffing. Stuff the body firmly after Round 12 or Round 13, before you close the hole.
- Skipping the stitch marker: with only 24 stitches at the widest point, losing your place makes the decrease rounds uneven.
- Sewing the beak too high: attach it in the middle of the face, just between and slightly below the eyes, so the chick looks cute and not surprised.
Pattern notes
- Work in continuous rounds and mark the first stitch of every round.
- Stuff the body before you close it. Fasten off with a long tail for sewing.
Body
Round 1: 6 sc in magic ring (6)
Round 2: 2 sc in each sc around (12)
Round 3: (inc, sc in next st) x6 (18)
Round 4: (inc, sc in next 2 st) x6 (24)
Round 5-10: sc in each st around (24)
Round 11: (inv dec, sc in next 2 st) x6 (18)
Round 12: (inv dec, sc in next st) x6 (12)
Tip: if you are using safety eyes, insert them before the opening gets too small to reach inside.
Round 13: inv dec x6 (6)
Round 14: sc in each st around, back loops only (6)
Stuff the body, fasten off and leave a long tail for sewing.
Mouth (beak)
Round 1: 3 sc in magic ring (3)
Round 2: 2 sc in each sc around (6)
Fasten off and leave a long tail for sewing.
Assembly and face details
- Thread the body tail through the remaining stitches and pull tight to close the hole, then hide the end inside.
- Sew the beak to the middle of the face with the long tail.
- Add the eyes on either side of the beak, slightly above it.
- Add rosy cheeks with pink embroidery thread or a touch of blush.
- Weave in all ends.
FAQ
Do I need to stuff the chick?
Yes. The pattern does not say so, but the ball needs firm stuffing to keep its round shape. Stuff after Round 12 and add a little more before you close the final 6 stitches.
Why is Round 14 worked in the back loops only?
Working the last round in the back loops leaves a clean ring of front loops that pulls closed neatly, so the hole disappears on top of the ball.
Are the egg keychains in the photo included?
No. The photo shows fried-egg keychains next to the chicks, but this pattern only contains the chick body and beak.
Is this safe for small children?
Small eyes and beads can come loose. For a child under 3, embroider the eyes and cheeks instead of using safety eyes or beads.
How do I make a bigger chick?
Keep the stitch counts and use thicker yarn with a larger hook. Scale the eyes up as well.
Optional & Creative Ideas
- Customize colors: make pastel chicks in pink, mint or lilac, or a whole flock in different shades of yellow.
- Easter basket filler: stuff a few chicks into a basket or hide them for an egg hunt.
- Keychain or ornament: sew a loop of yarn or a small chain to the top of the chick to hang it on a bag or a tree.
- Safer version: embroider the eyes and cheeks so it is suitable as a gift for young children.
- Quick gift topper: tie one to a wrapped present instead of a bow.
Final Thoughts
This chick is small and quick to make, so it is easy to turn into a whole batch from yarn scraps while you perfect the round shape and the beak placement.
Patterns and instructions on OpenCrochet are for personal use. Please do not redistribute copies of this content; share the page link instead.