

Crochet Penguin Pattern with Earflap Pompom Hat
Crochet a sitting penguin with black-and-white colorwork, yellow beak and feet, and a red earflap pompom hat.
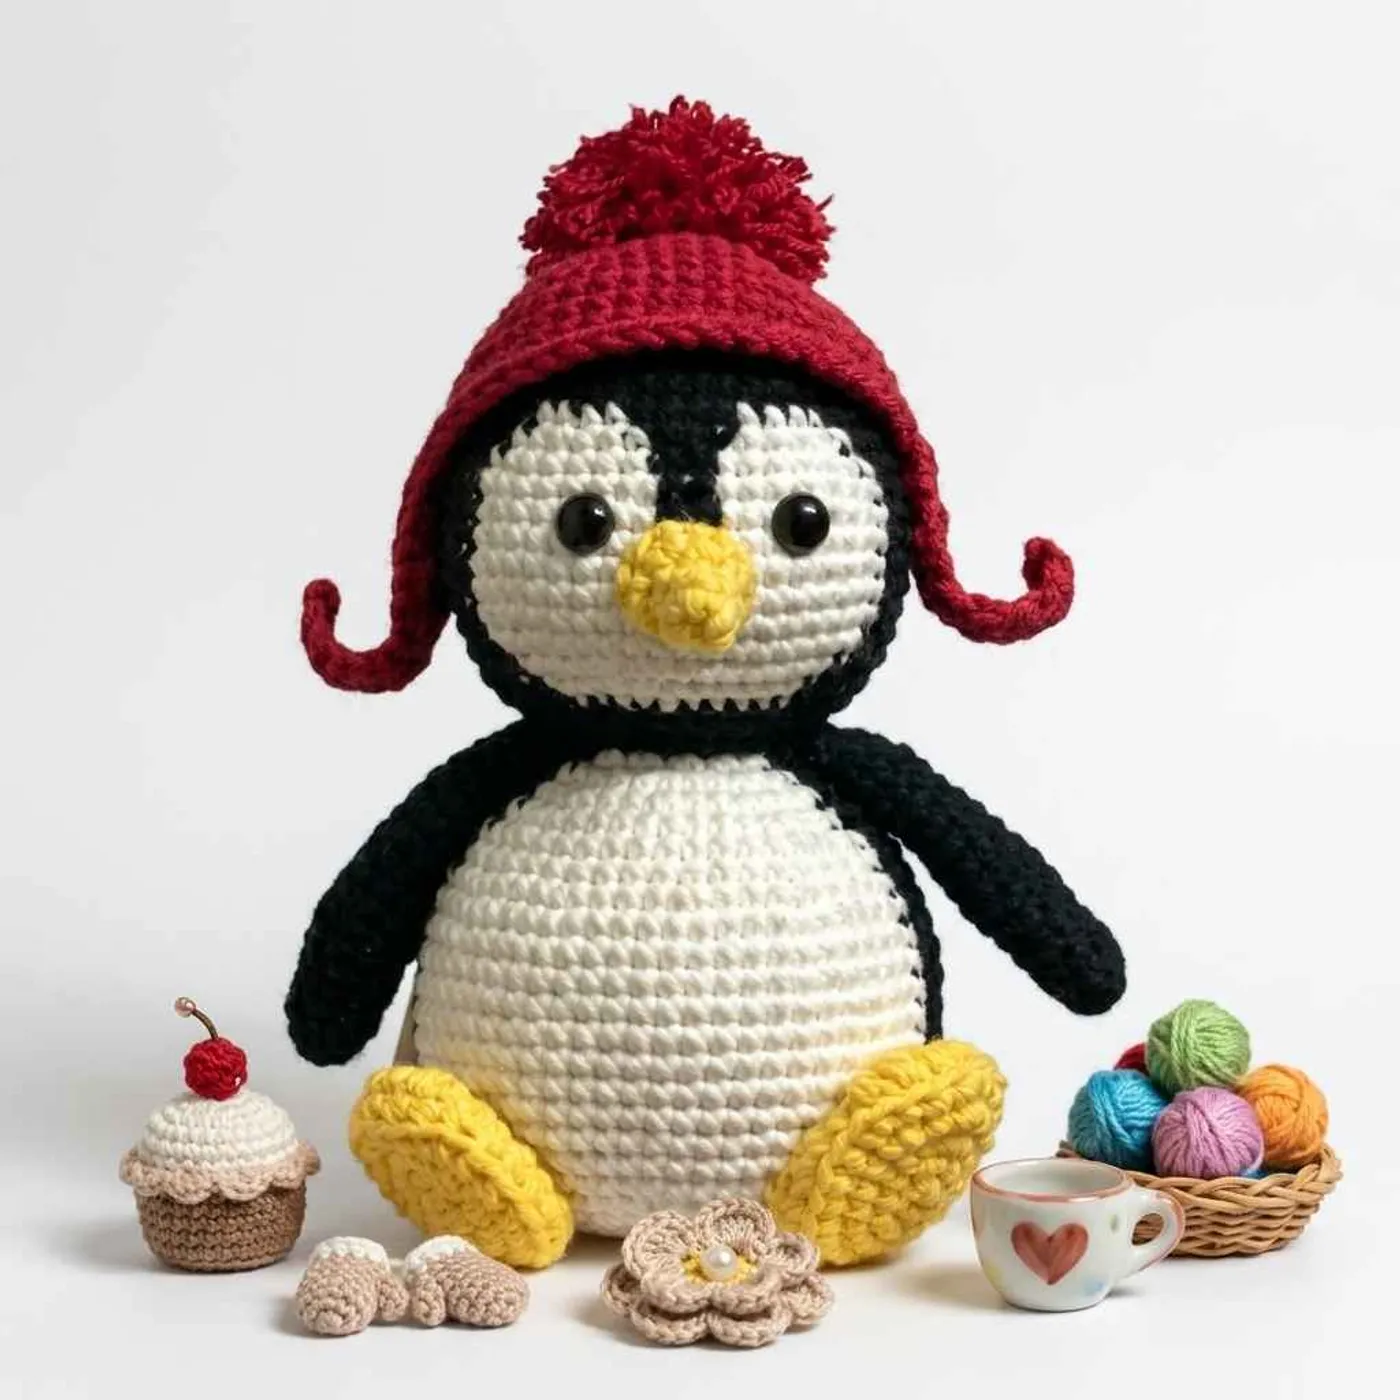
About this crochet penguin pattern
This is a seated amigurumi penguin with a black head and back, a white belly and face patch, a small yellow beak and feet, and a red earflap hat finished with a pompom. It is a winter make that works well as a gift or a seasonal shelf decoration.
What sets it apart from a plain penguin is the colorwork. The head and body are crocheted in one piece, and you swap between black and white yarn inside the same round to shape the face patch, the belly and the dark edge down the sides.
That is why the pattern is rated advanced: the stitch count of each color section matters.
The extras are made separately: two wings, two feet with bobble toes, a small beak, and a hat with two shaped straps. The hat is its own piece, so you can put it on the penguin or leave it off.
You need four yarn colors (black, white, yellow, red), a 2.5-3 mm hook, safety eyes and fiberfill. Read the notes below before you start, because the colorwork and the leg rounds go better when you know what to expect.
Finished size
The original does not give a finished height. With a 2.5-3 mm hook and a fine yarn you get a small seated plush that fits in one hand.
The size scales with your yarn and hook. A thicker yarn with a bigger hook gives a bigger penguin, and a thinner yarn with a smaller hook gives a smaller one. Keep your tension tight so the stuffing does not show.
Tip: Measure your penguin when it is finished and write down the yarn and hook you used, so you can repeat the size later.
Yarn substitution
Any smooth yarn in a similar weight works. Use the same brand and weight for all four colors, so the pieces match in thickness when you sew them together.
Black yarn hides stitches, so work the head and body in good light. A lighter-weight black also makes counting easier.
If you change the colors, keep strong contrast between the head, the face patch and the belly. The colorwork rounds depend on the contrast to look clear.
Common mistakes
- Loose color changes. Pull the new color through firmly when you switch, and carry the unused yarn loosely on the inside of the work so it does not pucker.
- Losing the color sections. Many rounds have two or three color blocks. Count each block and check the total in parentheses at the end of the round.
- Placing the eyes too late. Fit the safety eyes in the white face patch before you stuff the head, so you can fasten them from the inside.
- Under-stuffing. The body has 62 stitches at its widest. Stuff firmly in stages, and finish stuffing before you close the last round.
- Uneven wings and feet. Pin both wings and both feet in place and check the symmetry before you sew them on.
FAQ
How do I work the color changes in the round?
Switch to the new color on the last pull-through of the stitch before the change, and keep the stitch marker at the start of the round. Carry the unused yarn along the inside, and do not pull it tight.
What is the bobble stitch used for?
The bobble stitch (BO) makes the toes on the yellow feet. Work it as described in the abbreviations: four unfinished double-crochet-style stitches in the same stitch, then pull through all 5 loops.
Is this safe for babies?
The penguin has safety eyes, which are not suitable for babies and very young children. For a baby gift, embroider the eyes instead.
Do I stuff the hat?
No. The hat is a single layer of crochet and is not stuffed. Only the pompom is filled with yarn.
Where do the pieces go?
Place the beak in the center of the white face patch, between and slightly below the eyes. Sew the wings to the sides of the body and the feet to the front, at the bottom of the belly. Finish by putting the hat on the head, with the straps over the sides.
Pattern
Wing (make 2, black yarn)
- Rnd 1:
6 scin MR (6) - Rnd 2:
(sc, inc) * 3(9) - Rnd 3-4:
9 sc(9) - Rnd 5:
(2 sc, inc) * 3(12) - Rnd 6:
(3 sc, inc) * 3(15) - Rnd 7 onward:
15 scper round (15). The original lists Rnd 7-14 here. - Next round:
(3 sc, dec) * 3(12) - Next round:
(2 sc, dec) * 3(9) - Final round: fold the wing in half and crochet
3 scthrough the folded edge. Cut the yarn and leave a long tail to sew the wing to the body.
Make the second wing the same way.
Beak (yellow yarn)
- Rnd 1:
4 scin MR (4) - Rnd 2:
4 sc(4) - Rnd 3:
3 sc, inc(5) - Rnd 4:
4 sc, inc(6) - Rnd 5:
3 sc, 3 inc(9)
Fasten off and leave a long tail to attach the beak to the face.
Feet (make 2, yellow yarn)
- Rnd 1:
6 scin MR (6) - Rnd 2:
6 inc(12) - Rnd 3:
(sc, inc) * 6(18) - Rnd 4:
(2 sc, inc) * 6(24) - Rnd 5:
6 sc, 3 BO, 8 sc
Fasten off and leave a long tail to attach the foot to the body. Make the second foot the same way.
Tip: As printed, Rnd 5 adds up to 17 stitches, fewer than the 24 of Rnd 4, so treat it as a partial round that ends where the sequence ends. The three bobbles form the toes.
Head and body (black and white yarn)
The head and body are worked in one piece. Black is the main color, and the bold color changes below mark the white sections.
Head
- Rnd 1:
6 scin MR (6) - Rnd 2:
6 inc(12) - Rnd 3:
(sc, inc) * 6(18) - Rnd 4:
(2 sc, inc) * 6(24) - Rnd 5:
(3 sc, inc) * 6(30) - Rnd 6:
(4 sc, inc) * 6(36) - Rnd 7:
(5 sc, inc) * 6(42) - Rnd 8:
(6 sc, inc) * 6(48) - Rnd 9:
18 sc, change to white4 sc, change to black4 sc, change to white4 sc,18 sc(48) - Rnd 10:
17 sc, change to white6 sc, change to black2 sc, change to white6 sc,17 sc(48) - Rnd 11:
16 sc, change to white7 sc, change to black2 sc, change to white7 sc,16 sc(48) - Rnd 12:
(7 sc, inc) * 2, change to white7 sc, (2 sc in the same st, 1 st with white yarn, 1 st with black yarn),sc, change to white(6 sc, inc), change to black4 sc, change to white4 sc,18 sc(54) - Rnd 13:
18 sc, change to white8 sc, change to black2 sc, change to white8 sc,18 sc(54) - Rnd 14-17:
18 sc, change to white18 sc, change to black18 sc(54) - Rnd 18:
19 sc, change to white16 sc, change to black19 sc(54) - Rnd 19:
20 sc, change to white14 sc, change to black20 sc(54) - Rnd 20:
(7 sc, dec) * 2,3 sc, change to white(4 sc, dec, 5 sc), change to black2 sc, dec, (7 sc, dec) * 2(48) - Rnd 21:
(6 sc, dec) * 6(42) - Rnd 22:
(sc, dec) * 14(28) - Rnd 23:
(sc, dec) * 9, sc(19) - Rnd 24:
19 sc(19)
Tip: Fit the safety eyes in the white face patch now, one on each side of the black center strip, and stuff the head before you start the body.
Body
- Rnd 25:
8 inc, change to white5 inc, change to black6 inc(38) - Rnd 26:
15 sc, change to white12 sc, change to black11 sc(38) - Rnd 27:
(2 sc, inc) * 4,3 sc, change to white(2 sc, inc) * 4, change to blacksc, inc, (2 sc, inc) * 3(50) - Rnd 28:
18 sc, change to white17 sc, change to black15 sc(50) - Rnd 29-30:
17 sc, change to white19 sc, change to black14 sc(50) - Rnd 31:
(3 sc, inc) * 4, change to white(3 sc, inc) * 5, change to black(3 sc, inc) * 3, 2 sc(62) - Rnd 32-42:
20 sc, change to white25 sc, change to black17 sc(62) - Rnd 43:
(3 sc, dec) * 4, change to white2 sc, dec, (3 sc, dec) * 3, 3 sc, change to black(3 sc, dec) * 3, 2 sc(50) - Rnd 44:
15 sc, change to white11 sc, change to black13 sc(39) - Rnd 45:
(2 sc, dec) * 4, sc, change to whitesc, dec, 2 sc, dec, 2 sc, change to black(2 sc, dec) * 3(30) - Rnd 46:
(sc, dec) * 10(20) - Rnd 47:
(sc, dec) * 6, 2 sc(14)
Stuff firmly. Use the long yarn tail to close the hole, fasten off, secure the yarn and cut the excess.
Hat (red yarn)
- Rnd 1:
6 scin MR (6) - Rnd 2:
6 inc(12) - Rnd 3:
(sc, inc) * 6(18) - Rnd 4:
(2 sc, inc) * 6(24) - Rnd 5:
(3 sc, inc) * 6(30) - Rnd 6:
(4 sc, inc) * 6(36) - Rnd 7:
(5 sc, inc) * 6(42) - Rnd 8:
(6 sc, inc) * 6(48) - Rnd 9:
(7 sc, inc) * 6(54) - Rnd 10-13:
54 sc(54)
First strap
Work these rows back and forth, turning each row.
- Row 1:
6 sc - Row 2:
ch, 5 sc - Row 3:
ch, 4 sc - Row 4:
ch, 3 sc - Row 5:
ch, 2 sc - Row 6-13:
ch, sc - Row 14:
ch, 13 sc
Hat back
- Rnd 14:
20 scin the back loop only (blo)
Second strap
- Row 1:
6 sc - Row 2:
ch, 5 sc - Row 3:
ch, 4 sc - Row 4:
ch, 3 sc - Row 5:
ch, 2 sc - Row 6-13:
ch, sc - Row 14:
ch, 13 sc
Finish the hat
- Rnd 15:
14 scin the back loop only (blo)
Fasten off, secure the yarn and cut the thread. Make a pompom and attach it to the top of the hat.
Assembly
- Check the safety eyes and the stuffing of the head and body.
- Sew the beak to the center of the white face patch.
- Sew the wings to the sides of the body.
- Sew the feet to the front, at the bottom of the white belly.
- Put the hat on the head, with the straps at the sides, and attach the pompom to the top.
Optional & Creative Ideas
- Customize colors: Make the hat and the feet in other colors, or knit a matching set of penguins in different winter colors.
- Make a family: Scale the pattern down with thinner yarn for a baby penguin, or up with thicker yarn for a parent.
- Add a scarf: Crochet a short strip in a contrast color and wrap it around the neck instead of the hat.
- Gift-ready version: Embroider the eyes instead of using safety eyes if the penguin is for a baby.
Final Thoughts
This penguin takes patience because of the colorwork, but the contrast of the black, white and yellow makes the effort worth it. Count each color block as you go, and the finished piece will be neat and charming.
Patterns and instructions on OpenCrochet are for personal use. Please do not redistribute copies of this content; share the page link instead.


