

Baby Yoda Crochet Pattern: Cute Cupcake Amigurumi
Crochet a tiny Baby Yoda that sits in a brown cup with a beige cream rim. Fits in your palm; worked with cotton thread and a 3 mm hook.
About this Baby Yoda crochet pattern
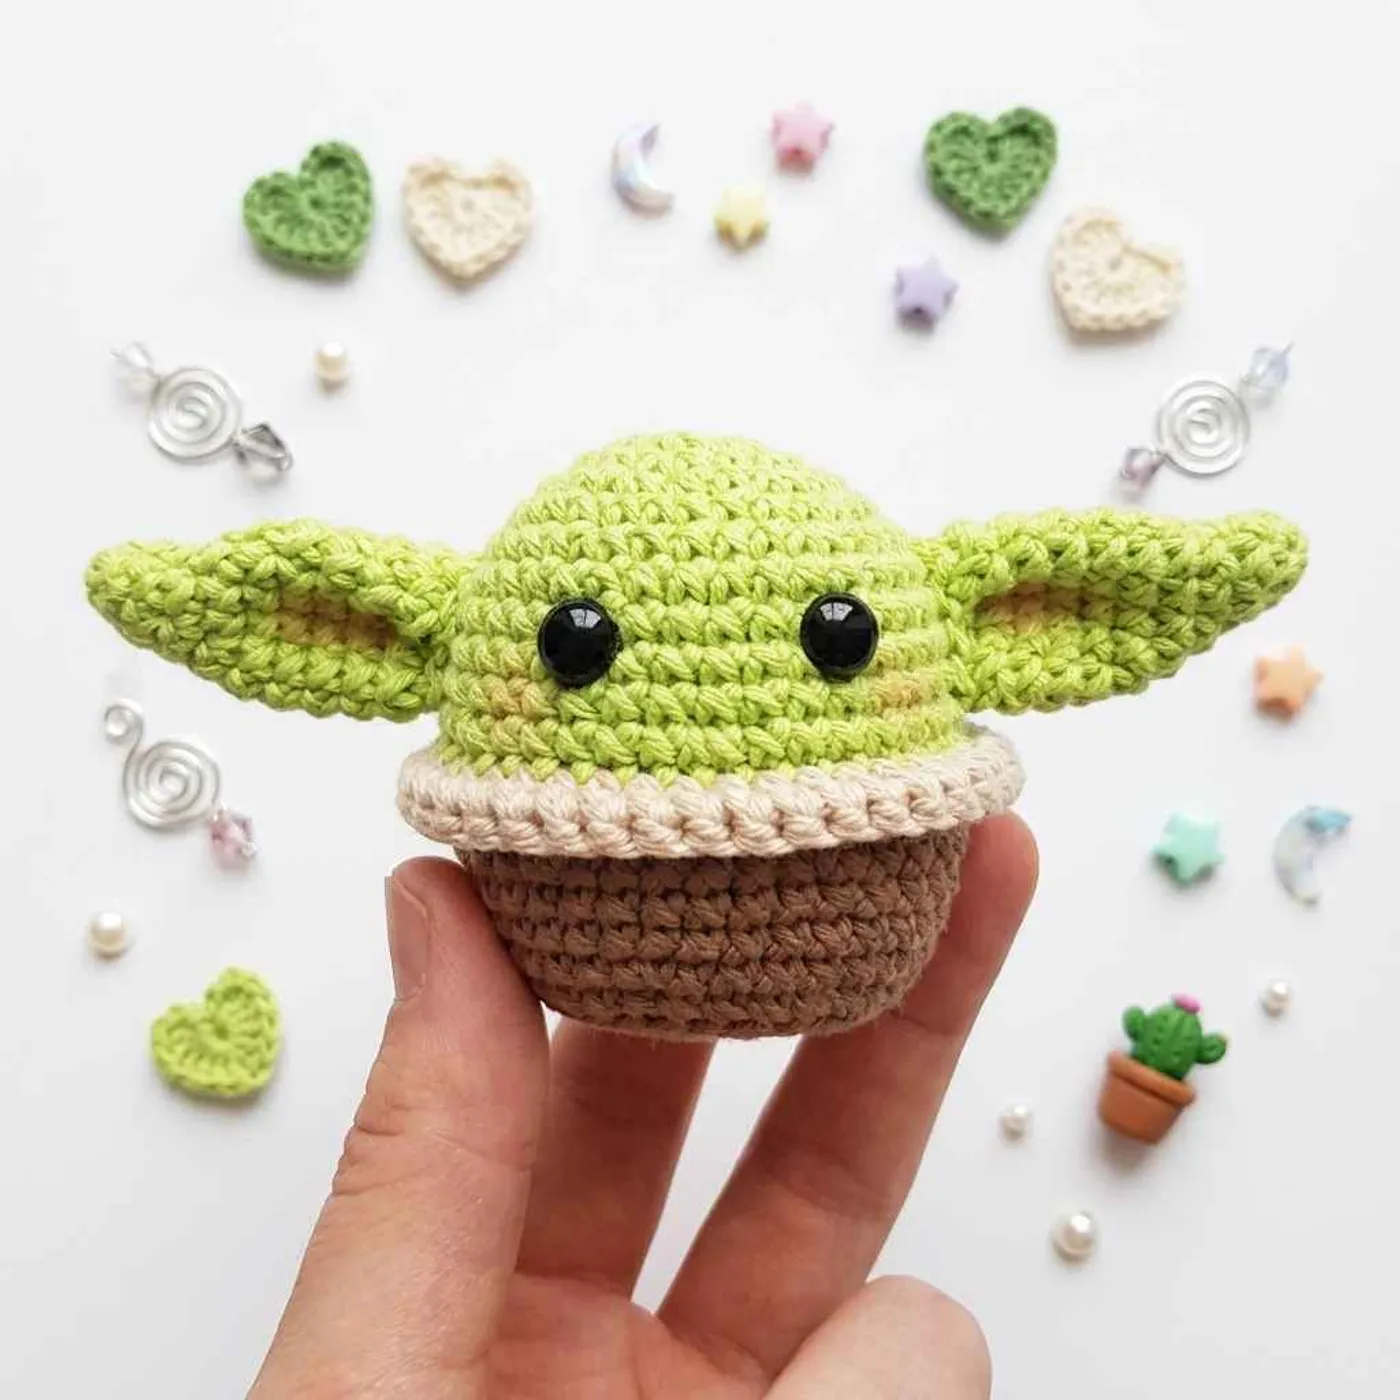
This is a mini Baby Yoda that sits in a little cup, like a cupcake. The green head has pointed ears with a tan inside and two black eyes, and it rests on a brown base with a beige ruffled rim, which looks like the cream on a cupcake.
The pattern has three simple pieces: a base, a head and two ears. Everything is worked from a magic ring with single crochet, increases and a few decreases, so it is quick to make.
The special step is the join. You work a round with beige thread through the back loops of both the head and the base, then turn and work a second round, and fold the result down to make the ruffled rim.
The photo shows the finished piece held in one hand, so it is a small, palm-sized figure. The original does not give a size.
The base is stiffened with a disc cut from EVA foam or acetate, so the cup keeps its shape and the figure stands firmly on a desk or shelf.
The pattern uses semi-thick cotton thread, a 3 mm hook and 8 mm eyes. Read the notes below before you start, because the original is short and some steps are written briefly.
Finished size
The original does not give a size. The photo shows a small figure, held in the palm of one hand.
The base and the head both end at 42 stitches, so the two pieces fit together at the join. If you use a thicker thread and a bigger hook, the whole figure will grow in proportion, and you should choose larger eyes.
Tip: Make the base and the head with the same thread and hook, so the two rims match at the join.
Yarn substitution
The designer used semi-thick cotton thread in brown, green and beige. Any smooth cotton in a similar weight works, and cotton keeps the stitches firm and clear.
Choose a bright green for the head and a darker, warm brown for the base. The beige rim should be lighter than both, so it stands out.
Use a hook small enough to make a dense fabric. The head is stuffed, so loose stitches will let the filling show.
Common mistakes
- Forgetting the back-loop round. Round 6 of the base is worked in the back loops only. It makes the edge between the floor and the sides of the cup.
- Skipping the foam disc. Cut a disc from EVA foam or acetate the size of the base and place it in the bottom, so the cup does not collapse.
- Joining before stuffing. Stuff the head firmly before you work the beige join, because you cannot add filling afterwards.
- Placing the eyes wrongly. Insert the 8 mm eyes between rounds 8 and 9, with 4 stitches between them, before you stuff the head.
- Sewing the ears unevenly. Fold the base of each ear a little, then count 4 stitches from the eye and pin the ear there.
FAQ
What does the back strand mean?
The back strand is the back loop of the stitch. Work round 6 of the base in the back loops only.
What is the foam disc for?
It makes the base stiff and flat. Cut a circle of EVA foam or acetate to the size of the base and put it inside before you finish the cup.
How do I join the head and the base?
Change to beige. Take the back loops of both pieces together and work a round of single crochet. Close with a slip stitch, chain, turn and work single crochet to the end, then slip stitch and close. Fold the rim down.
Are the eyes safe for children?
Safety eyes can come loose, so they are not suitable for babies or very young children. For a toy, embroider the eyes instead.
Can I change the colors?
Yes. You can use other colors for the head, the cup and the rim to make a different character or a different kind of cupcake.
Pattern
Base (brown thread)
- R1: magic ring,
6 sc(6) - R2:
6 inc(12) - R3:
(1 sc, inc) x 6(18) - R4:
(2 sc, inc) x 6(24) - R5:
(3 sc, inc) x 6(30) - R6:
scin the back loops only (30) - R7:
(4 sc, inc) x 6(36) - R8-9:
scaround (36) - R10:
(5 sc, inc) x 6(42) - R11:
scaround (42)
Close and fasten off. Cut a circle the size of the base from EVA foam or acetate, so the base has more stability.
Head (green thread)
- R1: magic ring,
6 sc(6) - R2:
6 inc(12) - R3:
(1 sc, inc) x 6(18) - R4:
(2 sc, inc) x 6(24) - R5:
(3 sc, inc) x 6(30) - R6:
(4 sc, inc) x 6(36) - R7-10:
scaround (36) - R11:
(5 sc, inc) x 6(42)
The eyes are 8 mm and are placed between rounds 8 and 9, with 4 sc between them. Insert them and stuff the head.
Join the head and the base
- Change to beige.
- Take the back loops of both pieces and work a round of
sc. - At the end of the round, close with a
sl st,ch, turn and workscuntil the end, thensl stand close. - Fold the rim down.
Ears (make 2, green thread)
- R1: magic ring,
5 sc(5) - R2:
inc, 4 sc(6) - R3:
inc, 5 sc(7) - R4:
2 sc, inc, 3 sc, inc(9) - R5:
(2 sc, inc) x 3(12) - R6-7:
scaround (12) - R8:
(5 sc, inc) x 2(14) - R9:
scaround (14) - R10:
(6 sc, inc) x 2(16)
Close and leave a thread for sewing.
Assembly
- Fold the base of each ear a little before you sew it.
- Count 4 sc from the eye and place the ear there.
- Sew both ears to the head with the long thread.
Optional & Creative Ideas
- Customize colors: Make the cup in other colors, or choose a pink rim for a strawberry cupcake look.
- Make a set: Crochet several figures in different colors for a shelf or a desk.
- Add small details: Embroider a tiny smile, or add a little blush with pink thread.
- Gift idea: Put the finished figure in a small box with a card as a handmade gift.
Final Thoughts
This little figure is quick to make and has a lot of personality. Take your time with the join and the rim, and keep the ears even, and you will end up with a charming piece for any shelf.
Patterns and instructions on OpenCrochet are for personal use. Please do not redistribute copies of this content; share the page link instead.


