

Axolotl Water Salamander Crochet Pattern
Crochet a 14 cm axolotl amigurumi with ruffled picot gills, safety eyes and a tail fin.
About this axolotl crochet pattern
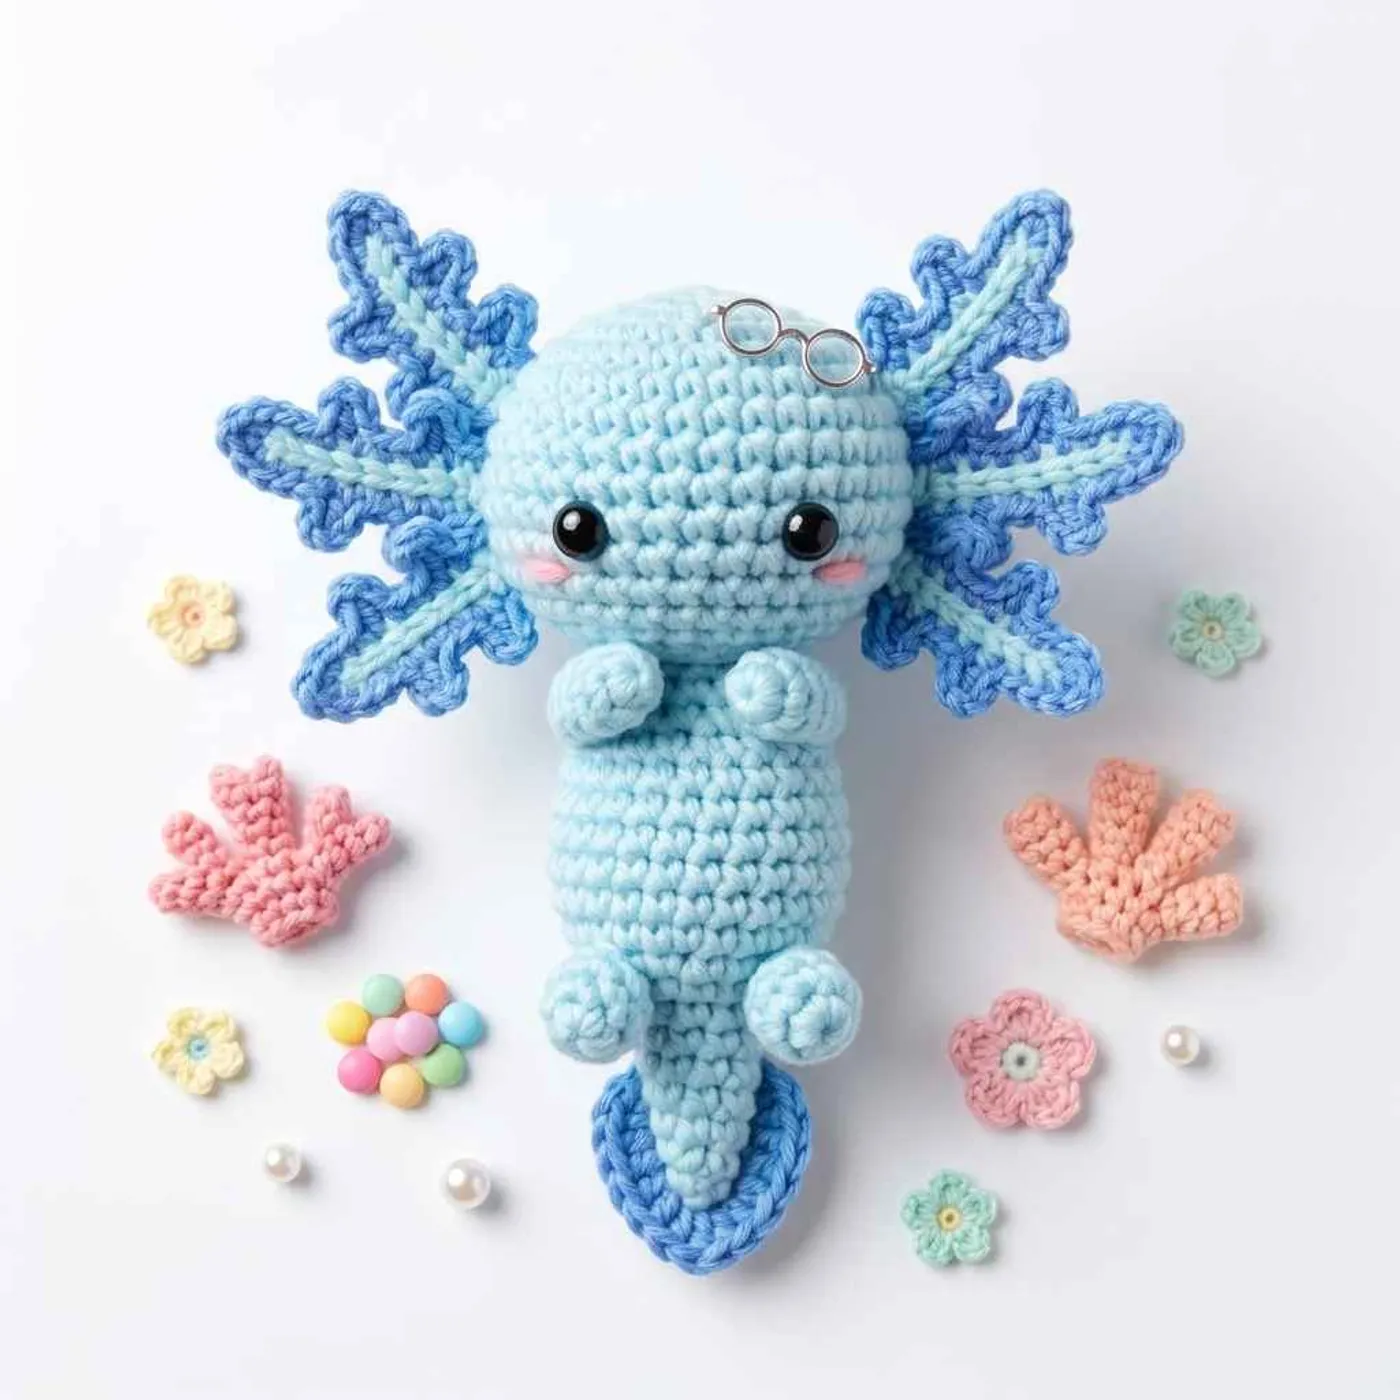
This is a small axolotl, or water salamander, in two shades of blue: a baby blue body and head, and sky blue for the fin and the edges of the gills. The designer describes it as a beginner project, and it stands about 14 cm tall.
The body is simple: a round head, a long tail-and-body piece, two short arms and two legs. What makes it an axolotl is the pair of ruffled gills, which have three branches each and are edged with small picots.
The tail ends in a flat fin worked in half double crochet, which is sewn under the tail. In the photo the axolotl lies flat with its arms held up to its chest, its gills spread to each side and a little pink blush under the eyes.
The pattern is worked in continuous rounds with US terminology. Gauge is not important, but keep your stitches tight so the stuffing does not show through.
You need two yarn colors, 8 mm safety eyes, polyester fiberfill and a little pink embroidery thread. The notes below explain the trickiest parts before you start.
Finished size
The finished axolotl is approximately 14 cm tall, with the 3 mm hook and 5 ply milk cotton yarn from the original.
A thicker yarn with a larger hook makes a larger axolotl, and the safety eyes should grow with it. The head is the widest part, with 36 stitches at its largest round.
Tip: Measure your axolotl from the top of the head to the end of the tail, and note the yarn and hook you used.
Yarn substitution
The original uses 5 ply milk cotton yarn in baby blue and sky blue, with a 3 mm hook. Any smooth cotton or cotton blend in a similar fine weight will give the same result.
Choose two shades with some contrast. In the photo, the pale body is paired with a deeper periwinkle blue for the gills and fin, so they stand out.
If you change to a thicker yarn, use a hook one size smaller than the label suggests, and use larger safety eyes to match.
Common mistakes
- Placing the eyes in the wrong round. Attach the safety eyes between R9 and R10, with 5 stitches between them, before you close the head.
- Forgetting the front loop round. On the tail, R8 is worked in the front loop only. It creates the step between the tail and the body.
- Under-stuffing the tail. Stuff the tail after R8, and the body at R18, before you fasten off.
- Losing count on the gills. The gills are made from chain branches. Count the chains before you work back along them.
- Sewing the gills unevenly. Pin both gills to the head and check them from the front before you sew.
FAQ
Are the gills difficult?
They are the most detailed part. Each gill is a chain with two side branches, edged with slip stitches and picots. Work slowly and check the diagram in the original if you are unsure.
Can I use a magic ring instead of ch 2?
Yes. The pattern says you can use a magic ring as an alternative to ch 2 for the first round of each piece.
Is it safe for small children?
The axolotl has 8 mm safety eyes, which are not suitable for babies or young children. For a toy, embroider the eyes with black thread instead.
Where do I put the pink thread?
Use the pink embroidery thread to make the small blush under each eye, as in the photo.
How do I join the pieces?
Sew the body to the head, sew the gills to the head, and sew the fin under the tail. The arms and legs are not covered in the original, so place them as shown in the photos.
Pattern
Head (baby blue)
- R1: ch 2, starting from the second chain from the hook,
6 sc(6) - R2:
inc, rep 6x (12) - R3:
sc, inc, rep 6x (18) - R4:
sc, inc, (2 sc, inc = rep 5x), sc(24) - R5:
3 sc, inc, rep 6x (30) - R6:
scaround - R7:
2 sc, inc, (4 sc, inc = rep 5x), 2 sc(36) - R8-9:
scaround - R10:
4 sc, dec, rep 6x (30) - R11:
scaround
Attach the safety eyes between R9 and R10, with 5 stitches between them.
- R12:
3 sc, dec, rep 6x (24) - R13:
2 sc, dec, rep 6x (18). Stuff. - R14:
sc, dec, rep 6x (12) - R15:
dec, rep 6x (6)
Fasten off.
Tail and body (baby blue)
- R1: ch 2, starting from the second chain from the hook,
4 sc(4) - R2:
sc, inc, rep 2x (6) - R3:
sc, inc, rep 3x (9) - R4-5:
scaround - R6:
2 sc, inc, rep 3x (12) - R7:
scaround - R8: FLO,
sc, inc, rep 6x (18)
Stuff the tail.
- R9:
scaround - R10:
sc, inc, (2 sc, inc = rep 5x), sc(24) - R11-13:
scaround - R14:
10 sc, dec, rep 2x (22) - R15:
4 sc, dec, 9 sc, dec, 5 sc(20) - R16:
8 sc, dec, rep 2x (18) - R17:
scaround - R18:
4 sc, dec, rep 3x (15). Stuff.
Fasten off, leaving a long tail for sewing.
Fin (sky blue)
Ch 12, starting from the second chain from the hook: 4 hdc, hdc-inc, 3 hdc in one st, hdc-inc, 4 hdc.
Fasten off, leaving a long tail for sewing.
Arms (make 2, baby blue)
- R1: ch 2, starting from the second chain from the hook,
5 sc(5) - R2-5:
scaround
Fasten off, leaving a long tail for sewing.
Legs (make 2, baby blue)
- R1: ch 2, starting from the second chain from the hook,
7 sc(7) - R2:
scaround - R3:
5 sc, dec(6)
Stuff. Fasten off, leaving a long tail for sewing.
Gills (make 2, baby blue and sky blue)
- R1: ch 8, starting from the second chain from the hook,
scin each st,(ch 9, sc in the second chain from the hook, sc in each of the next 6 sts, skip the last chain st = rep 2x) - R2: change color to sky blue, ch 1, turn,
(sl st, picot, 3 sl st, picot, 3 sl st, picot, 3 sl st, picot, 3 sl st, picot, sl st, sl st in the chain st = rep 2x),sl st, picot, 3 sl st, picot, 3 sl st, picot, 3 sl st, picot, 3 sl st, picot, sl st
Fasten off.
Finishing
- Sew the body to the head.
- Sew the gills to the head, one on each side.
- Sew the fin under the tail.
- Sew the arms to the front of the body, just below the head, and the legs to the lower sides, as in the photos.
- Embroider a little pink blush under each eye.
Optional & Creative Ideas
- Customize colors: Make an axolotl in pink, white or dark gray, and keep the gills in a contrasting shade.
- Make it a keychain: Sew a small loop of yarn or a clasp to the top of the head.
- Change the size: Use a thicker yarn and larger safety eyes for a bigger plush.
- Add small details: Embroider a tiny smile in pink thread below the eyes.
Final Thoughts
The axolotl is a quick project with one special feature: the ruffled gills. Take your time with the picots, keep your stitches tight, and you will end up with a charming little water salamander.
Patterns and instructions on OpenCrochet are for personal use. Please do not redistribute copies of this content; share the page link instead.


