

Bunny Comforter Crochet Pattern: Granny Square Lovey
Crochet a soft bunny comforter: a granny square blanket with a stuffed bunny head with floppy ears and arms.
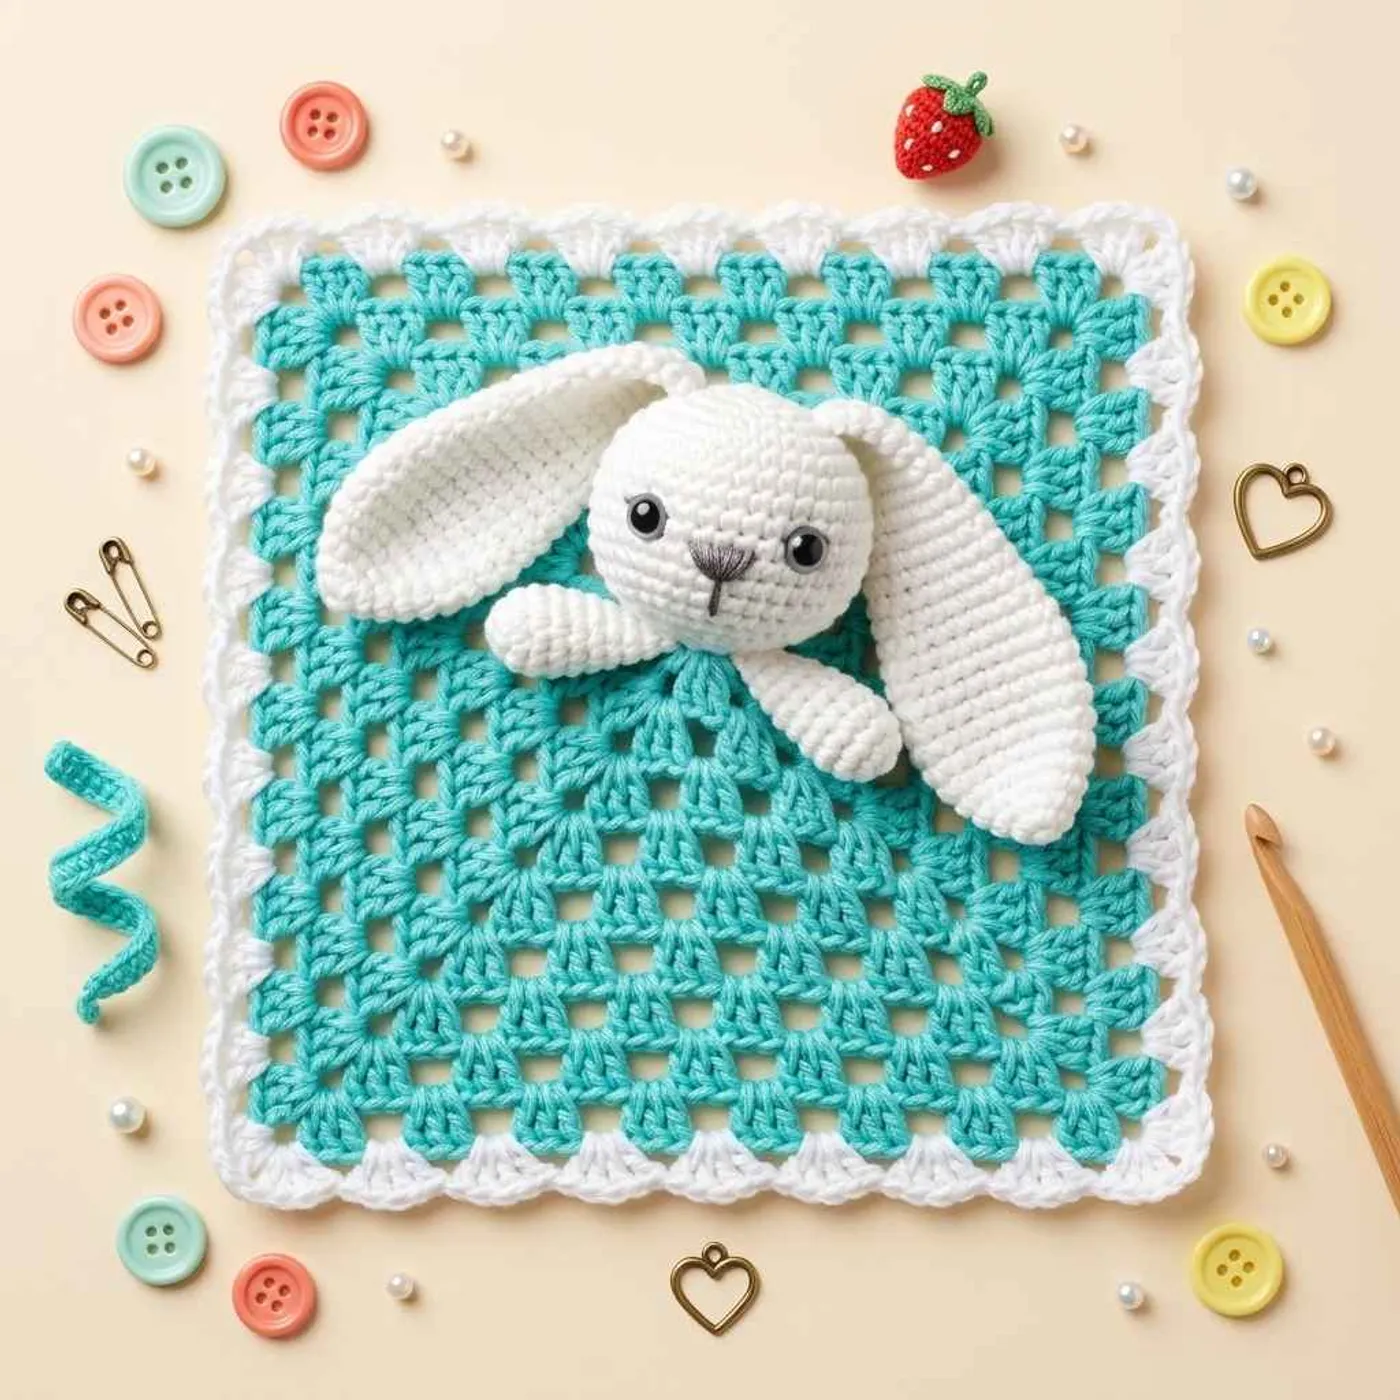
About this bunny comforter pattern
This is a crochet lovey: a small granny square blanket with a stuffed bunny head, two floppy ears and two little arms sewn on at one side. The blanket works as the bunny's body or dress, and the whole piece is easy for small hands to hold.
It combines two simple skills. The blanket is a classic granny square worked in rounds, and the head is a small amigurumi sphere worked in a spiral. The ears are made flat, in rows, and the arms are small unstuffed tubes.
The pattern uses just two main colors, about 15 g of each, plus a little yarn for the face. In the photos the blankets come in turquoise, pink and blue, with white, cream or beige bunnies and a pale edging.
The face is sewn on with yarn rather than made with safety eyes. That keeps the comforter free of hard parts, which is the reason many makers choose this kind of face for a baby gift.
The pattern uses US terminology and a 5 mm hook with light worsted yarn. The notes below explain how to size and adapt it before you begin.
Finished size
The original does not give a finished size. The blanket is a granny square of 12 rounds: three set-up rounds, then round 3 repeated nine more times. With a 5 mm hook and light worsted yarn it makes a square that you can hold in two hands.
Each extra round makes the square bigger, so you can stop earlier for a smaller lovey or add rounds for a larger one. Measure your own square, because gauge changes the result.
Tip: Keep a note of how many rounds you worked, so you can make the same size again.
Yarn substitution
The pattern calls for light worsted (category 3, 8-ply) yarn. A soft, smooth cotton or baby-friendly acrylic works well, and it should be washable, because comforters get a lot of use.
Choose two colors with some contrast, one for the bunny and one for the blanket. The photos show a pale bunny on a bright blanket, which makes the bunny easy to see.
If you use a thicker yarn and a bigger hook, the whole piece gets bigger. Keep the head stitches tight whatever yarn you use, so that the stuffing does not show.
Common mistakes
- Loose stitches on the head. The pattern asks you to keep the stitches as tight as you can on the head, so the stuffing does not show through.
- Losing the start of the round. The head and arms are worked in a spiral without joining. Move the stitch marker up at the start of every round.
- Stuffing the arms. The arms are not stuffed. Sew the open end shut as written.
- Missing corners on the granny square. Each corner has 3 dc, ch 2, 3 dc. Check that the corners stay sharp as the square grows.
- Under-stuffing the head. Stuff firmly before you work the last decrease round.
FAQ
How many rounds does the granny square have?
There are 12 rounds in total. Work rounds 1 and 2, then round 3, and repeat round 3 nine times.
Is the bunny safe for a baby?
The face is made with yarn, so there are no safety eyes or other hard parts. Check that the seams are secure, and supervise young children with any handmade toy.
Do I stuff the whole bunny?
Only the head is stuffed. The ears are flat and the arms are left unstuffed.
How much yarn do I need?
The original lists about 15 g for the head, arms and ears, about 15 g for the blanket, and a small amount for the face.
Do the stitch counts matter for the head?
Yes. The head is a ball made with increases and decreases, so check your total at the end of each round to keep it round and even.
Pattern
Granny square blanket
- Ch 4 and sl st to the beginning chain to form a ring.
- Round 1: ch 3 (counts as a dc from now on), work 2 dc into the ring,
*ch 2, 3 dc into the ring*, rep from * twice more, ch 2 and sl st to the top of the ch 3 that started the round. - Round 2: ch 3, work 2 dc into the same sp,
*ch 1, work 3 dc, ch 2, 3 dc into next ch 2 corner sp*, repeat from * all the way around. Your final sts should be 3 dc, ch 2 and then sl st to the top of the ch 3 that started the round. - Round 3: ch 3, work 2 dc into the same sp, ch 1,
*work 3 dc, ch 1 into each ch sp across to the corner sp. In the corner sp, work 3 dc, ch 2, 3 dc, ch 1*, repeat from * all the way around. Your final corner should have 3 dc, ch 2 and then sl st to the top of the ch 3 that started the round. - Repeat round 3 nine times. Each round makes the square bigger.
Head (make 1)
Rounds are worked in a continuous spiral. Do not join and do not turn. Place a stitch marker in the first st of the round, and move it up at the start of each round.
- Round 1: ch 2, work
6 scin the furthest ch from the hook. - Round 2:
2 scin each sc around (12 sc) - Round 3:
*2 sc in next sc, sc in next sc*, repeat from * around (18 sc) - Round 4:
*2 sc in next sc, sc in each of next 2 sc*, repeat from * around (24 sc) - Round 5:
*2 sc in next sc, sc in each of next 3 sc*, repeat from * around (30 sc) - Round 6-10:
scin each st around (30 sc) - Round 11:
*sc2tog, sc in each of next 3 sc*, repeat from * around (24 sc) - Round 12:
*sc2tog, sc in each of next 2 sc*, repeat from * around (18 sc) - Round 13:
*sc2tog, sc in next sc*, repeat from * around (12 sc)
Stuff firmly.
- Round 14:
sc2togaround (6 sc)
Fasten off, leaving a long tail to sew the head to the center of the blanket.
Ears (make 2)
Turning ch 1 does not count as a st.
- Row 1: starting at the bottom of the ear, ch 2, 3 sc in the 2nd ch from the hook, ch 1, turn (3 sc)
- Row 2:
scin each st across, ch 1, turn (3 sc) - Row 3:
2 scin the first sc,scin the next sc,2 scin the last sc, ch 1, turn (5 sc) - Rows 4-5:
scin each st across, ch 1, turn (5 sc) - Row 6:
2 scin the first st,scin each st to the last st,2 scin the last st, ch 1, turn (7 sc) - Rows 7-18:
scin each sc across, ch 1, turn - Row 19:
sc2tog,scin each st to the last 2 sts,sc2tog, ch 1, turn (5 sc) - Row 20:
scin each sc across, ch 1, turn - Row 21:
sc2tog,scin the next st,sc2tog, ch 1, do not turn (3 sc)
Edging: work 21 sc down the side of the ear, work 3 sc across the opposite side of the starting ch, work 21 sc up the other side of the ear, ch 1, and join with a sl st to the first sc of row 21. Leave a length of yarn for sewing and fasten off.
Fold the ear in half lengthwise and sew the top of row 21 together. Sew the ears to the top of the head.
Arms (make 2)
Rounds are worked in a continuous spiral. Do not join and do not turn. Move the stitch marker up at the start of each round.
- Round 1: ch 2, work
6 scin the furthest ch from the hook. Place a stitch marker in the first st. - Round 2:
2 scin each sc around (12 sc) - Rounds 3-4:
1 scin each st around (12 sc) - Round 5:
(sc2tog, sc, sc)around (9 sc) - Rounds 6-9:
1 scin each st around (9 sc)
Do not stuff the arms. Sew the open end shut and tie off, leaving a long tail.
Assembly
- Sew the head to the center of the blanket with the long tail from round 14.
- Sew the arms just beneath the head, onto the blanket.
- Use a darning needle and yarn to sew a simple face on the bunny.
Optional & Creative Ideas
- Customize colors: Choose a blanket color for the nursery, and use a lighter yarn for the bunny so it stands out.
- Add a border: Finish the granny square with a round of sc or a shell edging in a contrast color, like the white borders in the photos.
- Make a bigger blanket: Add more rounds of the granny square for a larger comforter.
- Gift idea: Make the lovey in the colors of a baby's room and add a small handwritten care label.
Final Thoughts
This comforter is soft, simple and easy to adapt. Keep the head stitches tight and the face simple, and you will end up with a gentle gift that is easy to wash and love.
Patterns and instructions on OpenCrochet are for personal use. Please do not redistribute copies of this content; share the page link instead.


