

Crochet Gift Box Pattern with Lid and Star
Crochet a tiny square gift box with a lift-off lid, yellow ribbon and star.
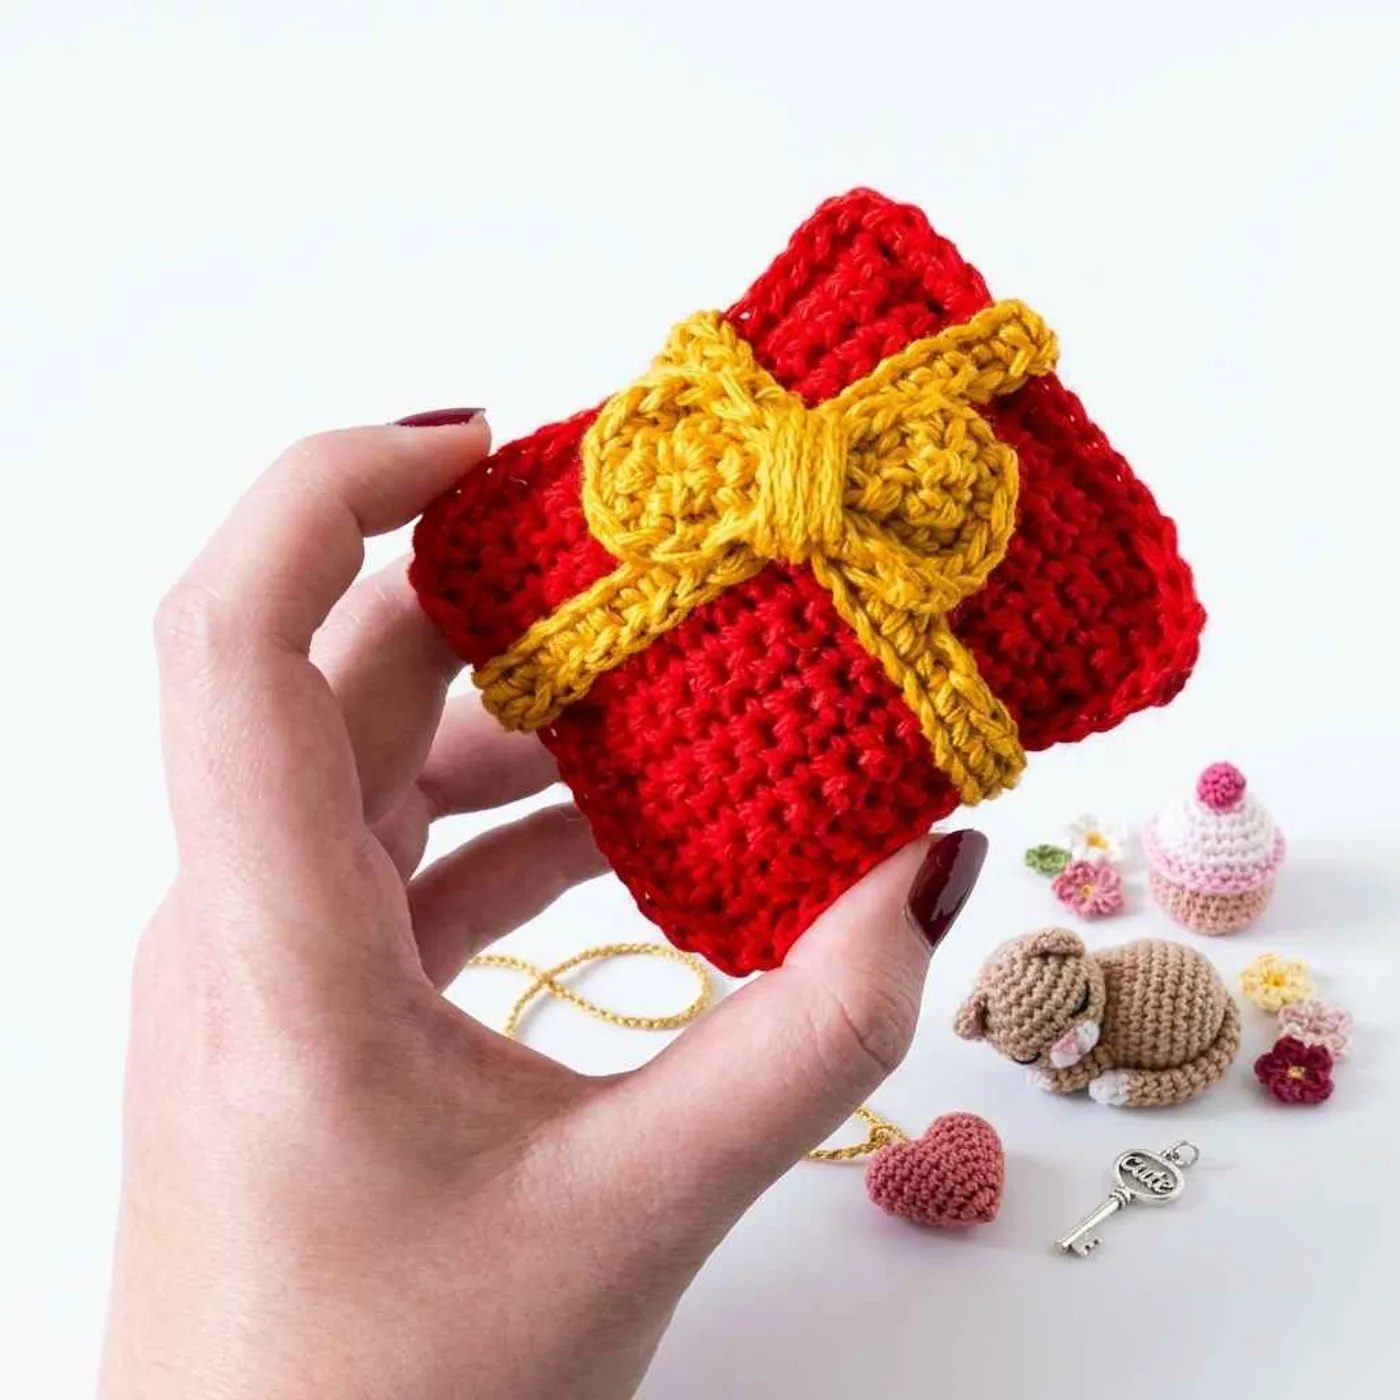
This crochet gift box is a tiny square present with a real lift-off lid, a yellow cross ribbon and a little star on top. The sample is bright red with mustard yellow trim, and another version is made in royal blue with a sunny yellow star.
Both the box and the lid are worked in joined rounds from a magic ring. Corner increases turn the circle into a crisp square, and one back-loop round folds the walls up so the box stands on its own. There is no stuffing, no sewing of panels and no safety eyes.
You only need fine yarn, a 2.2 mm hook and a bit of hot glue for the ribbon. It is a quick, beginner-friendly make and a sweet way to wrap a ring, a pair of earrings or a small note.
The pattern is written in US crochet terms.
Finished size
The designer does not give an exact measurement. From the photos, the box is small enough to sit in the palm of a hand, roughly 2–2.5 in (5–6 cm) square.
The box base has 48 stitches (12 per side) and walls 9 rounds tall. The lid has 56 stitches, so it is a little wider and slips over the box.
Materials overview
- Main color yarn for the box and lid (any color you like; samples are red and blue)
- Yellow yarn for the ribbon and star
- 2.2 mm crochet hook
- Hot glue
- Yarn needle and scissors
Yarn substitution
The 2.2 mm hook suits fine cotton yarn (sport or light fingering). Cotton keeps the corners sharp and the walls firm, which helps the box hold its shape.
You can use DK yarn with a 3 mm hook for a bigger box. Keep the hook small for the yarn so the fabric is dense and the walls do not flop.
Pick a ribbon color with good contrast to the box, like yellow on red or blue, or white on green.
Stitch notes
- W (3-sc increase): work 3 sc in the same stitch. This makes the corners of the square.
- Joined rounds: at the end of every round, slip stitch into the first stitch, then ch 1 and start the next round.
- BLO round: working into the back loop only leaves a ridge on the outside and makes the walls turn up at a clean angle.
Common mistakes
- Losing the corners: if you lose track of the W increases, the square turns into a round. Put a stitch marker in the middle stitch of each W.
- Forgetting the BLO round: if you work round 7 of the box (or round 8 of the lid) in both loops, the walls curve instead of standing up straight.
- Lid too tight or too loose: the lid needs a different tension than the box to fit. Try it on before you fasten off and add or remove a wall round if needed.
- Messy joins: the slip stitch seam can drift. Always slip stitch into the first stitch of the round, not into the ch 1.
- Too much glue: hot glue can show through fine cotton. Use small dots and press the ribbon ends from the inside.
FAQ
Can I put something inside the box?
Yes. The lid lifts off, so you can hide a small piece of jewelry, a coin or a folded note inside.
Does it need stuffing?
No. The box is hollow and stands up because of the dense stitches and the back-loop round.
What is "x" in the star round?
The original pattern writes the star as (1x, 1dc, 2ch, 1dc) five times. In this notation "x" usually means a single crochet, so each point is sc, dc, ch 2, dc.
Can I sew the ribbon instead of gluing it?
Yes. Glue is fast, but you can stitch the ribbon ends to the inside of the lid with a yarn needle if the box is for a child.
How do I make it bigger?
Use thicker yarn and a bigger hook, or keep repeating the increase pattern (one more stitch on each side between the W corners) for a wider base, then add the same rounds to the lid.
Box
Use the main color. Slip stitch at the end of each round, ch 1.
- R1: 8 sc into a magic ring. (8)
- R2: [1 sc, 1 W] 4 times. (16)
- R3: [2 sc, 1 W], [3 sc, 1 W] 3 times, 1 sc. (24)
- R4: [3 sc, 1 W], [5 sc, 1 W] 3 times, 2 sc. (32)
- R5: [4 sc, 1 W], [7 sc, 1 W] 3 times, 3 sc. (40)
- R6: [5 sc, 1 W], [9 sc, 1 W] 3 times, 4 sc. (48)
- R7: BLO sc in each st around. (48)
- R8–R15: sc in each st around (8 rounds). (48)
Cut the yarn and fasten off. Weave in the ends.
Tip: After round 7, push the base flat with your fingers and pinch the four corners so the walls stand straight.
Box lid
Use the main color. Slip stitch at the end of each round, ch 1.
- R1: 8 sc into a magic ring. (8)
- R2: [1 sc, 1 W] 4 times. (16)
- R3: [2 sc, 1 W], [3 sc, 1 W] 3 times, 1 sc. (24)
- R4: [3 sc, 1 W], [5 sc, 1 W] 3 times, 2 sc. (32)
- R5: [4 sc, 1 W], [7 sc, 1 W] 3 times, 3 sc. (40)
- R6: [5 sc, 1 W], [9 sc, 1 W] 3 times, 4 sc. (48)
- R7: [6 sc, 1 W], [11 sc, 1 W] 3 times, 5 sc. (56)
- R8: BLO sc in each st around. (56)
- R9–R10: sc in each st around (2 rounds). (56)
Cut the yarn and fasten off. Weave in the ends.
Star
Use yellow yarn.
- Into a magic ring, work [1 sc, 1 dc, ch 2, 1 dc] 5 times. (5 points)
- Pull the magic ring closed and cut the yarn.
Assembly
- Cut two pieces of yellow yarn, each about 12 cm (4¾ in) long.
- Lay them across the lid in a cross, one over each direction, and glue the ends to the inside of the lid with hot glue.
- Glue the star right in the middle of the lid where the two ribbons cross.
- Place the lid on the box, and your little gift is ready.
Optional & Creative Ideas
- Holiday colors: Make red and green boxes with white ribbons for Christmas tree ornaments.
- Bow instead of star: Tie a small yarn bow and glue it on top in place of the star.
- Hanging ornament: Add a loop of yarn to the center of the lid to hang the box on a tree.
- Set of presents: Make two or three boxes in different colors and stack them for a cute shelf display.
- Ring box: Glue a small piece of felt inside the box to hold a ring for a proposal or a birthday surprise.
Final Thoughts
This gift box is all about clean corners and one simple back-loop round. It works up in a short time and turns a tiny present into something people keep.
Patterns and instructions on OpenCrochet are for personal use. Please do not redistribute copies of this content; share the page link instead.
