Free Penguin Wearing a Beanie Crochet Pattern
Create an adorable penguin beanie with this Free crochet pattern. Step-by-step amigurumi hat tutorial for beginners, clear instructions and tips.
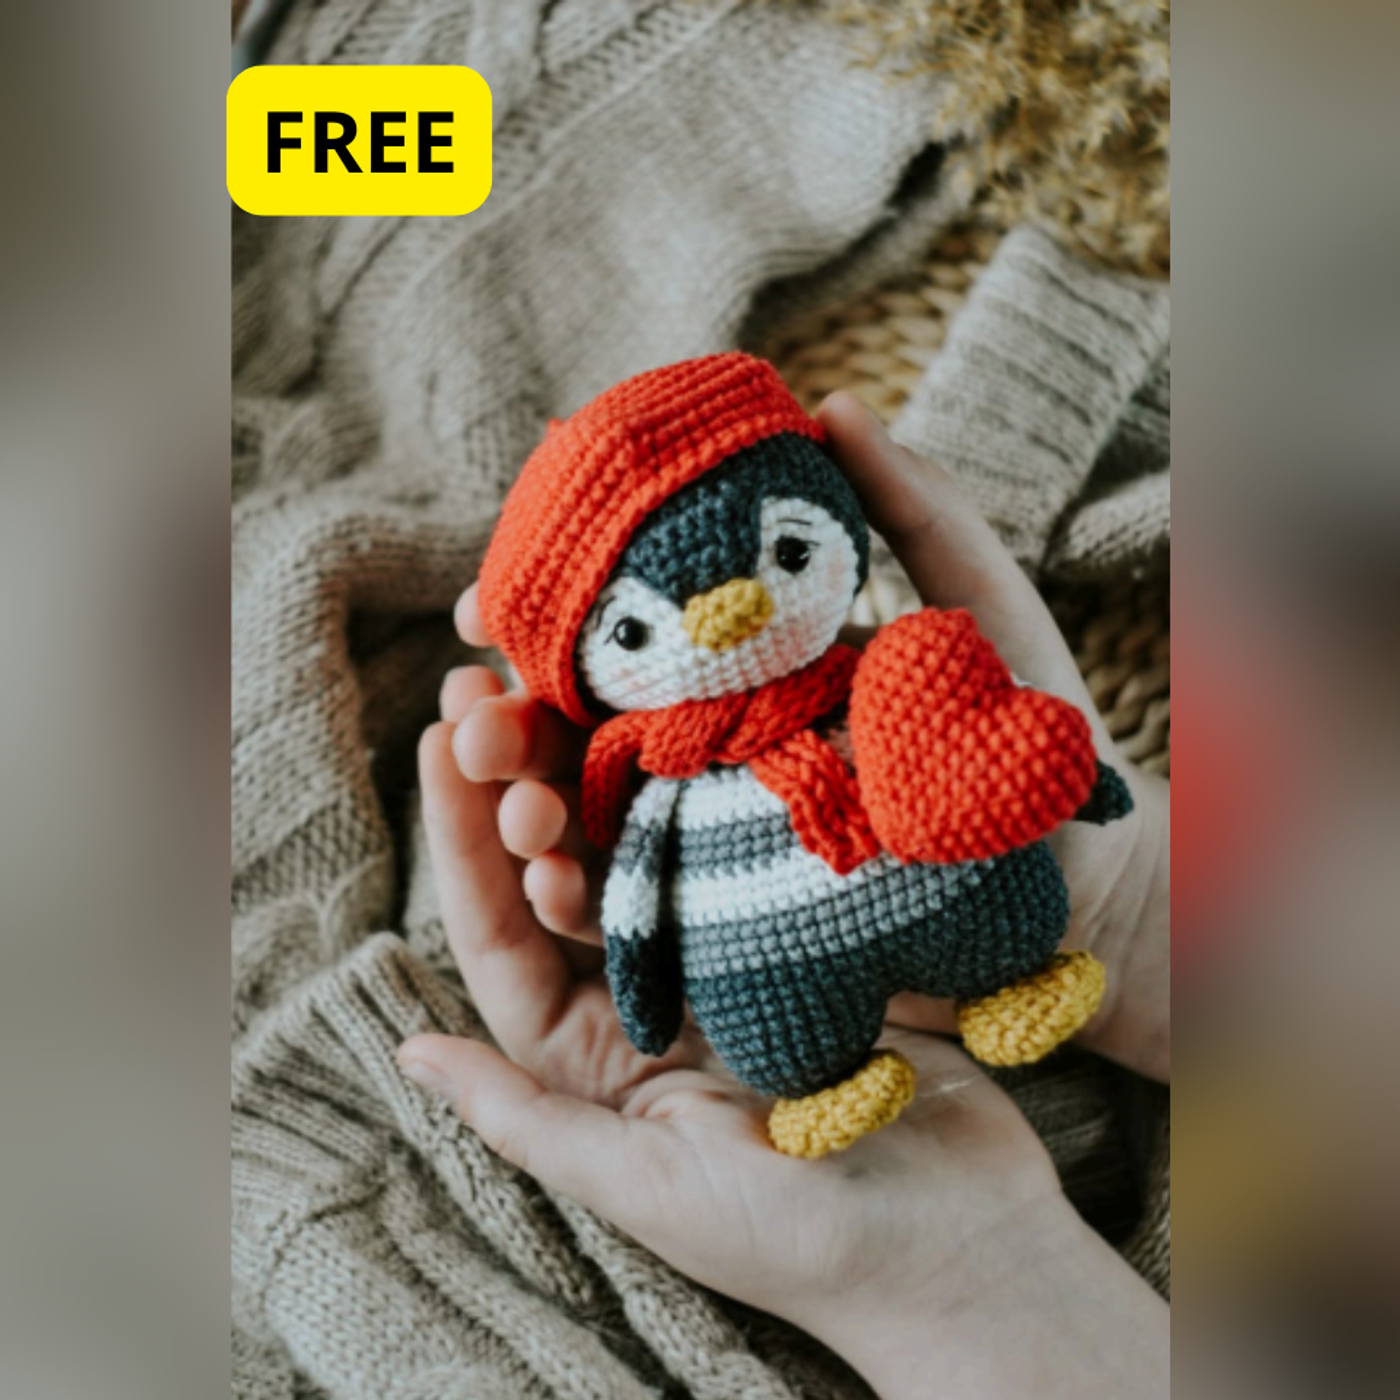
A step-by-step guide to making your own adorable crochet 💖
You will learn how to crochet a charming beanie-style beret for a penguin amigurumi. The hat is worked in the round, starting from the top and gradually increasing to form a flat circle before shaping the sides.
The pattern includes
two sizes:
- A small beret for a baby penguin
- A larger beret for a big penguin
Both versions follow the same logic, so once you understand the increases and decreases, the process becomes very intuitive.
🎀 Beret for Baby Penguin
Leave a long starting tail. This will be used later to crochet the decorative chain detail.
Round-by-Round Instructions
Round 1:
Create a magic ring and crochet 6 single crochets inside the ring. (6 stitches)
Round 2:
Increase in each stitch around by working 2 single crochets in every stitch. (12 stitches)
Round 3:
Work 1 single crochet, then 1 increase. Repeat this sequence 6 times. (18 stitches)
Round 4:
Work 2 single crochets, then 1 increase. Repeat 6 times. (24 stitches)
Round 5:
Work 3 single crochets, then 1 increase. Repeat 6 times. (30 stitches)
Round 6:
Work 4 single crochets, then 1 increase. Repeat 6 times. (36 stitches)
Round 7:
Work 5 single crochets, then 1 increase. Repeat 6 times. (42 stitches)
Round 8:
Work 6 single crochets, then 1 increase. Repeat 6 times. (48 stitches)
Round 9:
Work 7 single crochets, then 1 increase. Repeat 6 times. (54 stitches)
Round 10:
Work 8 single crochets, then 1 increase. Repeat 6 times. (60 stitches)
Round 11:
Work 9 single crochets, then 1 increase. Repeat 6 times. (66 stitches)
🧠 Explanation: These gradual increases create a smooth, flat circle that will form the top of the beret.
Rounds 12–13:
Work 1 single crochet in each stitch around for two rounds. (66 stitches each round)
Round 14:
Work 9 single crochets, then 1 decrease. Repeat 6 times. (60 stitches)
Round 15:
Work 8 single crochets, then 1 decrease. Repeat 6 times. (54 stitches)
Round 16:
Work 7 single crochets, then 1 decrease. Repeat 6 times. Finish with a slip stitch. (48 stitches)
✂️ Cut the yarn and neatly weave in the end.
Decorative Chain Detail
Using the long starting tail:
- Chain 6 stitches.
- Starting in the second chain from the hook, crochet 5 slip stitches along the chain.
- Secure and weave in the end.
This small chain adds a cute beret-style decorative finish ✨
🎩 Beret for Big Penguin
This larger version follows the same structure but includes additional increase rounds to make a wider hat.
Leave a long starting tail for the decorative chain later.
Round-by-Round Instructions
Round 1:
Create a magic ring and crochet 6 single crochets inside. (6 stitches)
Round 2:
Increase in each stitch around. (12 stitches)
Round 3:
Work 1 single crochet, then 1 increase. Repeat 6 times. (18 stitches)
Round 4:
Work 2 single crochets, then 1 increase. Repeat 6 times. (24 stitches)
Round 5:
Work 3 single crochets, then 1 increase. Repeat 6 times. (30 stitches)
Round 6:
Work 4 single crochets, then 1 increase. Repeat 6 times. (36 stitches)
Round 7:
Work 5 single crochets, then 1 increase. Repeat 6 times. (42 stitches)
Round 8:
Work 6 single crochets, then 1 increase. Repeat 6 times. (48 stitches)
Round 9:
Work 7 single crochets, then 1 increase. Repeat 6 times. (54 stitches)
Round 10:
Work 8 single crochets, then 1 increase. Repeat 6 times. (60 stitches)
Round 11:
Work 9 single crochets, then 1 increase. Repeat 6 times. (66 stitches)
Round 12:
Work 10 single crochets, then 1 increase. Repeat 6 times. (72 stitches)
Round 13:
Work 11 single crochets, then 1 increase. Repeat 6 times. (78 stitches)
🧵 Tip: If the circle starts to ruffle, your tension may be tight. Try relaxing your tension slightly or moving up half a hook size.
Rounds 14–16:
Work 1 single crochet in each stitch around for three rounds. (78 stitches each round)
Round 17:
Work 11 single crochets, then 1 decrease. Repeat 6 times. (72 stitches)
Round 18:
Work 10 single crochets, then 1 decrease. Repeat 6 times. (66 stitches)
Round 19:
Work 9 single crochets, then 1 decrease. Repeat 6 times. (60 stitches)
Round 20:
Work 18 single crochets, then 1 decrease. Repeat 3 times. Finish with a slip stitch. (57 stitches)
✂️ Cut the yarn and carefully weave in all loose ends.
Decorative Chain Detail
Using the long starting tail:
- Chain 6 stitches.
- Starting from the second chain, crochet 5 slip stitches back along the chain.
- Secure and weave in to finish the classic beret look 🎨
🎁 Optional & Creative Ideas
✨ Add a pom-pom on top of the beret for a playful winter style.
🎨 Use pastel yarn colors to create themed penguins (baby shower or nursery gifts).
💝 Make matching berets in different colors for a penguin family set.
🧵 Embroider tiny initials on the hat to personalize it as a handmade gift.
Patterns and instructions on OpenCrochet are for personal use. Please do not redistribute copies of this content; share the page link instead.


